1. Introduction
This instruction manual provides detailed guidance for the proper installation, usage, and maintenance of your Radtel RT-10 series walkie talkie belt clip. This accessory is designed to securely attach your compatible two-way radio to your belt or clothing, ensuring convenient access and portability.
The Radtel RT-10 series belt clip is an original, high-quality accessory, engineered for durability and a secure fit with specified Radtel and other compatible two-way radio models.
2. Compatibility
The Radtel RT-10 series belt clip is compatible with the following two-way radio models:
- Radtel RT-10
- WLN KD-C1
- LT-316
- TD-M8
- RT22
- X6
- ZS-B1
- NK-U1
- R1
Ensure your radio model is listed above for optimal fit and security.
3. Package Contents
Your package should contain the following items:
- 5 x Radtel RT-10 Series Belt Clips
4. Installation
Follow these steps to properly attach the belt clip to your compatible two-way radio:
-
Prepare the Radio and Clip: Hold the belt clip and your radio. Identify the designated slot on the back of your radio where the clip will attach.

Image: The belt clip and a compatible radio shown separately, ready for attachment.
-
Align and Slide: Align the top hook of the belt clip with the corresponding slot on the upper back of the radio. Gently slide the clip downwards until it clicks into place. Ensure the clip is fully seated and secure.
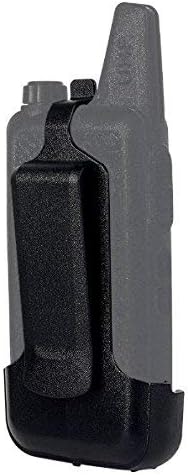
Image: The belt clip securely attached to the back of the radio.
- Verify Security: Once attached, gently pull on the belt clip to confirm it is firmly secured to the radio and does not easily detach.
Installation Video Guide
Video: Demonstrates the flexibility of the belt clip and its attachment to a compatible walkie talkie, followed by attaching the radio to a belt.
5. Usage
To use the belt clip, simply slide it over your belt, waistband, or a sturdy edge of your clothing. The clip's design ensures a firm grip, keeping your radio accessible and secure during activity.
Always ensure the radio is fully seated in the clip and the clip is securely fastened to your attire before engaging in activities that may cause the radio to dislodge.
6. Maintenance
- Cleaning: Wipe the belt clip with a soft, damp cloth to remove dust or dirt. Avoid using harsh chemicals or abrasive cleaners, as these can damage the material.
- Inspection: Periodically inspect the clip for any signs of wear, cracks, or damage. If the clip appears damaged, replace it to ensure the secure retention of your radio.
- Storage: Store the belt clip in a cool, dry place away from direct sunlight when not in use.
7. Troubleshooting
Issue: The belt clip does not attach securely to the radio.
- Solution: Verify that your radio model is listed under the "Compatibility" section. Ensure the clip is aligned correctly with the radio's attachment slot and pushed firmly until it clicks into place.
Issue: The belt clip feels loose on my belt.
- Solution: Ensure the belt or waistband material is thick enough for the clip to grip firmly. Avoid attaching the clip to thin or delicate fabrics that may not provide adequate support.
8. Specifications
| Feature | Detail |
|---|---|
| Brand | radtel |
| Model Number | RT-10 (rt-10-bl) |
| Color | Black |
| Item Weight | 0.03 Pounds (approx. 14g) |
| Included Components | 5 Belt Clips |
| Compatible Devices | Radtel RT-10, WLN KD-C1, LT-316/TD-M8, RT22/X6, ZS-B1, NK-U1, R1 |
9. Warranty and Support
For warranty information and customer support, please refer to the official Radtel website or contact your retailer. Keep your purchase receipt as proof of purchase.
You can visit the official Radtel store for more products and support: Radtel Official Store