1. Introduction
This instruction manual provides guidance for the proper use and assembly of the Upick Deals 1.5 Inch Round Button Making Supplies. These components are designed for creating custom pin-back buttons when used with a compatible button-making machine.
2. Product Components
Each pack contains 100 sets of 1.5-inch button parts. A complete set for one button consists of three primary components:
- Top Metal Shell: The front piece of the button, which holds the artwork and Mylar film.
- Pin-Back: The back piece of the button, featuring a metal pin for attachment.
- Transparent Mylar Film: A clear plastic film that protects the artwork and provides a glossy finish.
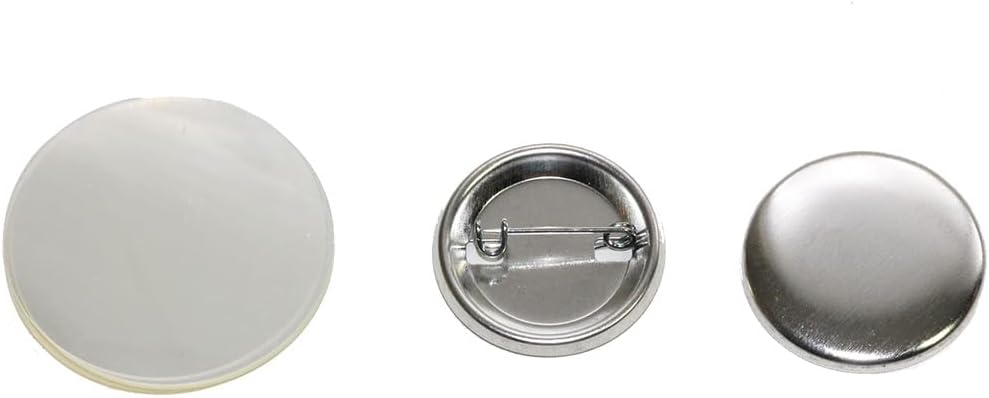
Image: Individual components of the 1.5-inch button making kit, including the transparent Mylar film, the metal pin-back with its safety pin mechanism, and the smooth metal top shell.
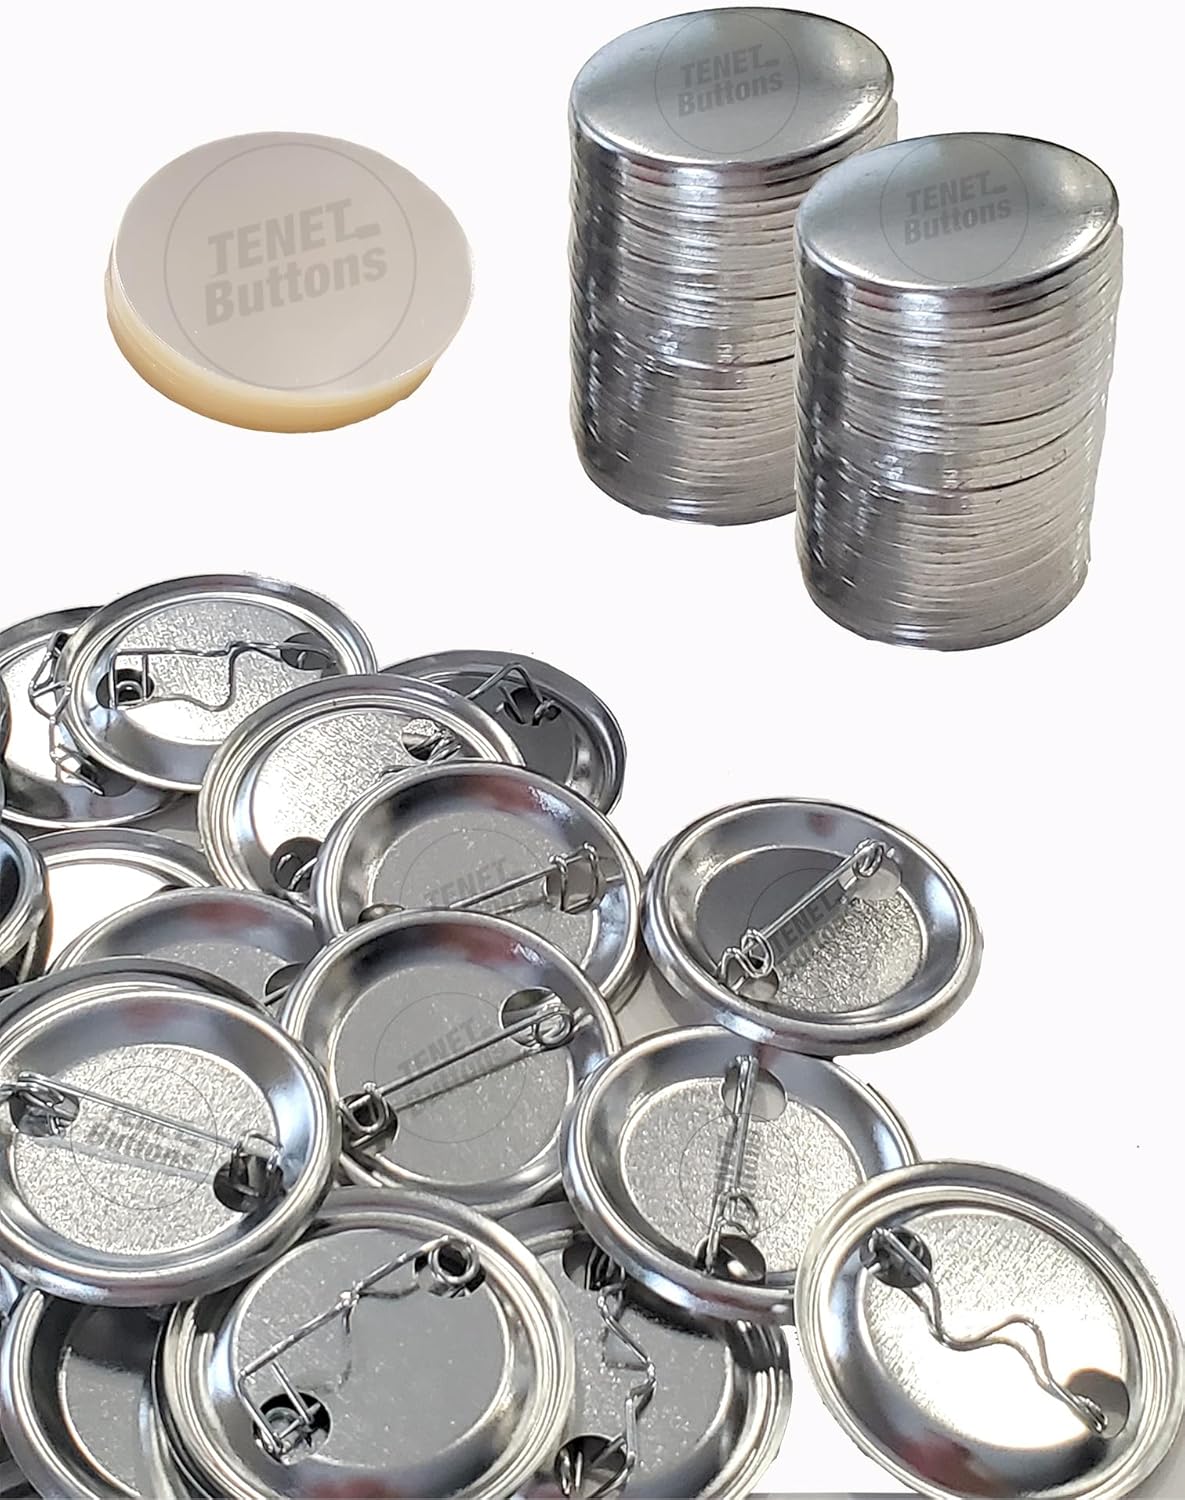
Image: A collection of button components, showing stacks of metal top shells and pin-backs, alongside a group of transparent Mylar films, ready for assembly.
3. Compatibility Information
These button parts are specifically designed for compatibility with American-made button machines, including brands such as Tecre, Neil, and American Buttons. It is crucial to verify compatibility with your specific machine model.
Important: These button parts are NOT COMPATIBLE with CHI button machines. Using incompatible parts may result in improper button assembly or damage to your machine.
For other brands, please refer to the exact diameter measurements provided below and compare them with your existing parts or machine specifications to ensure proper fit.

Image: Measurement of the Top Metal Shell, indicating a diameter of 36.55 mm (1 7/16 inches). This measurement is critical for machine compatibility.
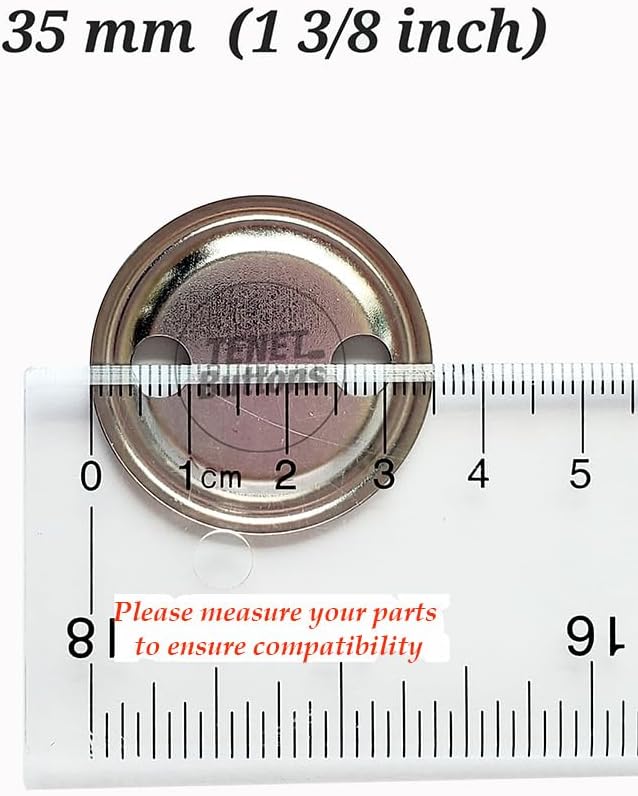
Image: Measurement of the Pin-Back component, indicating a diameter of 35 mm (1 3/8 inches). This measurement is important for ensuring the back piece fits correctly.

Image: Measurement of the Plastic Mylar Film, indicating a diameter of 46.5 mm (1 55/64 inches). The Mylar film's size is crucial for covering the artwork and sealing the button.
4. Setup and Assembly
To create buttons using these supplies, you will need a 1.5-inch button-making machine and a corresponding die cutter. The general assembly process is as follows:
- Prepare Artwork: Design and print your desired artwork. Use a 1.5-inch die cutter to precisely cut your artwork to the correct circular size for the button.
- Load Top Shell: Place one top metal shell into the first die (often labeled "A") of your button-making machine.
- Add Artwork and Mylar: Place your cut artwork on top of the metal shell, ensuring it is centered. Then, place one transparent Mylar film on top of the artwork.
- Load Pin-Back: Rotate the machine's die to the second position (often labeled "B"). Place one pin-back component into this die, ensuring the pin is oriented correctly (e.g., facing downwards or as per your machine's instructions).
- Press Button: Operate your button-making machine according to its specific instructions to press the components together. This typically involves pressing down a handle to crimp the top shell, artwork, Mylar, and pin-back into a finished button.
- Remove Finished Button: Once pressed, remove the completed 1.5-inch pin-back button from the machine.
Always refer to the specific instructions provided with your button-making machine for detailed operational steps and safety guidelines.
5. Operation
The operation of creating buttons relies primarily on the button-making machine itself. These button parts are passive components that are assembled by the machine. Ensure your machine is properly calibrated and maintained for optimal results.
6. Maintenance
To ensure the longevity and quality of your button supplies:
- Store components in a dry, cool place away from direct sunlight and moisture to prevent tarnishing or degradation of materials.
- Handle Mylar films carefully to avoid scratches or dust accumulation, which can affect the final appearance of the button.
- Keep parts organized to prevent bending or damage to the metal components.
7. Troubleshooting
If you encounter issues during button assembly, consider the following:
- Button Not Assembling Correctly:
- Verify that your button-making machine is compatible with 1.5-inch parts.
- Ensure all components (top shell, artwork, Mylar, pin-back) are correctly seated in the machine's dies.
- Check if the Mylar film or artwork is cut to the precise size required for 1.5-inch buttons.
- Confirm that the machine's pressure is correctly adjusted according to its manual.
- Parts Not Fitting:
- Re-check the compatibility section (Section 3) to ensure these parts are suitable for your specific button machine.
- Measure your machine's dies and compare them with the provided part dimensions.
- Artwork or Mylar Wrinkling:
- Ensure artwork is flat and free of creases before placing it in the machine.
- Confirm the Mylar film is placed smoothly over the artwork without air bubbles.
8. Specifications
| Feature | Detail |
|---|---|
| Product Name | 1.5 Inch Round Button Making Supplies |
| Brand | Upick Deals |
| Model Number | 787600128791 |
| Button Size (Assembled) | 1.5 inches (approx. 38.1 mm) |
| Material | Metal (shells and pin-backs), Plastic (Mylar film) |
| Quantity | 100 sets (100 top shells, 100 pin-backs, 100 Mylar films) |
| Product Dimensions (Pack) | 1.5 x 1.5 x 1.5 inches (approx. 3.81 x 3.81 x 3.81 cm) |
| Item Weight (Pack) | 1 pound (approx. 0.45 kg) |
9. Warranty and Support
For questions regarding product compatibility, missing parts, or general inquiries, please contact Upick Deals customer support through the retailer's platform where the purchase was made. Please retain your proof of purchase for any support requests.