
SMARTSTANDARD 10
SMARTSTANDARD 10 Feet Heavy Duty Sliding Barn Door Hardware Kit Instruction Manual
Model: 10
Introduction
This manual provides detailed instructions for the installation, operation, and maintenance of your SMARTSTANDARD 10 Feet Heavy Duty Sliding Barn Door Hardware Kit. Please read all instructions carefully before beginning installation to ensure proper setup and safe operation. This kit is designed for single barn doors up to 60 inches wide and 220 lbs in weight, with a door thickness between 1 3/8 inches and 1 3/4 inches.
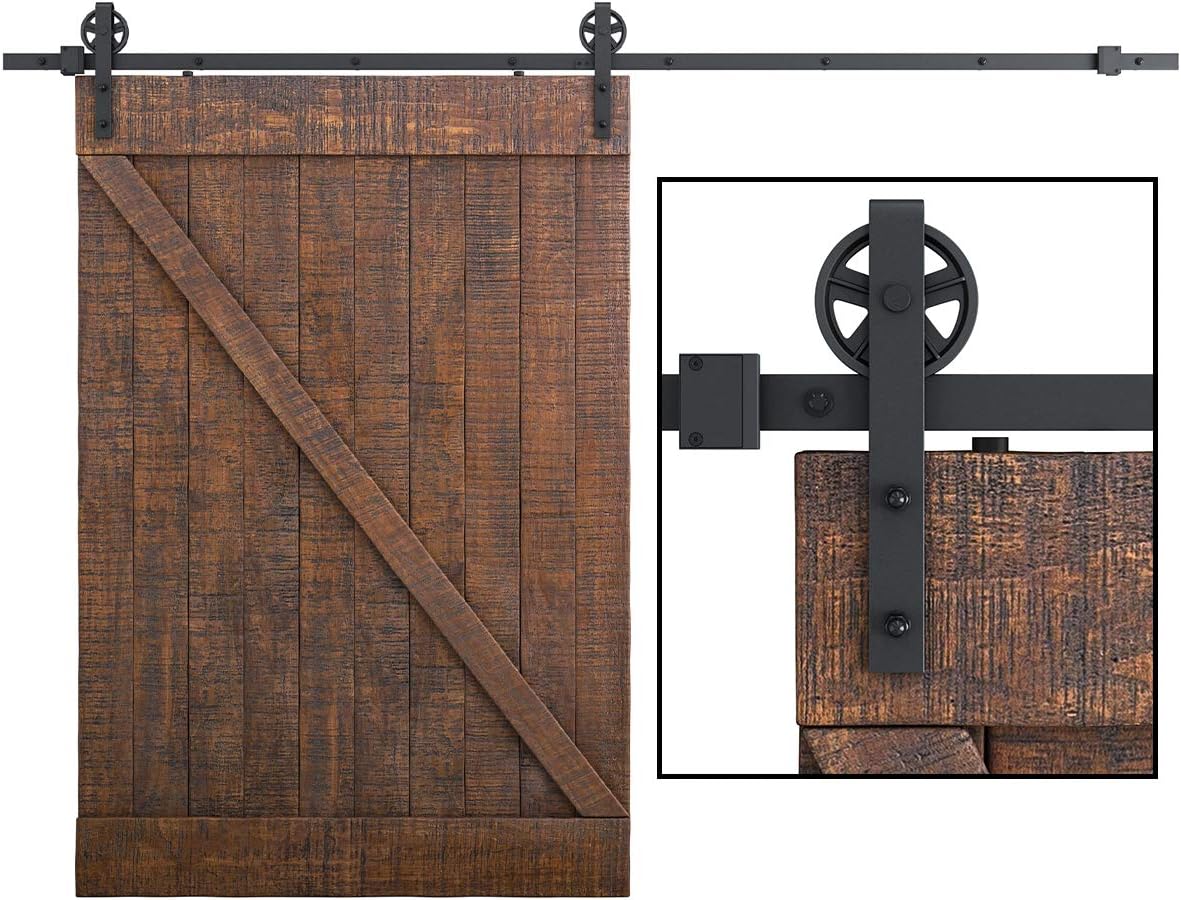
Image: A fully installed SMARTSTANDARD barn door hardware kit featuring a dark wooden barn door with a diagonal brace, mounted on a black track with large industrial-style wheels. A close-up inset shows the detail of the hanger and wheel mechanism.
Safety Information
- Always wear appropriate safety gear, including eye protection and gloves, during installation.
- Ensure the wall structure can support the weight of the door and the hardware. Consult a professional if unsure.
- Use a stud finder to locate wall studs for secure mounting. The kit is suitable for 16-inch stud spacing.
- Keep children and pets away from the work area during installation.
- Do not exceed the maximum door weight capacity of 220 lbs.
- Handle all components carefully to avoid injury or damage.
Package Contents
Verify that all components listed below are present and undamaged before beginning installation.

Image: An overhead view displaying all individual components included in the SMARTSTANDARD barn door hardware kit, neatly arranged on a white surface. This includes two large wheel hangers, two track sections, eight rail spacers, two door stoppers, two anti-jump blocks, one track connector, one floor guide, a hex key, and various screws and bolts.
- 5.0 FT Rail (x2): Forms the 10-foot track.
- Rail Spacer (x8): Ensures proper distance between the track and the wall.
- Roller (x2): Industrial bigwheel hangers for the door.
- Door Stopper (x2): Prevents the door from sliding off the track.
- Anti-jump Block (x2): Prevents the door from lifting off the track.
- Connector (x1): Joins the two 5.0 FT rail sections.
- Floor Guide (x1): Keeps the bottom of the door stable.
- Hex Key (x1): For tightening specific fasteners.
- Screws and Bolts: Various fasteners for assembly and mounting.

Image: A detailed breakdown of key hardware components. Labels identify the "Track" (heavy-duty sturdy 1/4" thick), "Hanger" (upgraded nylon bearings), "Spacers" (for firm wall mounting), "Stopper" (prevents sliding off track), "Anti-Jumpers" (prevents lifting off track), and "Floor Guide" (prevents door swinging).
Specifications
| Feature | Specification |
|---|---|
| Brand | SMARTSTANDARD |
| Model Number | 10 |
| Material | Carbon Steel |
| Color | Black |
| Track Length | 10 Feet (composed of two 5.0 FT rails) |
| Track Thickness | 1/4 inch |
| Max. Door Weight Capacity | 220 lbs |
| Fit Door Width | Up to 60 inches |
| Fit Door Thickness | 1 3/8'' to 1 3/4'' |
| Clearance Above Door | 8 inches needed |
| Assembly Required | Yes |
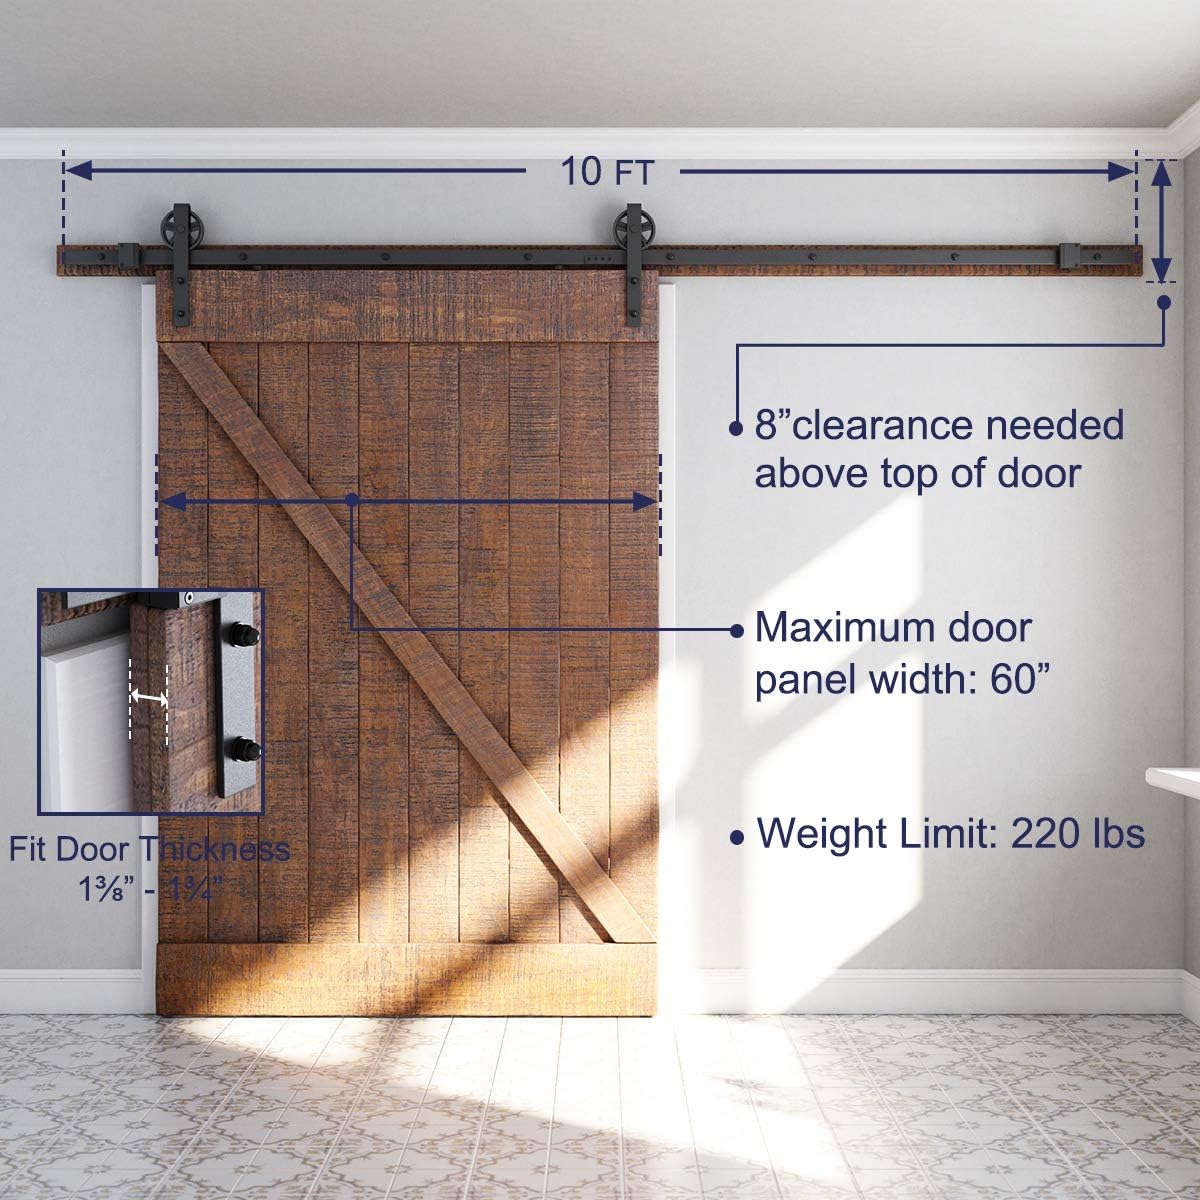
Image: A diagram illustrating key measurements and specifications for the barn door hardware. It shows the 10 FT track length, an 8-inch clearance needed above the door, a maximum door panel width of 60 inches, and a weight limit of 220 lbs. An inset highlights the fit for door thickness between 1 3/8" and 1 3/4".
Setup and Installation
Follow these steps carefully for a successful installation. It is recommended to have two people for certain steps, especially when handling the door.
- Prepare the Wall: If your wall studs do not align with the pre-drilled holes on the track, or if you have a hollow wall, attach a sturdy headboard (wooden board) to the wall first. Ensure it is level and securely fastened to wall studs.
- Install the Metal Track: Connect the two 5.0 FT rail sections using the provided connector. Mount the assembled 10 FT track to the wall or headboard using the rail spacers and appropriate screws/bolts. Ensure the track is perfectly level.
- Install Rollers and Anti-Jump Disks: Attach the rollers to the top edge of your barn door. Ensure they are securely fastened. Install the anti-jump blocks on the top edge of the door, above the rollers, to prevent the door from lifting off the track.
- Mount the Stoppers on the Track: Slide the door stoppers onto the track. Adjust their positions later to control the door's travel distance.
- Mount the Floor Guide: Position the floor guide on the floor directly below the track. This guide will prevent the bottom of the door from swinging out. Secure it to the floor.
- Lift and Place the Barn Door on the Track: With assistance, carefully lift the barn door and hang the rollers onto the track. Ensure the anti-jump blocks are positioned correctly.
- Adjust and Test: Adjust the positions of the door stoppers to your desired open and closed positions. Test the door's movement to ensure it slides smoothly and quietly. Tighten all fasteners.

Image: A visual step-by-step guide for installing the barn door hardware. It shows: 1. Attaching a headboard (if needed). 2. Installing the metal track. 3. Installing rollers and anti-jump disks. 4. Mounting stoppers on the track. 5. Mounting the floor guide. 6. Lifting and placing the barn door on the track.

Image: A fully installed SMARTSTANDARD barn door hardware kit with a rustic wooden door, showcasing the complete setup in a modern living space. The black track and large wheels are visible above the door frame.
Operating Instructions
The SMARTSTANDARD barn door hardware is designed for smooth and quiet operation. To open or close the door, gently push or pull the door panel along the track. The premium nylon wheels and superior quality bearings ensure minimal friction and noise.

Image: A close-up view highlighting key operational features of the barn door hardware. It shows "RUBBER CUSHIONED STOPPERS" designed to stop the door gently, a "SUPERIOR QUALITY BEARING" tested beyond 100,000 rolls for durability, and "PREMIUM NYLON WHEELS" for super smooth and quiet sliding.
Maintenance
Regular maintenance will ensure the longevity and optimal performance of your barn door hardware.
- Cleaning: Wipe the track and rollers periodically with a soft, dry cloth to remove dust and debris. Avoid abrasive cleaners.
- Lubrication: If the door's movement becomes less smooth over time, apply a small amount of silicone-based lubricant to the roller bearings and the top of the track.
- Fastener Check: Periodically check all screws and bolts for tightness. Re-tighten if necessary to prevent wobbling or misalignment.
- Inspect Components: Examine the rollers, stoppers, and floor guide for any signs of wear or damage. Replace any worn parts promptly.
Troubleshooting
| Problem | Possible Cause | Solution |
|---|---|---|
| Door does not slide smoothly | Dust/debris on track or rollers; loose fasteners; track not level. | Clean track and rollers. Check and tighten all fasteners. Verify track is level and adjust if needed. Apply lubricant. |
| Door swings out at the bottom | Floor guide not installed or improperly positioned. | Ensure the floor guide is securely installed and correctly aligned with the groove in the bottom of the door. |
| Door lifts off the track | Anti-jump blocks not installed or improperly adjusted. | Install or adjust the anti-jump blocks to sit flush with the top of the track, preventing the door from lifting. |
| Loud noise during operation | Lack of lubrication; debris in rollers. | Clean rollers and track. Apply silicone-based lubricant to rollers and track. |
Warranty and Support
SMARTSTANDARD is committed to providing high-quality products. If you encounter any problems during installation or use, please do not hesitate to contact us via Amazon. Our customer service team is available to assist you with any questions or concerns.
Related documents10


Ask a question about this manual
Ask about setup, troubleshooting, compatibility, parts, safety, or missing instructions. Manuals+ will review the question and use this page’s manual context to help answer it.