Outsunny UK845-1480331
Outsunny Polytunnel Greenhouse User Manual
Model: UK845-1480331 | Brand: Outsunny
Introduction
This manual provides essential information for the safe and effective use of your Outsunny Polytunnel Greenhouse. Designed to extend your growing season and protect plants from adverse weather, this greenhouse offers a controlled environment for various horticultural needs. Please read all instructions carefully before assembly and operation to ensure proper setup and longevity of your product.
Video: Overview of the Outsunny Polytunnel Greenhouse, showcasing its design and features.

Image: Front view of the Outsunny Polytunnel Greenhouse, highlighting its overall structure.
Safety Information
This product contains heavy components and may have sharp edges. Exercise caution during assembly and handling. Proper anchoring is crucial for the stability and safety of the greenhouse.
- Always ensure the greenhouse is securely anchored to the ground to prevent damage from wind.
- In case of heavy snow, strong wind, or heavy rain, the cover should be temporarily removed or secured to prevent structural damage. This product is not designed for extreme weather conditions.
- Keep children and pets away from the assembly area.
- Do not use the greenhouse for purposes other than its intended use as a plant shelter.
Components List
Before beginning assembly, verify that all components are present and undamaged. Refer to the packing list provided with your product for specific quantities.
- Galvanized Steel Frame: Provides the main structural support.
- PE Cover: Durable polyethylene cover designed to protect plants and allow sunlight penetration.
- Roll-up Zippered Door: For easy access and ventilation.
- Roll-up Mesh Windows: For cross-ventilation and pest control.
- Slant Supporting Tubes: Additional rods for enhanced stability.
- Ground Nails/Stakes and Ropes: For securing the greenhouse to the ground.
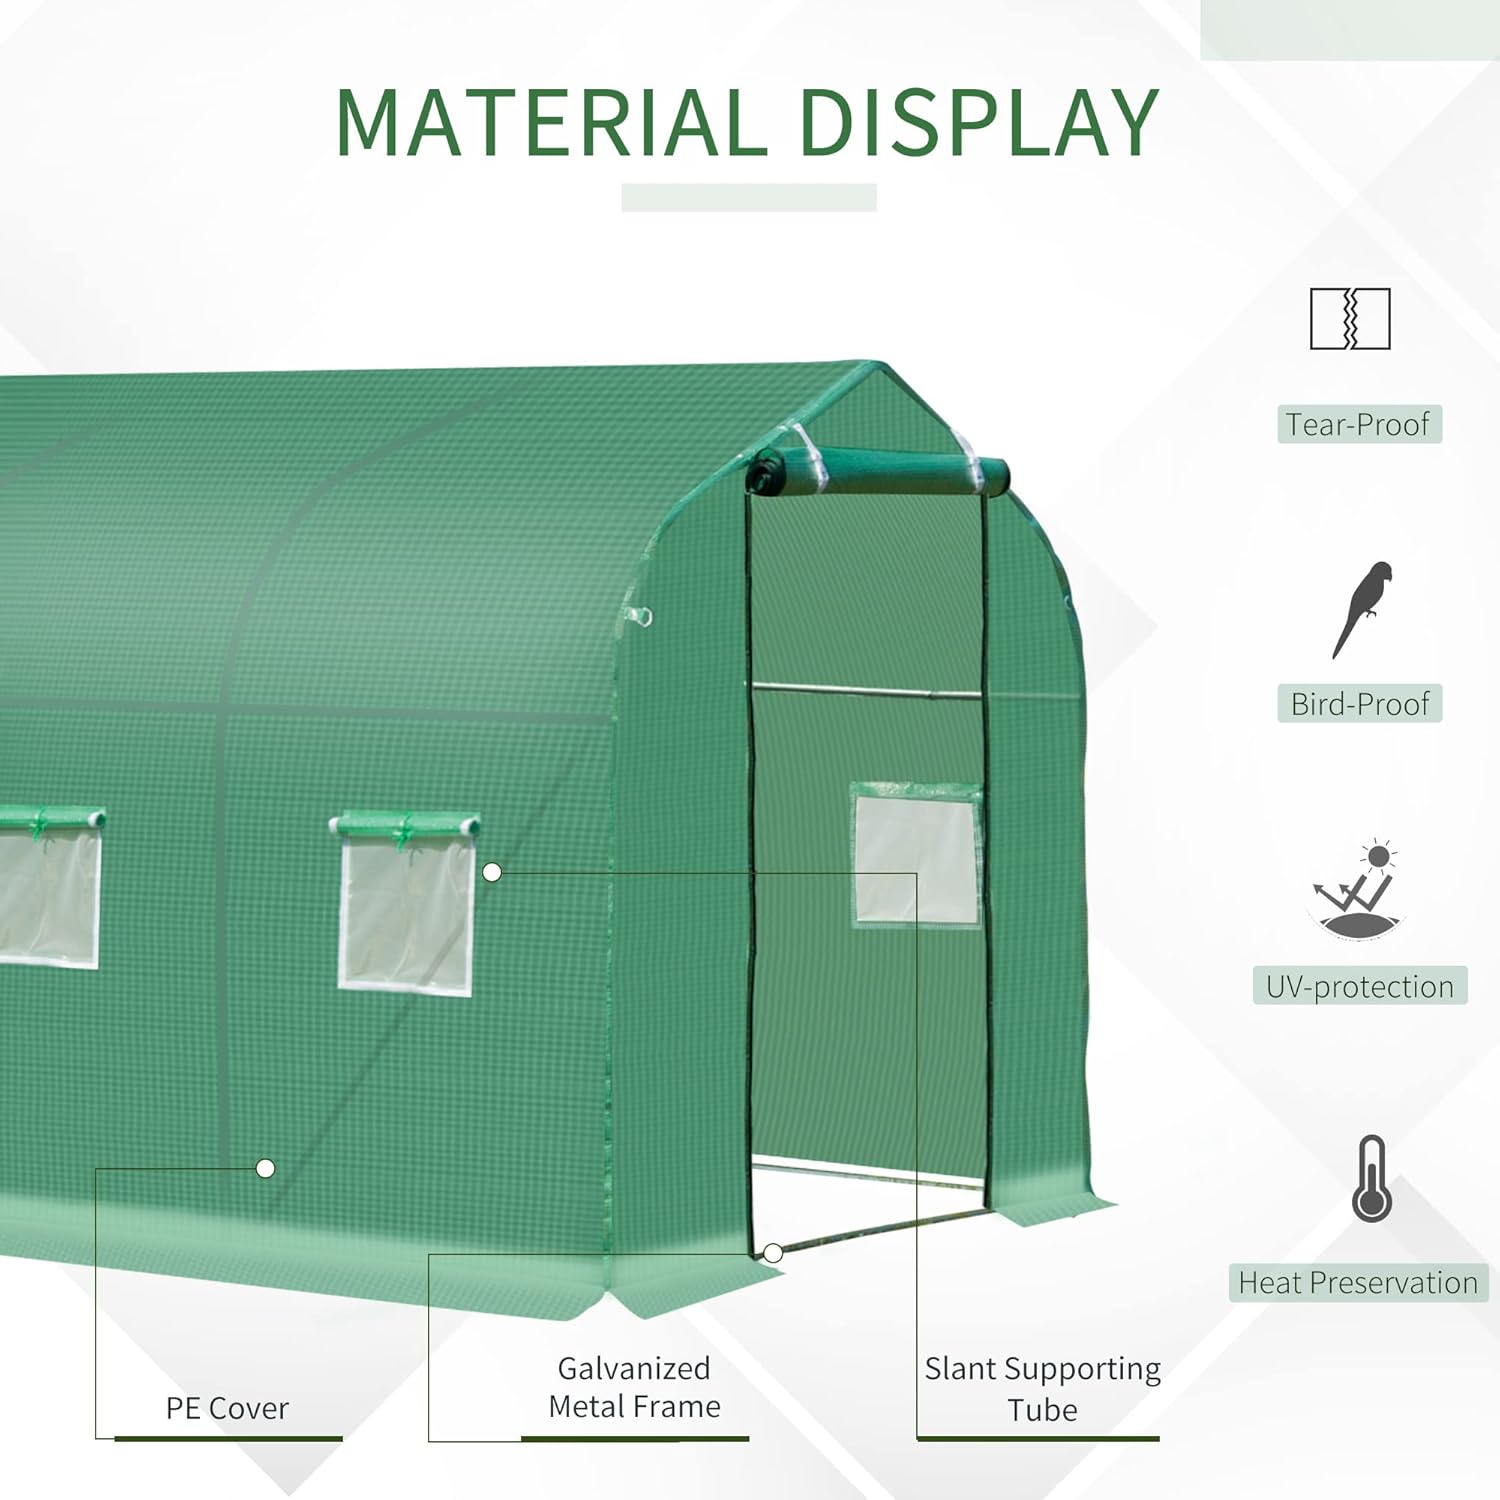
Image: Detailed view of the greenhouse materials, including the PE cover, galvanized metal frame, and slant supporting tube.
Setup and Assembly
Assembly requires careful attention to detail. It is recommended to have at least two people for assembly. Follow the step-by-step instructions provided in the separate assembly guide included with your product. The following provides a general overview of key steps:
1. Site Preparation
Choose a level, well-drained area for your greenhouse. Ensure the site is clear of debris and has adequate space around it for access and anchoring. Consider sun exposure and wind patterns.
2. Frame Assembly
Assemble the galvanized steel frame according to the diagrams in your assembly guide. Ensure all connections are firm and secure. The frame provides the essential structure for the greenhouse.
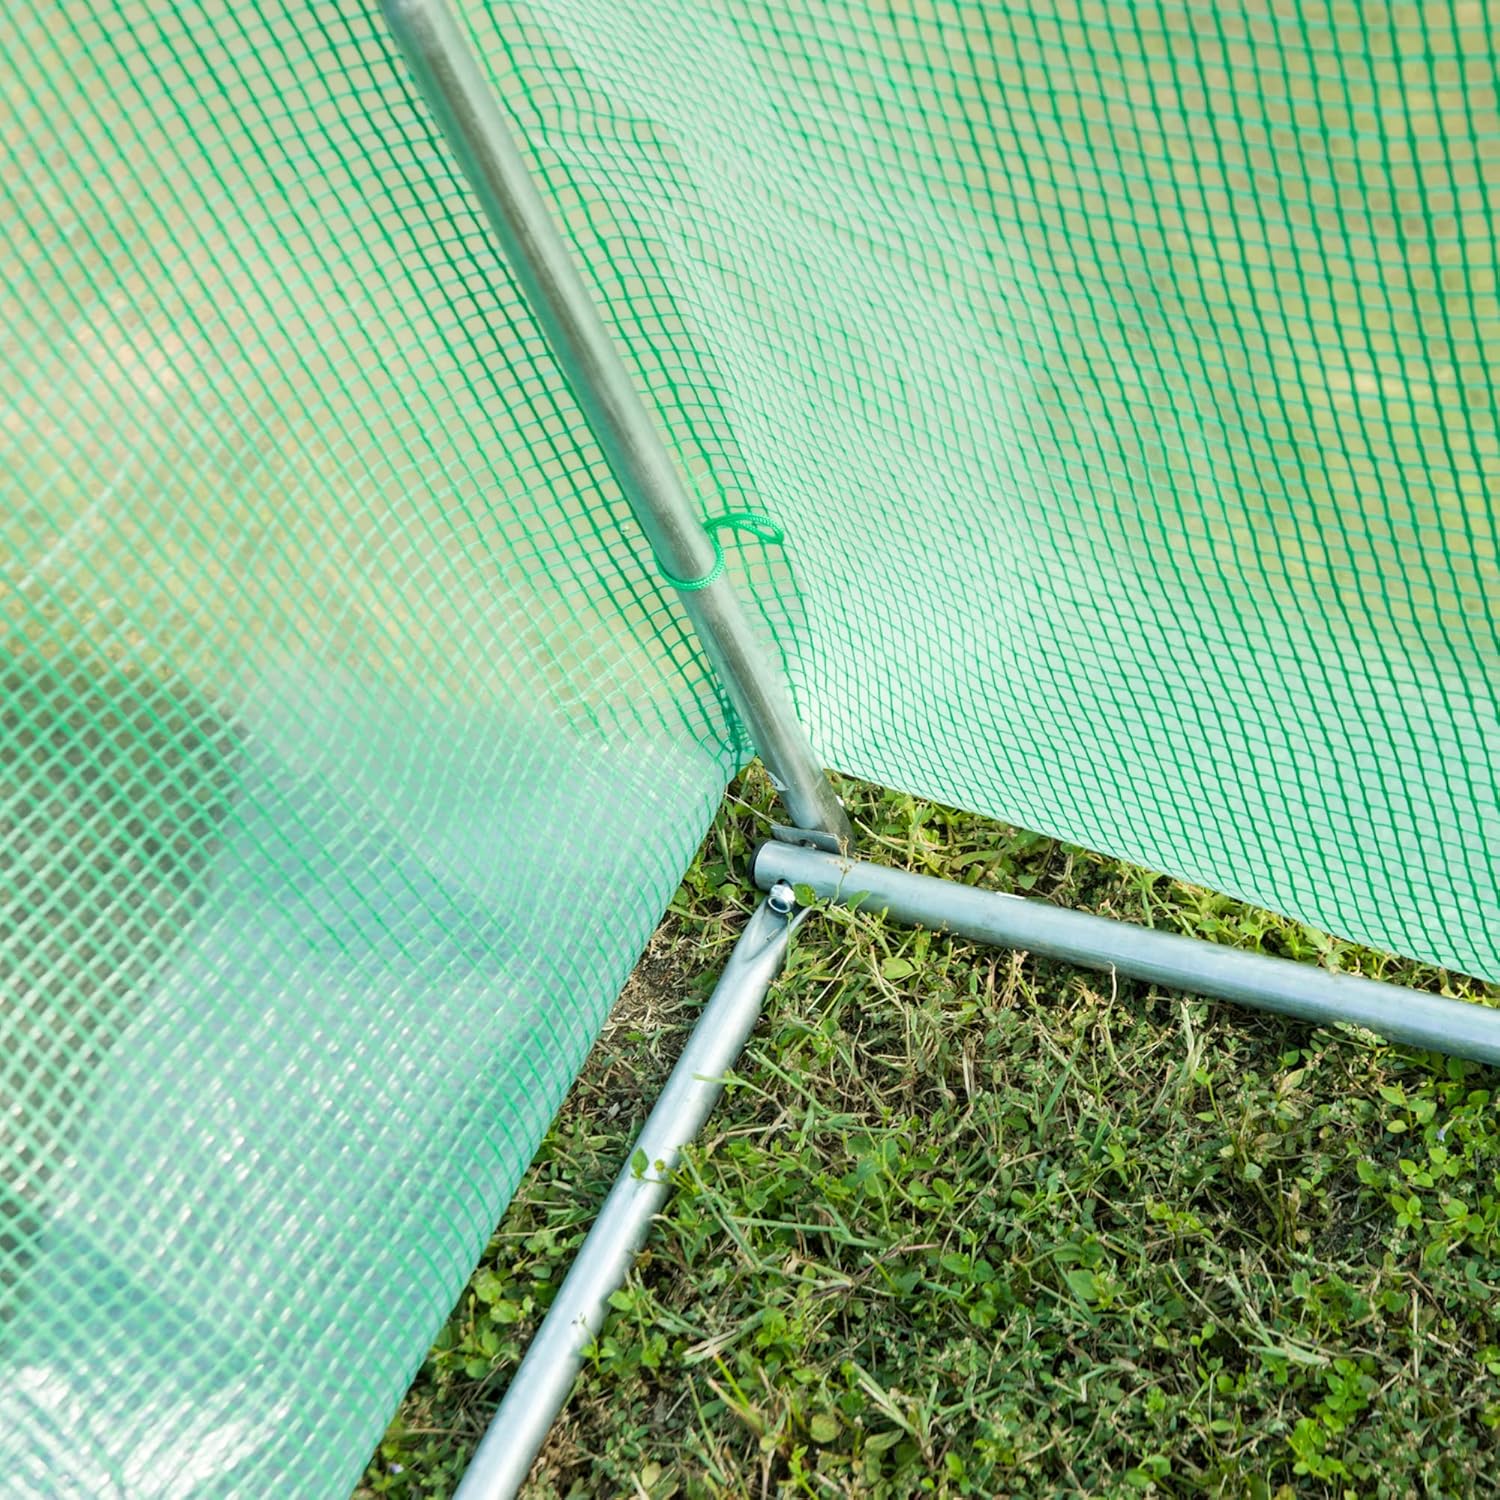
Image: Detail of a firm connection point within the galvanized steel frame, essential for structural integrity.
3. Cover Installation
Carefully drape the PE cover over the assembled frame. Ensure it is centered and aligned correctly. Secure the cover to the frame using the provided strings or ties to prevent flapping and ensure a snug fit.
4. Anchoring
Proper anchoring is critical for stability. The 15cm extended edge of the cover should be deeply buried in the soil to create a secure base. Additionally, tighten the four wind ropes and fix them firmly on the ground using the provided ground nails/stakes.

Image: Illustration of proper anchoring techniques, including burying the extended edge of the cover and securing with ground nails.

Image: The included ground ropes and stakes used for additional stability and anchoring.
Operating Instructions
The Outsunny Polytunnel Greenhouse is designed for ease of use and optimal plant growth.
1. Door Operation
The greenhouse features a roll-up zippered door for convenient access. Unzip the door completely and roll it up, securing it with the attached ties to keep it open. This allows for easy entry, exit, and movement of gardening equipment.
2. Ventilation (Windows)
Each side of the greenhouse is equipped with roll-up mesh windows. These windows can be opened to provide cross-ventilation on warmer days, helping to regulate temperature and humidity inside the greenhouse. The mesh design helps keep insects out while allowing airflow.

Image: Close-up of the roll-up mesh window and zippered door, illustrating their functionality for ventilation and access.
Maintenance
Regular maintenance will prolong the life of your greenhouse and ensure optimal performance.
- Cleaning: Periodically clean the PE cover with mild soap and water to remove dirt and algae buildup, which can reduce light transmission. Rinse thoroughly.
- Cover Care: Inspect the cover regularly for any tears or damage. Small tears can often be repaired with specialized greenhouse repair tape.
- Frame Inspection: Annually check all frame connections and bolts to ensure they remain tight and secure. Inspect the galvanized steel for any signs of rust or corrosion and treat as necessary.
- Anchoring Check: Regularly verify that the greenhouse remains securely anchored, especially after strong winds or heavy rainfall. Re-bury the extended edge and re-tighten ropes and stakes if needed.
- Winterization: In areas with heavy snow or extreme winter conditions, it is advisable to remove the PE cover to prevent damage from snow accumulation and ice. Store the cover in a dry, protected area.
Troubleshooting
Here are some common issues and their potential solutions:
| Issue | Possible Cause | Solution |
|---|---|---|
| Greenhouse instability / wobbling | Insufficient anchoring; loose frame connections. | Ensure the extended cover edge is deeply buried. Tighten all ground ropes and stakes. Check and tighten all frame bolts and connections. |
| Cover tearing or damage | Exposure to strong winds; sharp edges on frame; prolonged UV exposure. | Ensure proper anchoring to minimize wind stress. Inspect frame for sharp points and cover with tape if found. Consider removing cover during extreme weather. Repair small tears with greenhouse repair tape. |
| Poor ventilation / overheating | Windows and door not opened sufficiently. | Open all roll-up mesh windows and the zippered door during warm periods to allow for maximum airflow. |
| Difficulty zipping door | Zipper misalignment or debris. | Ensure the cover is properly aligned on the frame. Clean the zipper teeth. Apply a silicone-based lubricant if necessary. |
Specifications
| Feature | Detail |
|---|---|
| Overall Size | 3 x 2 x 2 M (Length x Width x Height) |
| Product Dimensions | 139 x 36 x 12 cm (packaged); 13 kg |
| Frame Material | Galvanised Steel |
| Cover Material | Polyethylene (PE) cloth |
| Number of Doors | 1 (Roll-up zippered) |
| Number of Vents | 6 (Roll-up mesh windows) |
| Closure Type | Zipper |
| Special Feature | Waterproof, Includes Cover |
| Indoor/Outdoor Usage | Outdoor |
| Colour | Green |
| Item Model Number | UK845-1480331 |

Image: Diagram illustrating the overall dimensions of the Outsunny Polytunnel Greenhouse.
Warranty and Support
For any questions regarding your Outsunny Polytunnel Greenhouse, including warranty claims, missing parts, or technical support, please contact the retailer or manufacturer directly. Keep your purchase receipt as proof of purchase.
You can visit the official Outsunny store for more information and contact details:
Ask a question about this manual
Ask about setup, troubleshooting, compatibility, parts, safety, or missing instructions. Manuals+ will review the question and use this page’s manual context to help answer it.