
1. Product Overview
The KEYSIGHT E36311A is an 80 W, 3-output programmable DC power supply designed for professional and industrial applications. It features three independent outputs: 6 V/5 A, +25 V/1 A, and -25 V/1 A, providing versatile power solutions for various testing and development needs.

Figure 1.1: Front view of the KEYSIGHT E36311A Power Supply, showing the display, control knobs, keypad, and output terminals.
Key Features:
- Three independent outputs: 6 V/5 A, +25 V/1 A, and -25 V/1 A.
- Total output power of 80 Watts.
- Programmable voltage and current settings.
- Designed for industrial and professional use.
2. Important Safety Information
Keysight Technologies products are classified as 'Industrial Monitoring and Control Equipment' designed for specialists or industrial applications and related training programs. Keysight products are designed and certified to meet national safety standards (e.g., for electrical equipment for measurement, control, and laboratory use), and these products are sold for use only by trained specialists.
Keysight products are not intended for consumer use in residential environments and may not meet EMC or other emission interference standards for household use. Keysight products are intended for use in the country where they were originally sold.
- Always operate the device in a well-ventilated area.
- Ensure proper grounding to prevent electrical shock.
- Do not open the device casing; refer servicing to qualified personnel.
- Use only the specified power cord and accessories.
- Observe all warning labels on the product.
3. Setup
3.1 Unpacking and Inspection
- Carefully remove the power supply from its packaging.
- Inspect the unit for any signs of physical damage. If damage is found, contact your supplier immediately.
- Verify that all accessories listed in the packing list are present.
3.2 Power Connection
Before connecting the power supply to the AC mains, ensure the AC selector switch on the rear panel is set to the correct voltage for your region (100V, 120V, 220V, or 240V).

Figure 3.1: Rear view of the KEYSIGHT E36311A, highlighting the AC input and voltage selector.
- Locate the AC input connector and voltage selector on the rear panel.
- Set the AC selector to match your local mains voltage.
- Connect the supplied power cord to the AC input connector and then to a grounded AC outlet.
3.3 Initial Power On
- Press the main power switch located on the front panel to turn on the unit.
- The display will illuminate, and the unit will perform a self-test.
- After the self-test, the default output settings will be displayed.
4. Operating Instructions
4.1 Front Panel Controls
The front panel provides access to all primary controls for setting voltage, current, and managing outputs.
- Voltage/Current Knobs: Adjust output voltage and current limits for each channel.
- Output On/Off Buttons: Independently control the activation of each output channel.
- Keypad: For direct entry of numerical values.
- Display: Shows real-time voltage, current, and status for all three outputs.
4.2 Setting Output Voltage and Current
- Select the desired output channel (1, 2, or 3) using the corresponding button on the front panel.
- Use the Voltage knob to set the desired output voltage. The display will show the set value.
- Use the Current knob to set the desired current limit. The display will show the set value.
- Press the 'On' button for the selected channel to enable the output. The output indicator will illuminate.
- To disable an output, press its 'On' button again.
4.3 Tracking Mode
The E36311A supports tracking mode, allowing outputs to be linked and controlled simultaneously. Refer to the full user manual for detailed instructions on configuring tracking modes.
5. Maintenance
5.1 Cleaning
- Disconnect the power supply from the AC mains before cleaning.
- Use a soft, damp cloth to clean the exterior surfaces. Do not use abrasive cleaners or solvents.
- Ensure no liquid enters the ventilation openings.
5.2 Ventilation
The power supply requires adequate ventilation to prevent overheating. Ensure that the ventilation grilles on the sides and rear of the unit are not obstructed.
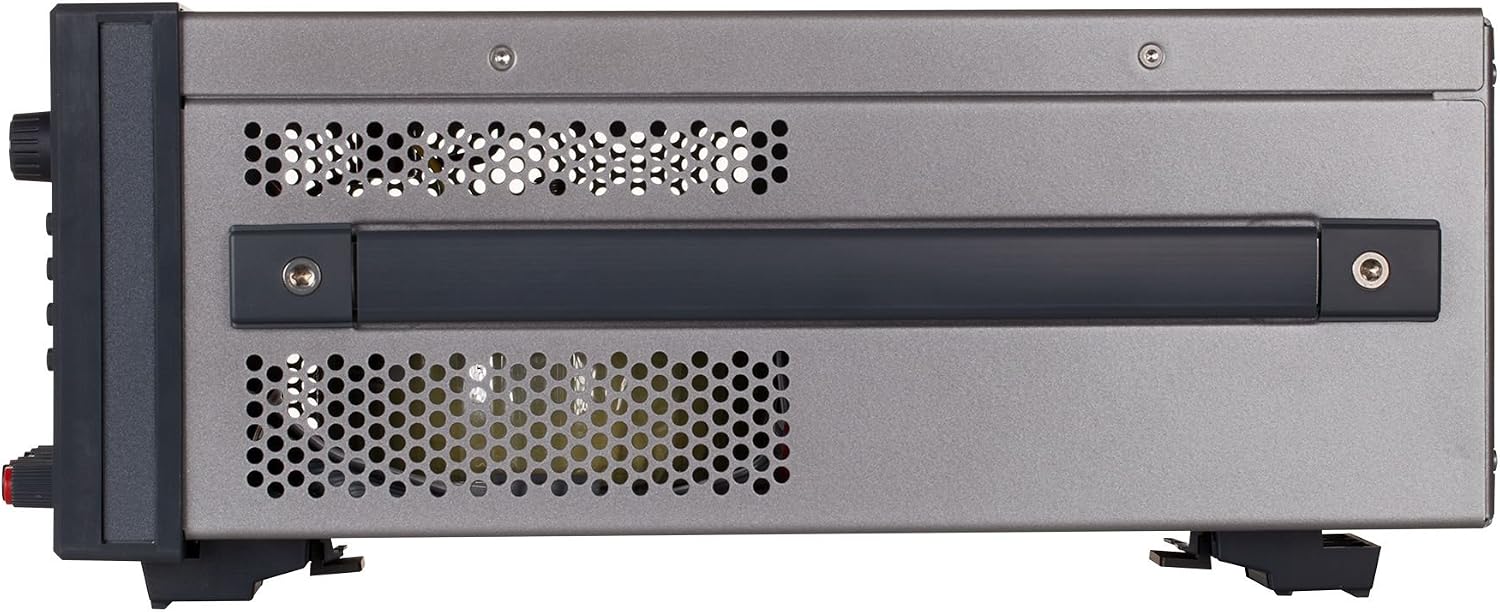
Figure 5.1: Side view of the KEYSIGHT E36311A, showing ventilation grilles for proper airflow.
- Maintain at least 10 cm (4 inches) of clear space around all sides of the unit.
- Regularly check and clean any dust accumulation on the grilles.
5.3 Calibration
Periodic calibration by qualified service personnel is recommended to maintain measurement accuracy. Refer to the official Keysight documentation for calibration procedures and intervals.
6. Troubleshooting
| Problem | Possible Cause | Solution |
|---|---|---|
| Unit does not power on. | No AC power; incorrect voltage selection; faulty power cord. | Check AC power connection; verify AC selector switch setting; try a different power cord. |
| Output voltage/current cannot be set. | Output is off; control lock engaged. | Ensure the specific output channel is enabled; check for any lock indicators on the display and unlock if necessary. |
| Output is unstable or fluctuating. | Poor load connection; internal fault. | Check load connections for shorts or open circuits; if problem persists, contact support. |
| Over-temperature warning. | Blocked ventilation; excessive ambient temperature. | Ensure ventilation grilles are clear; move unit to a cooler environment. |
For issues not listed above, or if troubleshooting steps do not resolve the problem, please contact Keysight customer support.
7. Specifications
| Parameter | Value |
|---|---|
| Brand | KEYSIGHT |
| Model Number | E36311A |
| Output Power | 80 Watts |
| Number of Outputs | 3 |
| Output 1 | 6 V / 5 A |
| Output 2 | +25 V / 1 A |
| Output 3 | -25 V / 1 A |
| Input Voltage | Selectable (100V, 120V, 220V, 240V AC) |
8. Warranty and Support
Keysight Technologies products typically come with a standard manufacturer's warranty. For specific warranty terms and conditions, please refer to the documentation included with your purchase or visit the official Keysight Technologies website.
For technical support, service, or to inquire about calibration services, please contact your local Keysight Technologies representative or visit the Keysight support portal:


