1. Introduction
This manual provides essential information for the safe and efficient use of your Superer UL Listed AC Charger. Please read these instructions carefully before using the product and retain them for future reference. This charger is designed to provide reliable power to compatible Asus X751 series laptops.
2. Safety Information
Your Superer AC Charger is UL Listed, ensuring it meets nationally recognized standards for high-level electronic safety. It incorporates multiple safety mechanisms to protect against common electrical hazards.
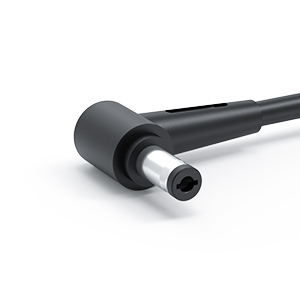
Image: UL Listed certification logo, indicating compliance with safety standards.
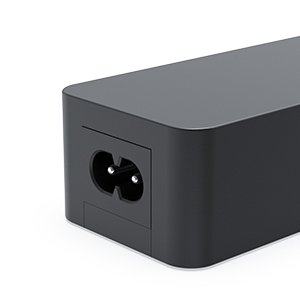
Image: Table detailing safety certifications including UL Listed, FCC approved, and CE marking.
- UL Listed: Passed UL safety tests for high-level electronic safety.
- Overcharge Protection: Prevents damage from excessive charging.
- Overvoltage Protection: Safeguards against voltage surges.
- Overcurrent Protection: Protects against excessive current flow.
- Short Circuit Protection: Prevents damage from short circuits.
- Internal Overheating Protection: Monitors and prevents internal overheating.
Always use the charger in a well-ventilated area and avoid covering it during operation. Do not expose the charger to water or extreme temperatures.
3. Package Contents
Verify that your package contains the following items:
- 1 x Superer AC Adapter (Model: ADP190342L)
- 1 x Power Cord
4. Specifications
| Feature | Detail |
|---|---|
| Model Number | ADP190342L |
| Input Voltage | 100-240V ~ 50-60Hz |
| Output Voltage | 19V |
| Output Current | 3.42A |
| Output Wattage | 65W (Compatible with 45W) |
| Connector Type | Round Connector |
| Item Dimensions (LxWxH) | 4.21 x 1.85 x 1.22 inches |
| Item Weight | 10.9 ounces |
Compatible Devices:
- Asus X751M, X751MA, X751L, X751LX, X751LA, X751LAB, X751LAV
- Asus X751S, X751SA, X751N, X751NA, X751NV, X751BP, X751B, X751
- Asus X751LX-DH71, X751LX-DB71 Laptops
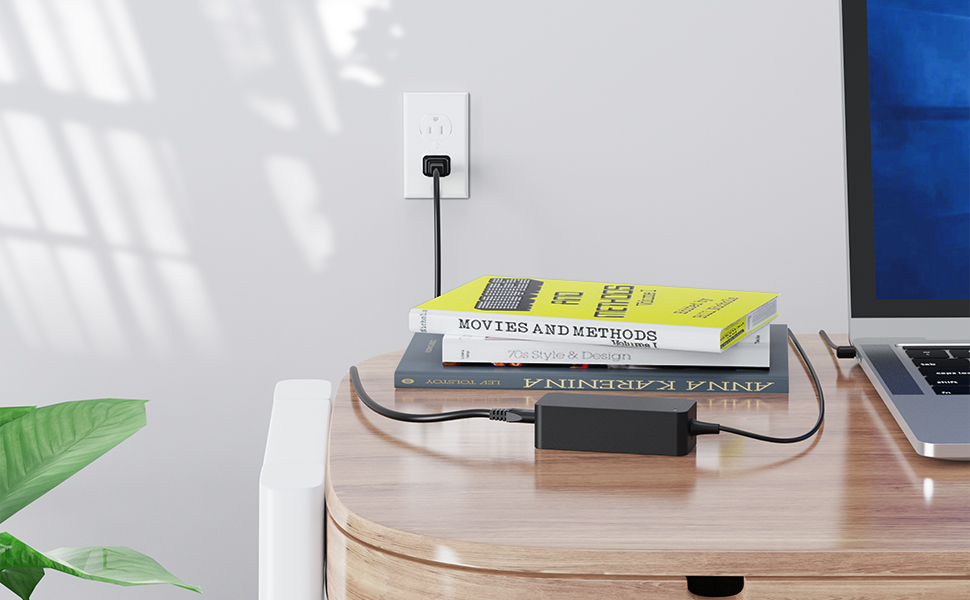
Image: A table illustrating charger compatibility based on voltage, amperage, and wattage, highlighting 19V 3.42A 65W as compatible.

Image: A visual representation of the adapter's dimensions, including length, width, and height.
5. Setup
- Connect the Power Cord: Insert the included power cord into the AC input port on the charger adapter. Ensure it is firmly seated.
- Connect to Power Outlet: Plug the other end of the power cord into a standard wall outlet (100-240V).
- Connect to Laptop: Insert the round connector tip of the charger into the power input port on your compatible Asus X751 series laptop.
- Verify Connection: A power indicator light on the adapter (if present) should illuminate, and your laptop should begin charging.

Image: The AC charger connected to a laptop, which is then plugged into a wall outlet, demonstrating proper setup.
6. Operating Instructions
Once connected, the charger will automatically begin supplying power to your laptop and charging its battery. The charger is designed to provide a consistent and stable power supply.

Image: A laptop connected to the charger, illustrating the consistent and stable power delivery.
- Ensure the charger is always connected to a grounded power outlet.
- Avoid bending or crimping the cables excessively.
- Disconnect the charger from the power outlet when not in use for extended periods.
7. Maintenance
Proper maintenance ensures the longevity and optimal performance of your charger.

Image: Detailed views of the adapter's features, including the power lamp, integrated fastener tape for cable management, and the extended cable length.
- Cleaning: Use a soft, dry cloth to clean the charger. Do not use liquid cleaners or solvents.
- Storage: When not in use, coil the cable neatly. The integrated fastener tape can be used for organized storage. Store the charger in a cool, dry place.
- Inspection: Periodically inspect the cables and connectors for any signs of damage, fraying, or loose connections. If damage is found, discontinue use and replace the charger.
8. Troubleshooting
If you encounter issues with your charger, refer to the following common solutions:
| Problem | Possible Cause | Solution |
|---|---|---|
| Laptop not charging | Loose connection, faulty outlet, incompatible charger, laptop issue | Ensure all connections are secure. Try a different wall outlet. Verify charger compatibility with your laptop model. Test with another known-good charger if available. |
| Charger gets hot | Normal operation, poor ventilation, excessive load | Some warmth is normal during operation. Ensure adequate ventilation around the charger. Avoid covering it. If it becomes excessively hot to touch, discontinue use and contact support. |
| Power indicator light is off | No power, faulty charger | Check the wall outlet and power cord connection. Try a different outlet. If the issue persists, the charger may be faulty. |
If troubleshooting steps do not resolve the issue, please contact Superer customer support.
9. Warranty and Support
Superer stands behind the quality of its products. This AC charger comes with the following:
- 30-Day Replacement or Returns: Eligible for replacement or returns within 30 days of purchase.
- 12-Month Guarantee: The manufacturer provides an additional 12-month guarantee against defects.

Image: A graphic highlighting the 12-month replacement service and 30-day refund policy, emphasizing customer support.
For warranty claims, technical assistance, or any product-related inquiries, please refer to the contact information provided with your purchase or visit the official Superer website.