Logilink BP0043
LogiLink BP0043 Dual Monitor Desk Mount Instruction Manual
Model: BP0043 | Brand: Logilink
Introduction
Welcome to your LogiLink BP0043 Dual Monitor Desk Mount. This manual provides detailed instructions for the assembly, operation, and maintenance of your new monitor mount. Please read this manual thoroughly before installation and use to ensure proper setup and safe operation.
Important Safety Information
Please read and understand all instructions before use. Failure to follow these instructions may result in property damage, serious injury, or death.
- Do not exceed the maximum weight capacity of 9 kg (19.8 lbs) per arm.
- Ensure the desk surface is strong enough to support the combined weight of the mount and monitors.
- Use only with monitors within the specified size range of 13-32 inches.
- Verify VESA compatibility (75x75mm, 100x100mm) before attachment.
- Keep small parts away from children.
- If any parts are missing or damaged, do not attempt to assemble. Contact customer support.
Package Contents
Verify that all components are present before beginning assembly.
| Item | Quantity |
|---|---|
| Dual Monitor Desk Mount Assembly | 1 |
| Mounting Hardware Kit (screws, washers, spacers) | 1 |
| Allen Keys | 1 set |
| Instruction Manual | 1 |
Setup and Installation
Step 1: Attach the Desk Clamp
Secure the desk clamp to the edge of your desk. Ensure it is tightened firmly for stability.

Description: This image shows the base of the monitor mount with its C-clamp mechanism, ready to be attached to a desk edge. The black knob at the bottom is used to tighten the clamp.
Step 2: Assemble the Monitor Arms
Connect the monitor arms to the main pole.
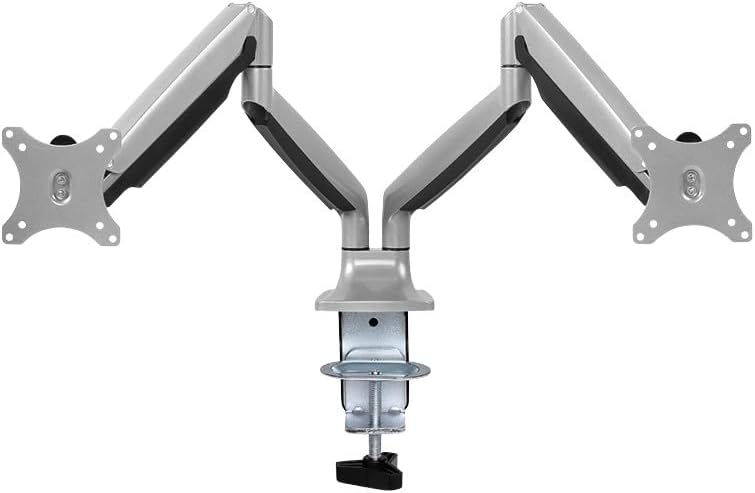
Description: This image displays the fully assembled LogiLink BP0043 dual monitor desk mount, featuring two articulating arms extending from a central pole, ready for monitor attachment.
Step 3: Attach Monitors to VESA Plates
Secure your monitors to the VESA plates on each arm using the provided screws. Ensure the VESA pattern (75x75mm or 100x100mm) matches your monitor.

Description: This technical diagram illustrates the various adjustable angles and dimensions of the LogiLink BP0043 dual monitor mount, including VESA plate measurements (75x75mm, 100x100mm) and arm articulation ranges.
Step 4: Adjust Gas Spring Tension
Adjust the gas spring tension using the included Allen key to counterbalance the weight of your monitors. This allows for smooth height adjustment. Turn clockwise to increase tension for heavier monitors, counter-clockwise for lighter monitors.
Operating Instructions
Adjusting Monitor Position
The LogiLink BP0043 allows for extensive adjustment:
- Tilt: -90° to +90° (up/down)
- Swivel: -90° to +90° (left/right)
- Rotation: -90° to +90° (portrait/landscape)
Gently move the monitor to your desired position. The gas spring mechanism will hold it in place once adjusted correctly.
Maintenance
- Clean the mount regularly with a soft, dry cloth. Avoid abrasive cleaners.
- Periodically check all screws and connections to ensure they remain tight.
- Do not lubricate the gas spring mechanism.
Troubleshooting
Monitor Sags or Does Not Stay in Position
This indicates the gas spring tension is too low for the monitor's weight. Increase the gas spring tension by turning the adjustment screw clockwise.
Monitor is Difficult to Move Up or Down
The gas spring tension may be too high. Decrease the gas spring tension by turning the adjustment screw counter-clockwise.
Mount is Unstable
Ensure the desk clamp is securely tightened to the desk. Check that the desk surface is stable and robust enough to support the mount and monitors.
Specifications
| Feature | Detail |
|---|---|
| Model | BP0043 |
| Brand | Logilink |
| Compatible Monitor Size | 13 - 32 inches |
| Weight Capacity per Arm | Max. 9 kg (19.8 lbs) |
| VESA Compatibility | 75x75mm, 100x100mm |
| Tilt Range | -90° to +90° |
| Swivel Range | -90° to +90° |
| Rotation Range | -90° to +90° |
| Material | Aluminum |
| Product Dimensions | 23.82 x 47.64 x 47.64 inches |
| Item Weight | 2.2 pounds |
Warranty and Support
This LogiLink product is covered by a manufacturer's warranty. For warranty claims or technical support, please contact your local LogiLink distributor or visit the official LogiLink website. Keep your purchase receipt as proof of purchase.
For further assistance, please refer to the contact information provided on the LogiLink official website.
Ask a question about this manual
Ask about setup, troubleshooting, compatibility, parts, safety, or missing instructions. Manuals+ will review the question and use this page’s manual context to help answer it.