1. Introduction
Welcome to the Philco Electronic Bread Maker user manual. This appliance is designed to simplify the bread-making process, allowing you to create a variety of delicious breads, cakes, jams, and more with minimal effort. Please read this manual carefully before using the appliance to ensure safe and efficient operation and to fully understand its features.
2. Important Safety Instructions
When using electrical appliances, basic safety precautions should always be followed to reduce the risk of fire, electric shock, and injury to persons, including the following:
- Do not touch hot surfaces. Use handles or knobs.
- To protect against electric shock, do not immerse cord, plugs, or appliance in water or other liquid.
- Close supervision is necessary when any appliance is used by or near children.
- Unplug from outlet when not in use and before cleaning. Allow to cool before putting on or taking off parts.
- Do not operate any appliance with a damaged cord or plug or after the appliance malfunctions or has been damaged in any manner.
- The use of accessory attachments not recommended by the appliance manufacturer may cause injuries.
- Do not use outdoors.
- Do not let cord hang over edge of table or counter or touch hot surfaces.
- Do not place on or near a hot gas or electric burner, or in a heated oven.
- Extreme caution must be used when moving an appliance containing hot oil or other hot liquids.
- To disconnect, turn any control to "off," then remove plug from wall outlet.
- Do not use appliance for other than intended use.

Image: Safety certification logos (INMETRO OCP 0040 and SGS) indicating compliance with safety standards.
3. Product Overview
Familiarize yourself with the components of your Philco Electronic Bread Maker.
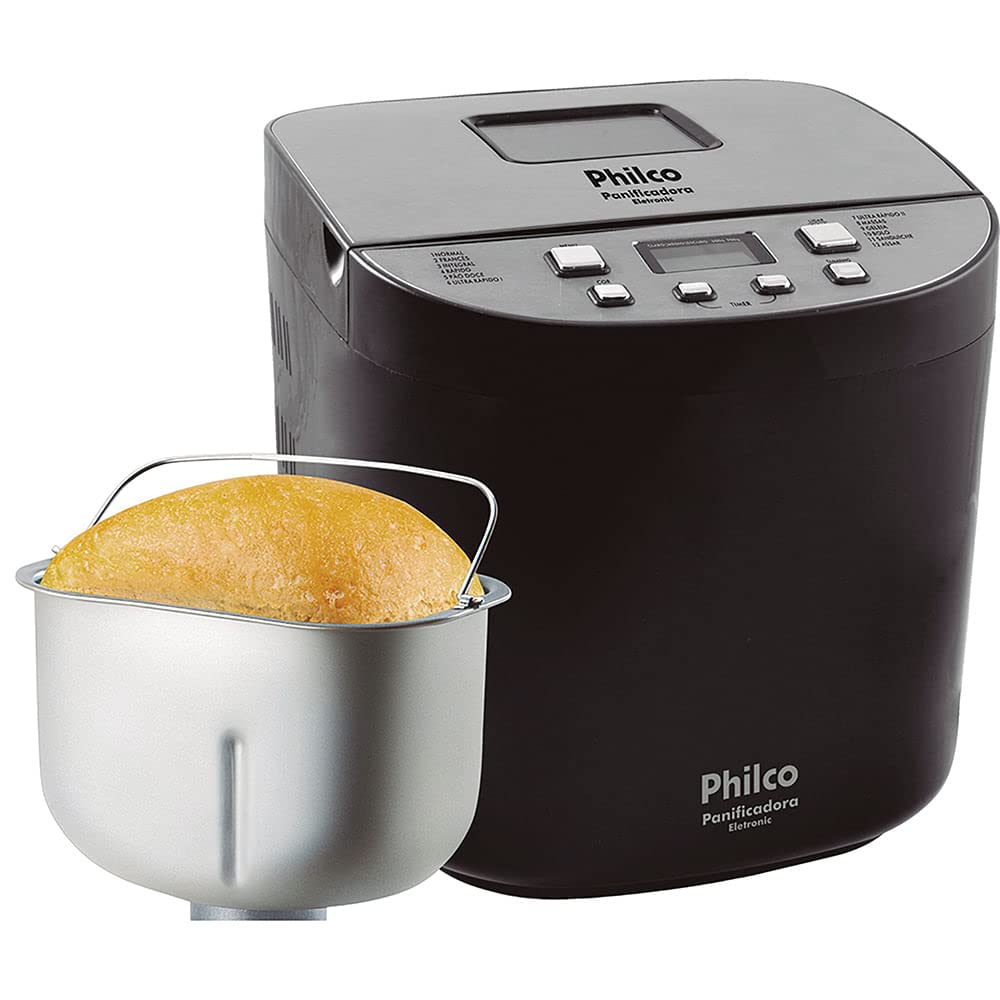
Image: Front view of the Philco Electronic Bread Maker, showing the main unit, control panel, and viewing window.
Control Panel
The control panel allows you to select programs, adjust settings, and start/stop the bread maker.
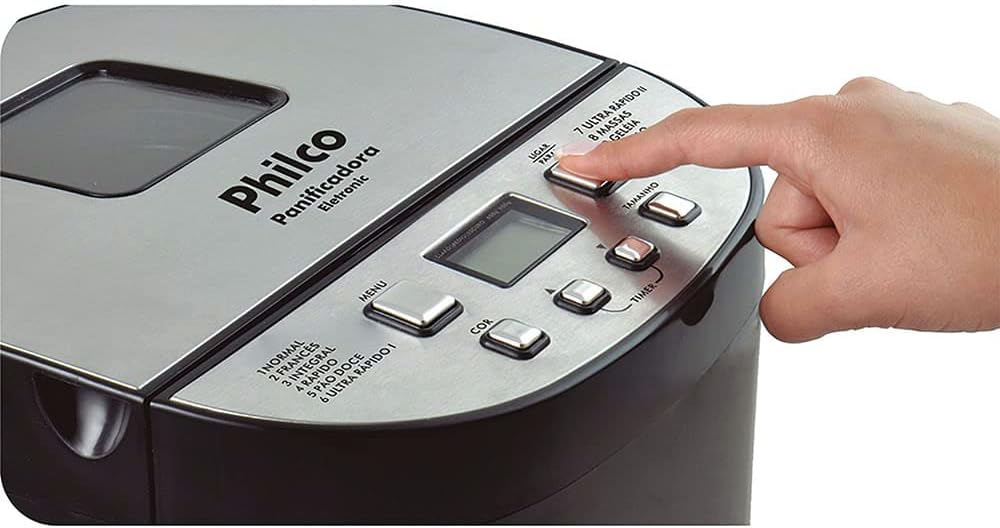
Image: Close-up of the bread maker's control panel, highlighting buttons for MENU, COLOR, TIMER, SIZE, and POWER, along with the digital display.
- MENU Button: Selects one of the 12 available programs.
- COLOR Button: Adjusts the crust color (Light, Medium, Dark).
- TIMER Buttons (+/-): Sets the delay timer for deferred baking.
- SIZE Button: Selects the loaf size (450g, 600g, 900g, 1200g).
- POWER Button: Starts or stops the selected program.
- LCD Display: Shows program number, time remaining, and selected settings.
4. Setup and First Use
4.1 Unpacking
Carefully remove the bread maker and all accessories from the packaging. Retain the packaging for future storage or transport. Check that all parts are present and undamaged.
4.2 Initial Cleaning
Before first use, clean the bread pan, kneading paddle, and measuring accessories with warm, soapy water. Rinse thoroughly and dry completely. Wipe the exterior of the appliance with a damp cloth.
4.3 Placement
Place the bread maker on a stable, flat, heat-resistant surface, away from direct sunlight and heat sources. Ensure there is adequate ventilation around the appliance.
5. Operating Instructions
5.1 Adding Ingredients
Always add liquid ingredients first, followed by dry ingredients. Yeast should be added last, placed in a small indentation on top of the flour, away from liquids and salt.

Image: A hand pouring dry ingredients, likely flour, into the bread maker's non-stick pan.
5.2 Program Selection
Press the MENU button repeatedly to cycle through the 12 available programs. The selected program number will be displayed on the LCD screen.
Available Programs:
- NORMAL: For basic bread recipes.
- FRENCH: For light bread with a crispy crust.
- WHOLE WHEAT: For whole wheat bread, typically requiring a longer kneading time.
- RAPID: For quick bread baking, suitable for smaller loaves.
- SWEET BREAD: For breads with high sugar and fat content.
- ULTRA FAST I: For very quick baking of smaller loaves.
- ULTRA FAST II: For very quick baking of larger loaves.
- DOUGH: Prepares dough for rolls, pizza, or pastries without baking.
- JAM: For making homemade jams and marmalades.
- CAKE: For baking cakes and quick breads.
- SANDWICH: For light, fluffy sandwich bread.
- BAKE: For baking pre-made dough or for additional baking time.
5.3 Crust Color Selection
After selecting a program, press the COLOR button to choose your desired crust color: Light, Medium, or Dark.
5.4 Loaf Size Selection
Press the SIZE button to select the desired loaf weight: 450g, 600g, 900g, or 1200g. Ensure your recipe quantities match the selected loaf size.
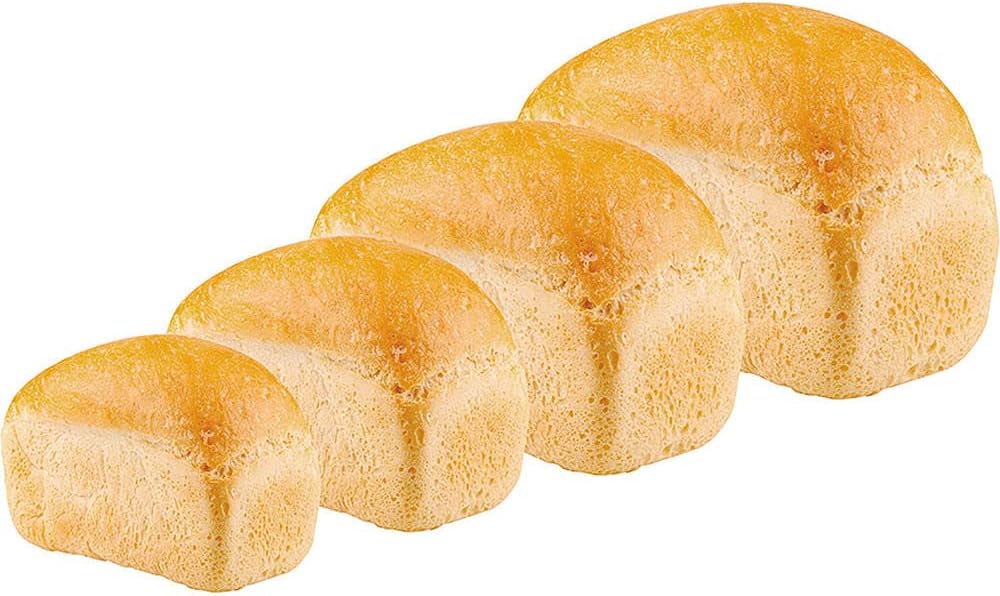
Image: Four baked loaves of bread, demonstrating the different size options available from the bread maker.
5.5 Delay Timer Function
The timer function allows you to delay the start of the baking process by up to 13 hours. After selecting the program, crust color, and loaf size, use the TIMER buttons (+/-) to set the desired delay time. The display will show the total time until the bread is ready.
5.6 Keep Warm Function
After the baking cycle is complete, the bread maker will automatically switch to a 60-minute keep-warm function. This keeps your bread warm until you are ready to remove it.
5.7 Starting and Stopping
Press the POWER button to start the selected program. To stop a program, press and hold the POWER button for a few seconds.
5.8 Removing the Bread
Once the program is complete and the keep-warm cycle has finished (or you have manually stopped it), unplug the appliance. Carefully remove the bread pan using oven mitts, as it will be hot. Invert the pan to release the bread. If the kneading paddle remains in the bread, remove it carefully with a non-metallic utensil.

Image: A hand carefully lifting a freshly baked loaf of bread out of the bread maker's non-stick pan using the pan's handle.
6. Care and Maintenance
6.1 Cleaning the Bread Pan and Kneading Paddle
After each use, allow the bread pan and kneading paddle to cool completely. Fill the pan with warm, soapy water and let it soak for 10-15 minutes to loosen any stuck-on dough. Use a soft sponge or cloth to clean. Do not use abrasive cleaners or metal utensils, as this can damage the non-stick coating. Rinse and dry thoroughly.
6.2 Cleaning the Exterior
Wipe the exterior of the bread maker with a soft, damp cloth. Do not immerse the appliance in water or spray it with liquids. Ensure no water enters the ventilation openings.
6.3 Storage
Ensure the appliance is clean, dry, and completely cool before storing. Store it in a dry place, away from direct sunlight and out of reach of children.
7. Troubleshooting
If you encounter issues with your bread maker, refer to the following common problems and solutions:
| Problem | Possible Cause | Solution |
|---|---|---|
| Bread does not rise | Expired yeast, incorrect water temperature, too much salt/sugar. | Check yeast expiration, use lukewarm water, ensure correct ingredient measurements. |
| Bread is too dense | Too much flour, not enough liquid, incorrect program. | Measure ingredients precisely, ensure proper liquid-to-flour ratio, select appropriate program. |
| Kneading paddle stuck in bread | Common occurrence. | Allow bread to cool slightly, then carefully remove the paddle with a non-metallic utensil. |
| Appliance not turning on | Not plugged in, power outage, faulty outlet. | Check power cord connection, test outlet with another appliance, ensure power supply. |
| Smoke or burning smell | Food residue on heating element, internal malfunction. | Unplug immediately. Allow to cool and clean thoroughly. If problem persists, contact support. |
8. Specifications
| Feature | Specification |
|---|---|
| Model | Eletronic 12 Programs 700W (Part No. 054301004) |
| Brand | PHILCO |
| Power | 700W |
| Voltage | 110V |
| Number of Programs | 12 |
| Loaf Sizes | 450g, 600g, 900g, 1200g |
| Crust Colors | Light, Medium, Dark |
| Delay Timer | Up to 13 hours |
| Keep Warm Function | 60 minutes |
| Material | Stainless Steel (exterior) |
| Color | Black |
| Product Weight | 5.66 kg (5660 Grams) |
| ASIN | B076HVLX2G |
9. Warranty and Support
Your Philco Electronic Bread Maker is covered by a manufacturer's warranty. Please refer to the warranty card included with your purchase for specific terms and conditions. For technical support, service, or replacement parts, please contact Philco customer service through their official website or the contact information provided in your product documentation.


