Glenparts CB225 - 59
Glenparts Carburetor Instruction Manual
For Briggs and Stratton Engines
Brand: Glenparts | Model: CB225 - 59
Product Overview
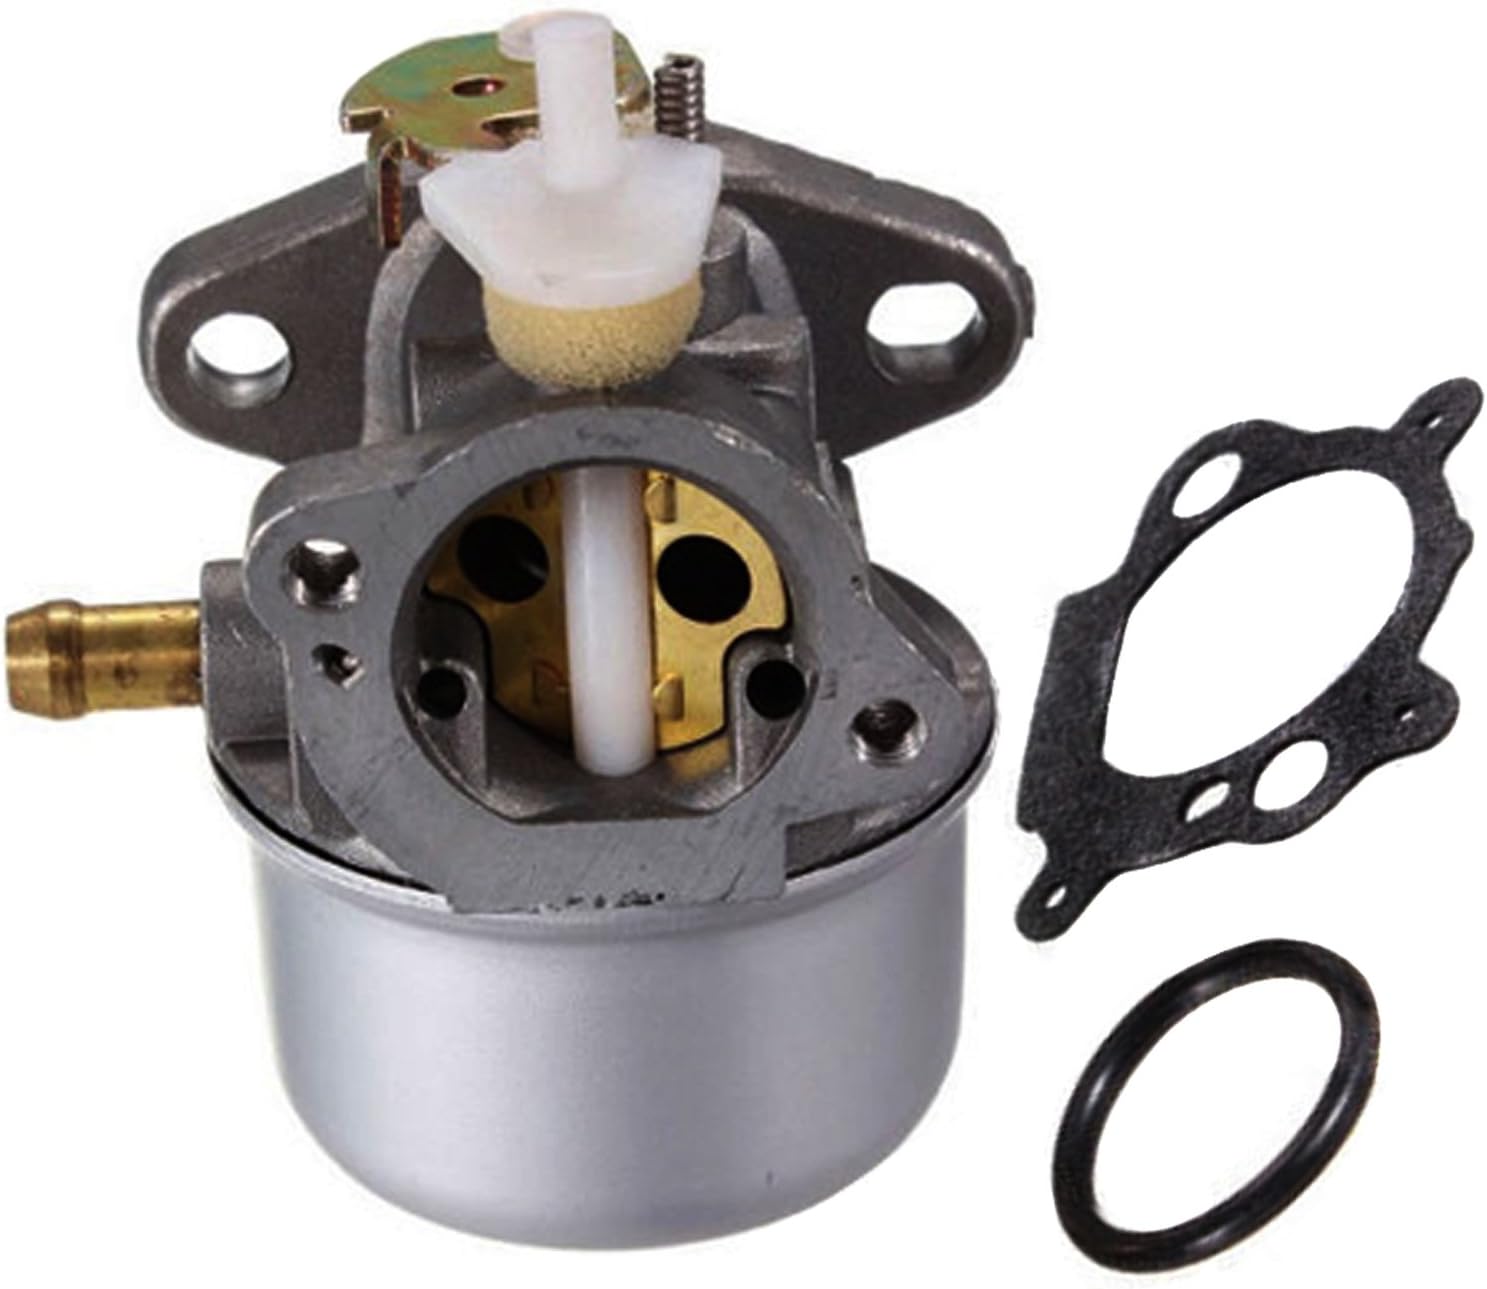
This instruction manual provides essential information for the installation, operation, and maintenance of your new Glenparts Carburetor, designed as an aftermarket replacement for various Briggs & Stratton engine models. A carburetor is a device that blends air and fuel for an internal combustion engine. Its primary function is to regulate the air-fuel mixture to ensure optimal engine performance under varying conditions.
This specific carburetor is an aftermarket replacement for Briggs & Stratton part number 499059 and is supplied with a free gasket for installation.
Product Features
- Direct aftermarket replacement for Briggs & Stratton 499059.
- Designed for specific Briggs & Stratton 123K02 series engines.
- Includes necessary gasket for installation.
- Constructed for reliable fuel and air mixture delivery.
Compatibility
This carburetor is compatible with the following Briggs & Stratton engine models:
- 123K02-0209-E1
- 123K02-0217-E1
- 123K02-0219-E1
- 123K02-0222-E1
- 123K02-0224-E1
- 123K02-0226-E1
- 123K02-0230-E1
- 123K02-0231-E1
- 123K02-0232-E1
- 123K02-0234-E1
- 123K02-0235-E1
- 123K02-0237-E1
- 123K02-0239-E1
- 123K02-0243-E1
- 123K02-0258-E1
- 123K02-0261-E1
- 123K02-0266-E1
- 123K02-0267-E1
- 123K02-0268-E1
- 123K02-0271-E1
- 123K02-0277-E1
- 123K02-0281-E1
- 123K02-0283-E1
- 123K02-0289-E1
- 123K02-0301-E1
- 123K02-0306-E1
- 123K02-0307-E1
- 123K02-0309-E1
- 123K02-0311-E1
- 123K02-0312-E1
- 123K02-0313-E1
- 123K02-0314-E1
- 123K02-0315-E1
- 123K02-0324-E1
- 123K02-0326-E1
- 123K02-0327-E1
- 123K02-0328-E1
- 123K02-0329-E1
- 123K02-0337-E1
- 123K02-0338-E1
- 123K02-0347-E1
- 123K02-0350-E1
- 123K02-0357-E1
- 123K02-0424-E1
- 123K02-0425-E1
- 123K02-0438-E1
- 123K02-0440-E1
- 123K02-0444-E1
- 123K02-0447-E1
- 123K02-0450-E1
- 123K02-0454-E1
Package Contents
- 1 x Glenparts Carburetor (Model CB225 - 59)
- 1 x Gasket (for installation)


Setup and Installation
Safety First: Before beginning any work on your engine, ensure the engine is cool, the spark plug wire is disconnected to prevent accidental starting, and the fuel tank is drained or fuel line is clamped off to prevent spills.
- Preparation: Gather necessary tools, including wrenches, screwdrivers, and a clean rag.
- Remove Air Filter Assembly: Carefully detach the air filter housing and any associated hoses or linkages connected to the old carburetor.
- Disconnect Fuel Line and Linkages: Disconnect the fuel line from the old carburetor. Note the routing of all linkages (throttle, choke) and springs before removal. Taking a photo can be helpful.
- Remove Old Carburetor: Unbolt the old carburetor from the engine manifold. Be mindful of any existing gaskets.
- Clean Mounting Surface: Thoroughly clean the engine's mounting surface to ensure a proper seal with the new gasket. Remove any old gasket material.
- Install New Gasket: Place the new gasket(s) provided with the Glenparts carburetor onto the engine's mounting studs. Ensure correct orientation.
- Mount New Carburetor: Carefully position the new Glenparts carburetor onto the studs, aligning it with the gasket and mounting holes. Secure it with the original nuts or bolts, tightening them evenly.
- Reconnect Fuel Line and Linkages: Reconnect the fuel line securely. Attach all throttle and choke linkages and springs to their correct positions on the new carburetor. Double-check that all connections move freely.
- Reinstall Air Filter Assembly: Reattach the air filter housing and any other components that were removed.
- Final Checks: Inspect all connections for tightness and ensure no fuel leaks are present. Reconnect the spark plug wire.
Note: For detailed, model-specific instructions, always refer to your engine's original service manual.
Operating Instructions
Once the new carburetor is installed, the engine should be ready for operation. Carburetors are generally pre-set for optimal performance, but minor adjustments may be necessary for specific environmental conditions or engine wear.
- Fuel: Ensure fresh, clean fuel is used. Stale or contaminated fuel is a common cause of carburetor issues.
- Choke: Use the choke mechanism as required for cold starts. Once the engine warms up, the choke should be fully disengaged.
- Idle Speed: If the engine idles too fast or too slow, locate the idle speed screw on the carburetor and adjust it gradually until a smooth, consistent idle is achieved.
- Mixture Screws (if applicable): Some carburetors may have adjustable mixture screws. Adjusting these requires careful attention and knowledge of engine tuning. Incorrect adjustments can lead to poor performance or engine damage. It is recommended to consult a professional if unsure.
Always operate your engine in a well-ventilated area and follow all safety guidelines provided by the engine manufacturer.
Maintenance
Proper maintenance of your carburetor and fuel system will extend the life of your engine and ensure reliable operation.
- Fuel System Cleanliness: Use a fuel stabilizer, especially during storage, to prevent fuel degradation and gumming in the carburetor.
- Fuel Filter: Regularly check and replace the fuel filter (if equipped) to prevent contaminants from reaching the carburetor.
- Air Filter: A clean air filter is crucial for proper air-fuel mixture. Inspect and clean or replace the air filter according to your engine's maintenance schedule.
- Carburetor Cleaning: If the carburetor becomes clogged due to old fuel or debris, it may require cleaning. This typically involves disassembling the carburetor, cleaning jets and passages with carburetor cleaner, and replacing any worn gaskets or O-rings. This task can be complex and may be best performed by a qualified technician.
- Seasonal Storage: Before long-term storage, either run the engine until it runs out of fuel or drain the fuel tank and carburetor bowl to prevent fuel-related issues.
Troubleshooting
If your engine experiences issues after carburetor installation, consider the following common troubleshooting steps:
| Symptom | Possible Cause | Solution |
|---|---|---|
| Engine won't start | No fuel, clogged fuel line/filter, incorrect choke setting, spark plug issue. | Check fuel level, inspect fuel line/filter, adjust choke, check spark plug. |
| Engine runs rough/surges | Dirty carburetor jets, air leak, old fuel, incorrect idle/mixture setting. | Clean carburetor, check for air leaks, use fresh fuel, adjust idle/mixture. |
| Engine smokes | Too rich fuel mixture, oil in combustion chamber. | Adjust mixture screw (if applicable), check engine oil level/condition. |
| Fuel leaks from carburetor | Damaged float, stuck needle valve, improper gasket seal. | Inspect float/needle valve, ensure gaskets are properly seated and tightened. |
If issues persist after basic troubleshooting, it is advisable to consult a qualified small engine mechanic.
Specifications
| Attribute | Detail |
|---|---|
| Brand | Glenparts |
| Model Number | CB225 - 59 |
| OEM Part Number | 499059 |
| Item Weight | 8 ounces |
| Recommended Uses | Lawn Mower (and other compatible small engines) |
| ASIN | B076HV4FSN |
| UPC | 611748656802 |
| Date First Available | December 7, 2012 |
Warranty and Support
For specific warranty information regarding your Glenparts Carburetor, please refer to the documentation included with your purchase or contact Glenparts customer support directly. Warranty terms typically cover manufacturing defects.
For technical support or further assistance, please reach out to the manufacturer or the retailer from whom the product was purchased. Always provide your product model number (CB225 - 59) and any relevant engine details when seeking support.
Note: This product is an aftermarket replacement. Any warranty claims or support inquiries should be directed to Glenparts, not Briggs & Stratton.
Ask a question about this manual
Ask about setup, troubleshooting, compatibility, parts, safety, or missing instructions. Manuals+ will review the question and use this page’s manual context to help answer it.