1. Introduction
This manual provides essential information for the installation, maintenance, and troubleshooting of your Autoround Front Wheel Hub and Bearing Assembly 513188. This assembly is designed to meet or exceed OEM performance standards, ensuring reliable operation for your vehicle. Please read these instructions carefully before proceeding with installation or maintenance.

Image 1.1: Autoround Front Wheel Hub and Bearing Assembly 513188.
2. Compatibility
The Autoround Front Wheel Hub and Bearing Assembly 513188 is compatible with the following vehicle models:
- Chevy: 2003-2006 SSR, 2002-2009 Trailblazer, 2002-2006 Trailblazer EXT
- GMC: 2002-2009 Envoy, 2002-2006 Envoy XL, 2004-2005 Envoy XUV
- Buick: 2004-2007 Rainier
- Oldsmobile: 2002-2004 Bravada
- Isuzu: 2003-2008 Ascender
- Saab: 2005-2009 9-7x

Image 2.1: Visual representation of compatible vehicle models for the 513188 hub assembly.
3. When to Replace Your Wheel Hub Assembly
Recognizing the signs of a failing wheel hub assembly is crucial for vehicle safety and performance. Consider replacement if you experience any of the following:
- ABS Light Illumination: The Anti-lock Braking System (ABS) warning light on your dashboard may turn on.
- Steering Wheel Vibration: Unusual vibrations felt through the steering wheel, especially at certain speeds.
- Clunking or Grinding Noise: Noises originating from under the vehicle, particularly when turning or driving over bumps.
- Steering Wheel Play: Excessive looseness or play in the steering wheel.

Image 3.1: Common indicators for wheel hub assembly replacement.
4. Product Features and Details
The Autoround Front Wheel Hub and Bearing Assembly 513188 is engineered for durability and precise fitment. Key features include:
- 6 Lugs: Designed for secure wheel attachment.
- ABS System Integration: Includes an ABS sensor for proper Anti-lock Braking System functionality.
- Flange Diameter: 5.92 inches.
- Flange Offset: 1.85 inches.
- Material: Constructed from alloy steel for strength and longevity.
- Bearing Type: Ball Bearing.
- Quality Tested: Each assembly undergoes rigorous quality testing to meet or exceed OEM performance standards.

Image 4.1: Detailed view of the hub assembly, including the ABS sensor connection.

Image 4.2: Highlighting performance testing and OEM specification compliance.
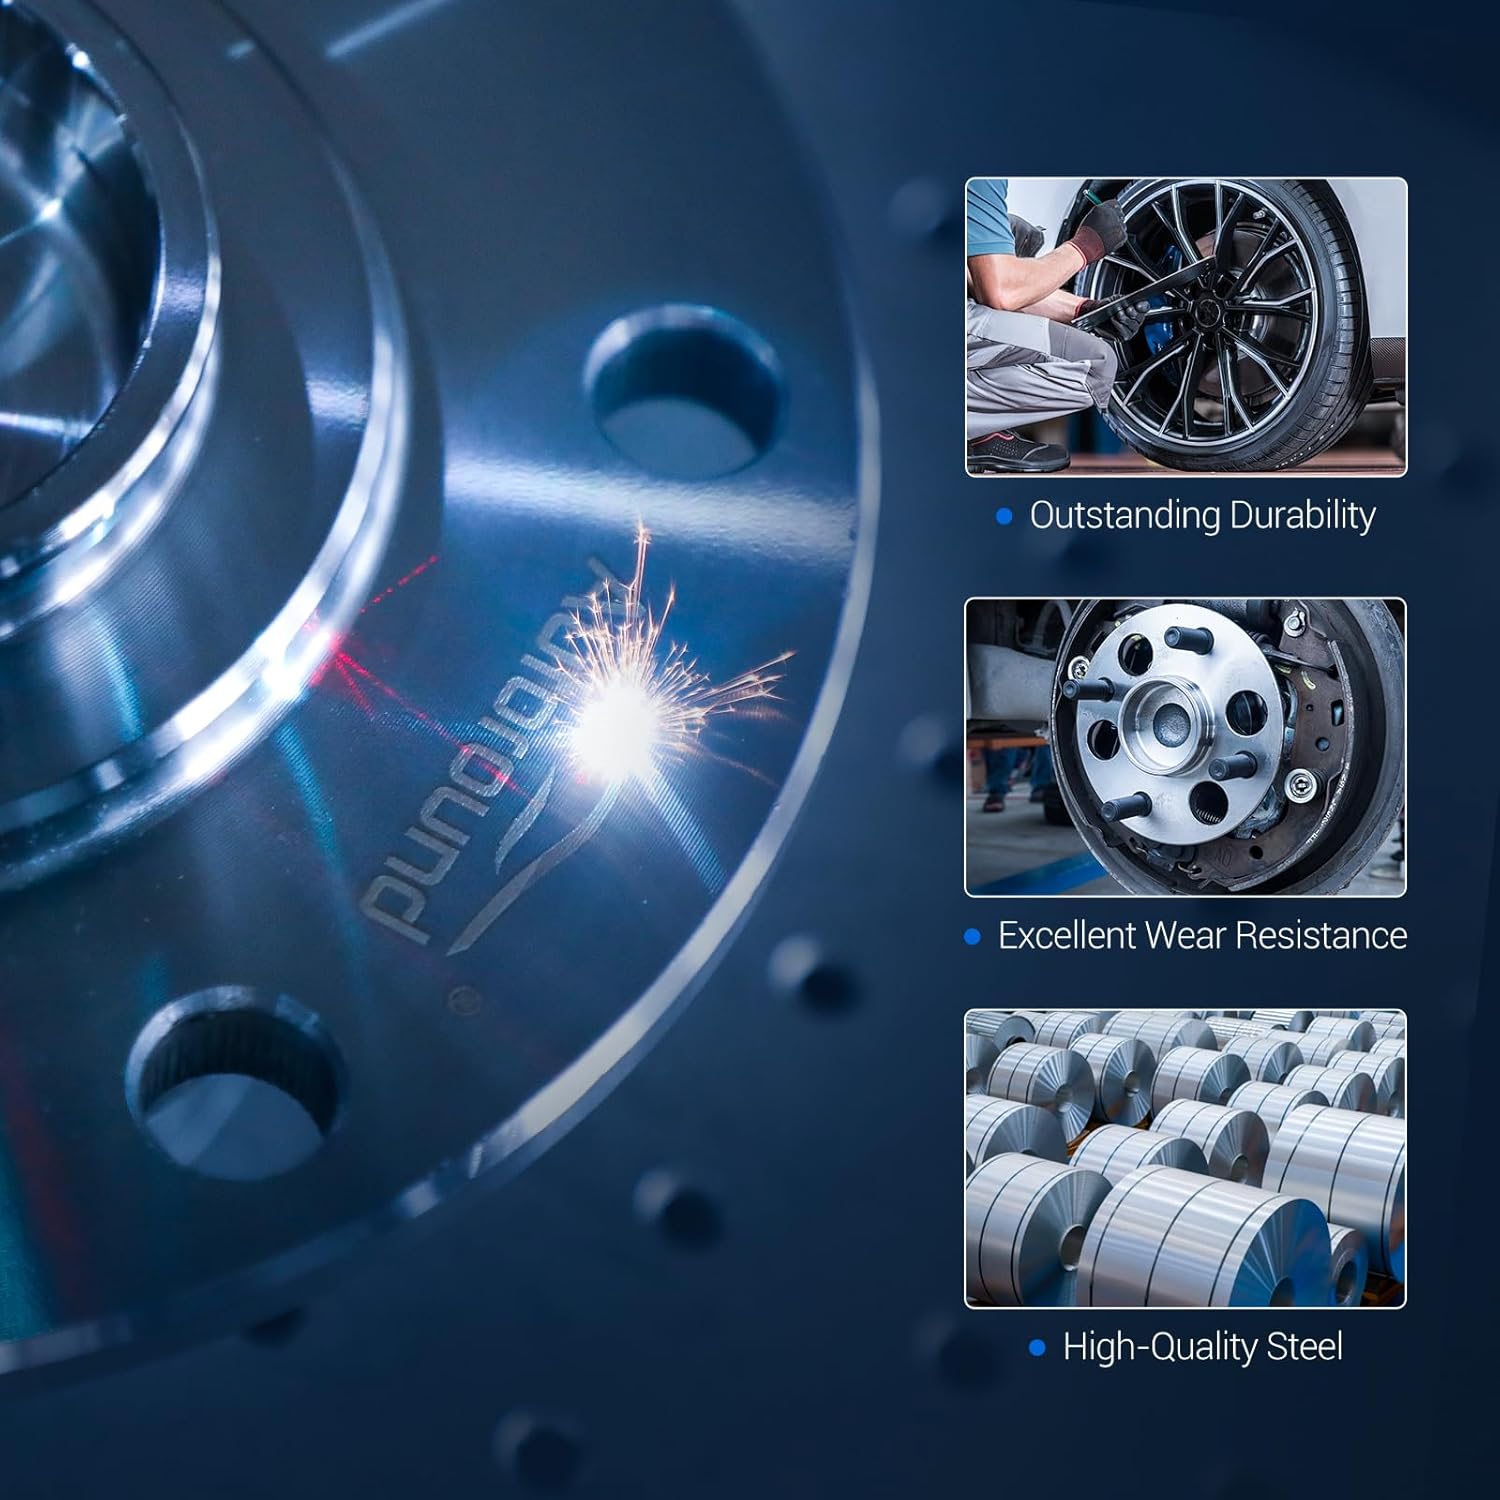
Image 4.3: Illustrating outstanding durability, wear resistance, and high-quality steel construction.
5. Installation Guide
Proper installation is critical for the longevity and safe operation of your new wheel hub assembly. It is recommended to consult a qualified mechanic if you lack the necessary tools or experience. Always refer to your vehicle's specific service manual for detailed torque specifications and procedures.
5.1. Tools Required
- Torque wrench
- Screwdrivers (flathead, Phillips)
- Sockets and wrenches
- Grinder (optional, for rust removal)
- Small hammer
- Air gun, cloth, and cleaner
- Vehicle lift or jack stands
5.2. Step-by-Step Installation
- Prepare the Vehicle: Lift the vehicle using a suitable lift or jack stands. Ensure the vehicle is stable and secure.
- Remove the Wheel: Use an impact wrench or lug wrench to remove the lug nuts, then carefully remove the wheel and tire assembly.
- Remove Brake Caliper and Pads: Disconnect the brake caliper and remove the brake pads. Secure the caliper to prevent damage to the brake line.
- Clean Brake Disk Area: If there is significant rust on the brake disk, use a grinder to lightly polish the surface. Remove any fixing screws on the brake disk.
- Dismantle Old Wheel Bearing: Use a small hammer to gently tap the brake disk. Then, use a torque wrench to remove the two bolts holding the caliper in place, allowing the caliper to be completely removed. Next, locate and unscrew the four bolts that secure the wheel bearing to the knuckle. Carefully remove the old wheel bearing assembly.
- Clean Mounting Area: Thoroughly clean the slot where the wheel bearing is mounted using an air gun, cloth, and appropriate cleaner to ensure a proper fit for the new assembly.
- Install New Wheel Bearing: Position the new Autoround wheel hub and bearing assembly into the cleaned mounting area. Secure it by tightening the four bolts to the manufacturer's specified torque value using a torque wrench.
- Reassemble Brakes and Wheel: Reinstall the brake disk, brake pads, and brake caliper. Ensure all components are correctly aligned and secured.
- Mount the Tire: Place the wheel and tire assembly back onto the hub. Hand-tighten the lug nuts, then lower the vehicle slightly so the tire makes contact with the ground. Use a torque wrench to tighten the lug nuts to the vehicle manufacturer's specifications in a star pattern.
- Final Check: Lower the vehicle completely. Double-check all connections and ensure there is no play in the wheel. Test drive the vehicle at low speeds to confirm proper function.
5.3. Installation Video Guide
Video 5.1: A detailed installation guide for a wheel hub assembly, demonstrating the steps from vehicle preparation to final wheel reattachment. This video provides visual instructions for removing old components and installing the new hub bearing.
6. Maintenance
To ensure the longevity and optimal performance of your Autoround wheel hub and bearing assembly, consider the following general maintenance tips:
- Regular Inspections: Periodically check for any signs of wear, such as unusual noises, vibrations, or excessive wheel play.
- Proper Torque: Ensure lug nuts are always tightened to the manufacturer's specified torque settings. Incorrect torque can lead to premature wear or failure.
- Avoid Overloading: Do not exceed your vehicle's maximum load capacity, as this can put undue stress on wheel bearings.
- Wheel Alignment: Maintain proper wheel alignment to prevent uneven tire wear and reduce stress on suspension components, including wheel bearings.
7. Troubleshooting
If you encounter issues after installation or during normal operation, refer to the following troubleshooting guide:
| Symptom | Possible Cause | Solution |
|---|---|---|
| Grinding or humming noise from wheel | Worn or damaged bearing | Inspect and replace the wheel hub assembly if necessary. |
| ABS light illuminated | Faulty ABS sensor or wiring | Check ABS sensor connection and wiring. Replace the assembly if the sensor is integrated and faulty. |
| Excessive wheel play/looseness | Loose or worn bearing | Inspect for proper installation and bearing integrity. Tighten bolts to spec or replace. |
| Vibration in steering wheel | Unbalanced wheel, worn tire, or damaged bearing | Check wheel balance and tire condition. If these are fine, inspect the wheel hub assembly. |
If troubleshooting steps do not resolve the issue, it is recommended to seek professional automotive service.
8. Specifications
| Specification | Value |
|---|---|
| Brand | Autoround |
| Model Number | 513188 |
| Material | Alloy Steel |
| Item Dimensions (L x W x H) | 7 x 7 x 7 inches |
| Item Weight | 10 Pounds |
| Bearing Number | 513188 |
| Specification Met | Meets Industry Standards |
| Bearing Type | Ball Bearing |
| Compatible Lubricant | Grease |
| Outside Diameter | 5.92 Inches |
| UPC | 748966883984 |
| Manufacturer Part Number | 513188 |
| OEM Part Number | 513188 |
9. Warranty and Support
9.1. Warranty Information
The Autoround Front Wheel Hub and Bearing Assembly 513188 comes with a 1-Year Warranty. This warranty covers defects in materials and workmanship under normal use and service. Please retain your proof of purchase for any warranty claims.
9.2. Customer Support
For further assistance, technical support, or warranty inquiries, please contact Autoround customer service through the retailer where the product was purchased or visit the official Autoround website.