1. Introduction
This manual provides detailed instructions for the installation and replacement of components within the ARO Repair Kit 637432-EB. This kit is specifically designed for maintaining and repairing ARO 3FPR2 and 3FPR3 series pumps, ensuring optimal performance and extending the lifespan of your equipment. Please read all instructions carefully before proceeding with any repair work.
The ARO Repair Kit 637432-EB is a fluid end repair kit containing essential components such as Santoprene check balls, diaphragms, O-rings, and seals. These parts are crucial for the proper functioning of your pump's fluid handling section.
2. Safety Information
- Always disconnect the pump from its power source and relieve any system pressure before beginning repair or maintenance.
- Wear appropriate personal protective equipment (PPE), including safety glasses and gloves, to prevent injury.
- Ensure the work area is clean, well-lit, and free from obstructions.
- Refer to the original pump's service manual for specific disassembly and reassembly procedures not covered in detail here.
- Dispose of old components responsibly and according to local regulations.
3. Kit Contents
The ARO Repair Kit 637432-EB includes the following components:
- 4 x Check Balls (Santoprene)
- 2 x Diaphragms (Santoprene)
- 5 x O-Rings
- 5 x Seals
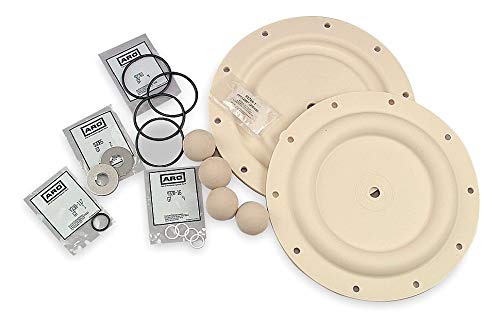
Image 1: Contents of the ARO Repair Kit 637432-EB, showing various Santoprene check balls, diaphragms, O-rings, and seals.
4. Setup and Installation
This section outlines the general procedure for replacing the fluid end components using the ARO Repair Kit. Specific disassembly and reassembly steps may vary slightly depending on your exact pump model (3FPR2 or 3FPR3). Always consult your pump's original service manual for detailed diagrams and torque specifications.
4.1. Preparation
- Isolate the Pump: Disconnect all air and fluid lines from the pump. Ensure the pump is depressurized.
- Drain Fluids: Drain any remaining fluid from the pump's fluid section.
- Secure the Pump: Place the pump on a stable work surface.
4.2. Disassembly of Fluid End
- Remove Manifolds: Carefully unbolt and remove the fluid inlet and outlet manifolds. Note the orientation of all components.
- Access Check Balls: Remove the check ball seats and check balls. Inspect for wear or damage.
- Remove Diaphragms: Unbolt the fluid caps or covers to access the diaphragms. Remove the diaphragms and their associated hardware (washers, plates).
- Remove O-Rings and Seals: Locate and remove all O-rings and seals from the fluid end housing.
4.3. Installation of New Components
- Clean Surfaces: Thoroughly clean all mating surfaces of the pump housing and manifolds. Remove any old gasket material or debris.
- Install New O-Rings and Seals: Lubricate new O-rings and seals with a compatible lubricant (if recommended by pump manufacturer) and install them into their respective grooves.
- Install New Diaphragms: Position the new Santoprene diaphragms with their associated hardware. Ensure they are correctly aligned and seated. Tighten bolts according to the pump's torque specifications.
- Install New Check Balls and Seats: Place the new Santoprene check balls into their chambers, followed by the check ball seats. Ensure proper seating.
- Reattach Manifolds: Reinstall the fluid inlet and outlet manifolds, ensuring all bolts are tightened evenly and to the specified torque.
5. Operating After Repair
After completing the repair, follow these steps to ensure proper pump operation:
- Reconnect Lines: Reconnect all air and fluid lines to the pump.
- Prime the Pump: Slowly introduce fluid into the pump's inlet to prime the fluid section.
- Start Pump: Gradually apply air pressure to the pump. Listen for unusual noises and observe fluid flow.
- Check for Leaks: Carefully inspect all newly assembled connections for any signs of leaks. Address any leaks immediately by re-tightening or re-sealing components as necessary.
- Monitor Performance: Run the pump for a short period to confirm stable operation and desired flow rates.
6. Maintenance Recommendations
To maximize the life of your ARO pump and its repair kit components:
- Regularly inspect the pump for signs of wear, leaks, or reduced performance.
- Ensure the fluid being pumped is compatible with Santoprene material to prevent premature wear of diaphragms and check balls.
- Maintain clean air supply to the air motor to prevent internal contamination.
- Store spare repair kits in a cool, dry place away from direct sunlight and harsh chemicals.
7. Troubleshooting Common Issues
If you encounter issues after installing the repair kit, consider the following:
- Pump Not Priming: Check for air leaks in the suction line, ensure check balls are seated correctly, and verify the fluid level in the supply.
- Reduced Flow/Pressure: Inspect diaphragms for proper installation and ensure no foreign objects are obstructing check balls or fluid passages. Verify air supply pressure.
- Fluid Leaks: Re-check all bolted connections for proper torque. Ensure O-rings and seals are correctly seated and not pinched or damaged.
- Excessive Air Consumption: This may indicate an issue with the air motor section, which is not covered by this fluid end repair kit. Refer to the pump's main service manual.
8. Specifications
| Attribute | Detail |
|---|---|
| Brand | ARO |
| Part Number | 637432-EB |
| Product Type | Fluid End Repair Kit |
| Compatible Pump Models | ARO 3FPR2, 3FPR3 (and compatible manufacturer models 666250-EEB-C, 666251-EEB-C, 666252-EEB-C, 66625B-2EB-C, 66625B-EEB-C, 66625C-EEB-C, 666270-EEB-C, 666271-EEB-C, 666272-EEB-C, 66627B-2EB-C, 66627B-EEB-C, 66627C-EEB-C) |
| Check Ball Material | Santoprene |
| Diaphragm Material | Santoprene |
| Number of Check Balls | 4 |
| Number of Diaphragms | 2 |
| Number of O-Rings | 5 |
| Number of Seals | 5 |
| Valve Type | Ball |
| Item Weight | 3.2 ounces (0.2 Pounds) |
| Product Dimensions | 18 x 16 x 4 inches |
9. Warranty and Support
Specific warranty information for the ARO Repair Kit 637432-EB is typically provided at the point of purchase or through the official ARO documentation accompanying the product. For detailed warranty terms, technical support, or to inquire about additional parts, please contact ARO customer service or your authorized ARO distributor.
You can often find contact information on the official ARO website or within the original pump's user manual.


