1. Product Overview
This manual provides instructions for the installation and maintenance of the Lifetime Appliance W10518394 Heating Element. This component is designed as a replacement part for various Whirlpool and Kenmore dishwasher models, ensuring proper water heating during wash cycles.

Image 1: The Lifetime Appliance W10518394 Heating Element, a curved metal component with electrical terminals at each end.
2. Safety Information
WARNING: Always disconnect power to the dishwasher before attempting any repairs or installations. Failure to do so can result in serious injury or electrical shock.
- Wear appropriate personal protective equipment, such as gloves and eye protection.
- If you are unsure about any step, consult a qualified appliance technician.
- Ensure all connections are secure and properly insulated after installation.
3. Package Contents
- 1 x Lifetime Appliance W10518394 Heating Element
- Note: Additional hardware or tools required for installation are not included.
4. Compatibility
This heating element is compatible with various Whirlpool and Kenmore dishwasher models.
Key Part Numbers: W10518394, AP5690151, 2977737, 8194250, 8563007, 8572861, PS8260087, W10134009, W10518394VP.
Important: Before ordering, visually confirm the presence of a yellow/gold colored thread on your existing heating element's terminals to ensure proper compatibility.
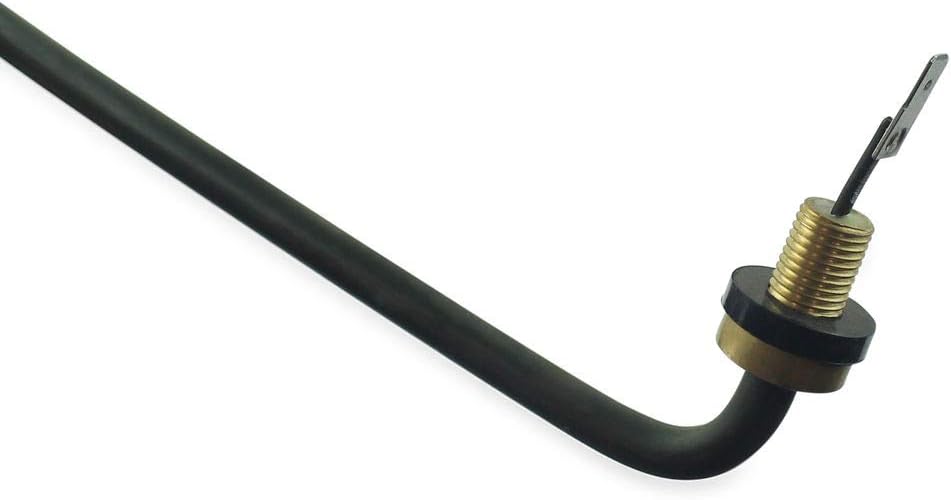
Image 2: Close-up view of the heating element's terminal, highlighting the yellow/gold colored thread for compatibility verification.
5. Installation Instructions
The following steps outline a general procedure for replacing a dishwasher heating element. Specific steps may vary slightly depending on your dishwasher model.
- Disconnect Power: Locate your dishwasher's circuit breaker and turn off the power supply. Verify power is off by attempting to start the dishwasher.
- Access Dishwasher: Open the dishwasher door and remove the lower dish rack to gain access to the bottom of the tub.
- Locate Heating Element: The heating element is typically a U-shaped or circular metal rod located at the bottom of the dishwasher tub.
- Disconnect Wires: From underneath the dishwasher (you may need to pull the dishwasher out from its cabinet), locate the electrical terminals for the heating element. Carefully disconnect the wires. Take a photo before disconnecting to aid reassembly.
- Remove Mounting Nuts: On the underside of the dishwasher, remove the nuts that secure the heating element to the tub. These are usually plastic.
- Remove Old Element: From inside the dishwasher tub, carefully push the old heating element down and then lift it out.
- Install New Element: Insert the new Lifetime Appliance W10518394 Heating Element into the holes in the tub from the inside. Ensure the rubber gaskets are properly seated to prevent leaks.
- Secure New Element: From underneath the dishwasher, thread and tighten the mounting nuts onto the terminals of the new heating element. Do not overtighten, especially if using plastic nuts.
- Reconnect Wires: Reconnect the electrical wires to the terminals of the new heating element. Refer to your photo if needed.
- Test for Leaks: Before pushing the dishwasher back, turn on the water supply and run a short cycle to check for any leaks around the heating element connections.
- Restore Power: Once satisfied there are no leaks, turn the power back on at the circuit breaker.
- Final Test: Run a full wash cycle to ensure the dishwasher heats water correctly.
6. Operation
The heating element is an integral part of your dishwasher's operation, responsible for heating the water to the optimal temperature for cleaning and sanitizing dishes, and assisting in the drying process. Once installed, it operates automatically as part of the dishwasher's wash and dry cycles.
7. Maintenance
The heating element itself requires minimal direct maintenance. However, to ensure its longevity and efficient operation:
- Prevent Food Debris: Scrape large food particles off dishes before loading to prevent them from accumulating around the heating element.
- Avoid Plastic Items on Lower Rack: Ensure plastic items are not placed on the lower rack where they could fall onto the heating element and melt, causing damage.
- Regular Cleaning: Periodically clean the dishwasher interior, including the filter, to prevent mineral buildup and ensure proper water circulation around the element.
8. Troubleshooting
| Problem | Possible Cause | Solution |
|---|---|---|
| Dishwasher not heating water | Faulty heating element, thermostat issue, or wiring problem. | Ensure the new heating element is correctly installed and wired. Check the dishwasher's thermostat and other electrical components if the issue persists. |
| Dishes not drying properly | Heating element not functioning, rinse aid dispenser empty, or vent issue. | Verify the heating element is receiving power and heating up. Refill rinse aid. Consult your dishwasher's main manual for drying cycle troubleshooting. |
| Element appears bent or damaged upon arrival | Shipping damage. | Contact the seller or manufacturer immediately for a replacement. Do not attempt to install a damaged part. |
9. Specifications
- Part Number: LAP1854 (Manufacturer's internal part number)
- Compatible Part Numbers: W10518394, AP5690151, 2977737, 8194250, 8563007, 8572861, PS8260087, W10134009, W10518394VP
- Item Weight: Approximately 1 pound
- Manufacturer: Lifetime Appliance Parts
- ASIN: B07651STK1
10. Warranty and Support
For information regarding warranty coverage or technical support for your Lifetime Appliance W10518394 Heating Element, please contact Lifetime Appliance Parts directly. Refer to their official website or the original purchase documentation for contact details.
Online Support: You can often find additional resources and contact information by visiting the Lifetime Appliance Parts Store on Amazon.