1. Important Safety Instructions
Please read all instructions carefully before using the Robby Robimix Multifunction Food Processor. Retain this manual for future reference.
- Electrical Safety: Ensure the voltage indicated on the appliance corresponds to your local mains voltage before connecting. Do not immerse the motor unit, cord, or plug in water or any other liquid. Always unplug the appliance from the power supply before cleaning, assembling, or disassembling parts, and when not in use.
- Children and Supervision: This appliance is not intended for use by children. Close supervision is necessary when any appliance is used near children.
- Moving Parts: Avoid contact with moving parts. Keep hands, hair, clothing, as well as spatulas and other utensils away from the mixing bowl during operation to reduce the risk of injury to persons and/or damage to the appliance.
- Blades and Sharp Edges: The blades of the meat grinder and blender are extremely sharp. Handle with extreme care during assembly, disassembly, and cleaning.
- Proper Use: Do not operate any appliance with a damaged cord or plug, or after the appliance malfunctions or has been dropped or damaged in any manner. Return appliance to the nearest authorized service facility for examination, repair, or electrical or mechanical adjustment.
- Attachments: The use of attachments not recommended or sold by the manufacturer may cause fire, electric shock, or injury.
- Stability: Always operate the appliance on a flat, stable, and dry surface.
- Overload Protection: The appliance is equipped with an overload protection system. If the motor stops due to overheating, switch off the appliance, unplug it, and allow it to cool down for at least 30 minutes before restarting.
2. Product Overview
The Robby Robimix is a versatile multifunction food processor designed for various kitchen tasks, including mixing, kneading, whisking, blending, and meat grinding. It features a powerful 1000W motor and multiple attachments.
Main Components:
- Motor Unit (Main Body)
- Stainless Steel Mixing Bowl (5 Liters)
- Splash Guard with Filling Spout
- Kneading Hook
- Flat Beater
- Whisk
- Glass Blender (1.5 Liters)
- Meat Grinder Attachment
- 3 Metal Grinding Plates (Fine, Medium, Coarse)
- Sausage Stuffer Accessories
- Food Pusher
- 4 Fresh Pasta Accessories
Product Diagram:

Image 1: Front view of the Robby Robimix Food Processor with mixing bowl and splash guard.

Image 2: Side view of the Robby Robimix Food Processor showing the meat grinder and blender attachments installed.

Image 3: All included accessories for the Robby Robimix, including various beaters, meat grinder parts, and pasta accessories.
3. Setup
3.1 Unpacking and Initial Cleaning:
- Carefully remove all components from the packaging.
- Wash the mixing bowl, splash guard, kneading hook, flat beater, whisk, blender jar, and all meat grinder and pasta accessories in warm soapy water. Rinse thoroughly and dry. The motor unit should only be wiped with a damp cloth.
3.2 Assembling the Mixer:
- Place the motor unit on a clean, flat, and stable surface.
- Press the 'LOCK' release lever (located on the side of the unit) and lift the motor head.
- Place the stainless steel mixing bowl into its base, turning it clockwise until it locks securely.
- Select the desired attachment (kneading hook, flat beater, or whisk). Insert the attachment into the shaft and turn it slightly until it clicks into place.
- Lower the motor head by pressing the 'LOCK' release lever again until it clicks into its locked position.
- Place the splash guard onto the mixing bowl, aligning the opening with the attachment.
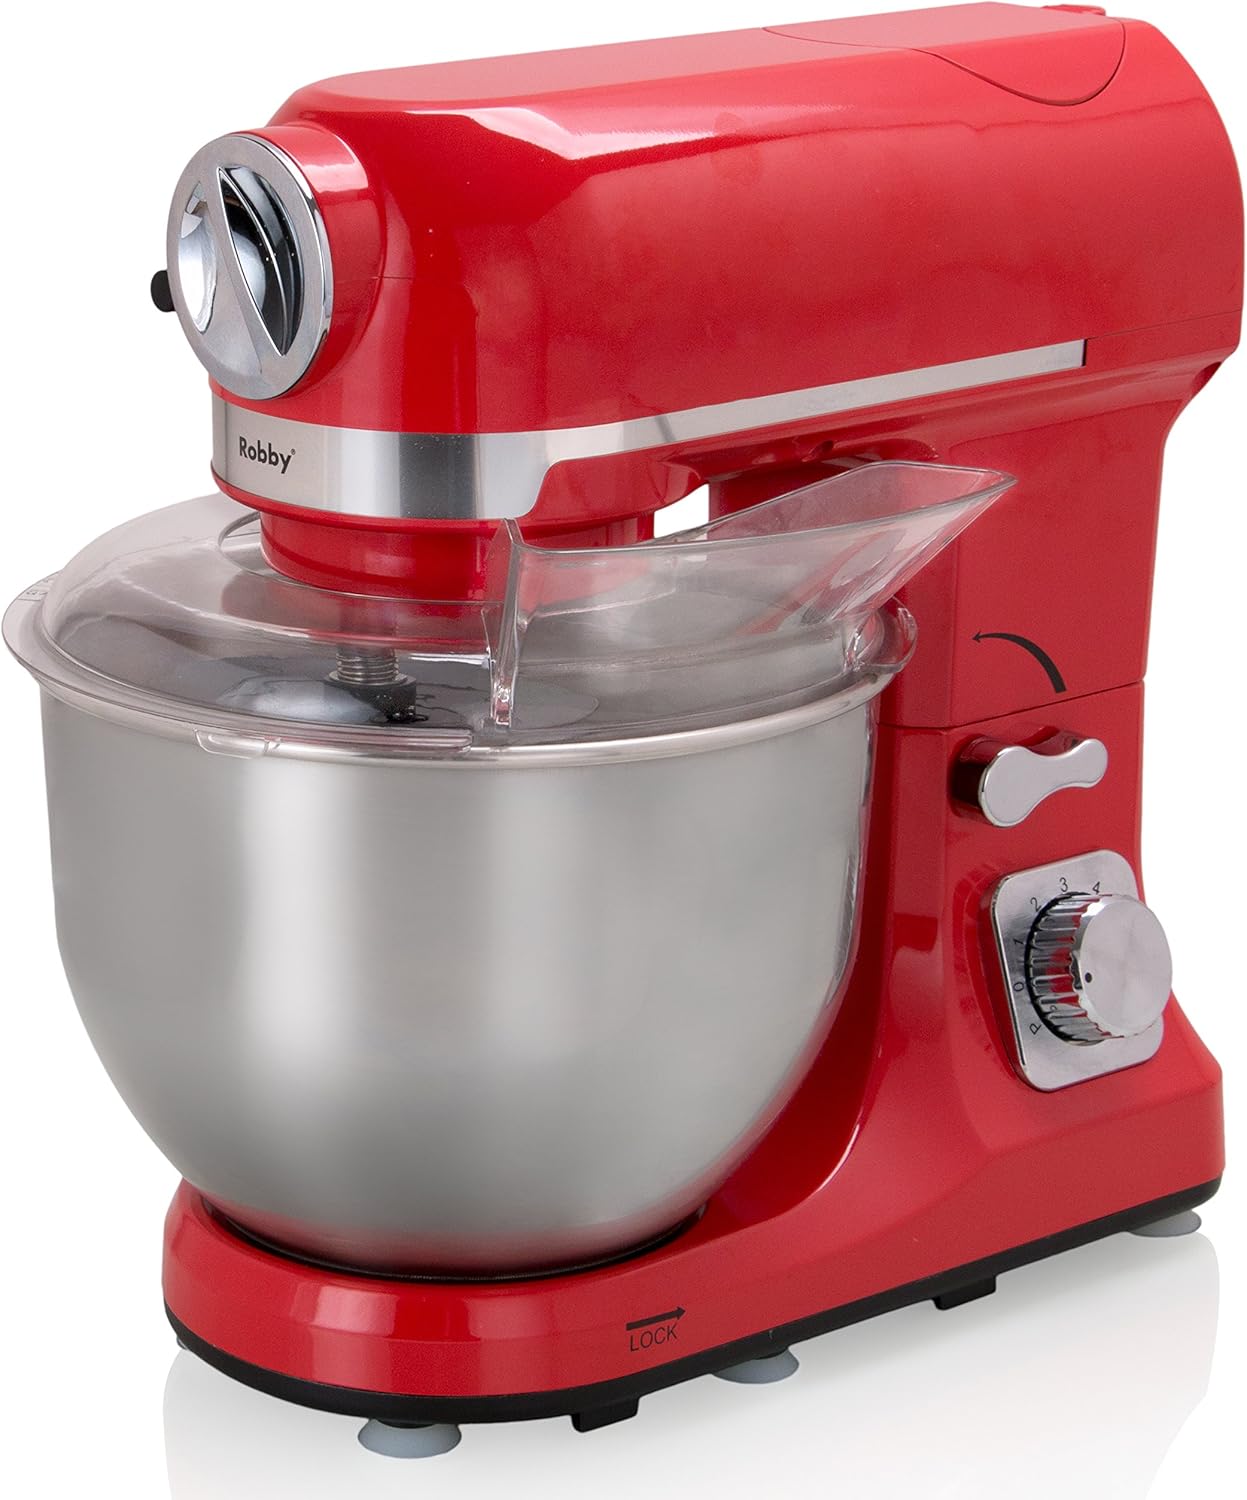
Image 4: The Robby Robimix mixer assembled with the mixing bowl and splash guard.
3.3 Assembling the Meat Grinder:
- Ensure the mixer head is in the lowered position.
- Remove the front cover from the accessory port on the front of the motor unit.
- Assemble the meat grinder components: insert the feeding screw, then the cutting blade (sharp side facing outwards), followed by the desired grinding plate. Secure with the locking ring.
- Insert the assembled meat grinder into the accessory port and turn the locking knob clockwise to secure it.
- Place the feeding tray on top of the grinder.
3.4 Assembling the Blender:
- Ensure the mixer head is in the lowered position.
- Remove the top cover from the blender drive port on the top rear of the motor unit.
- Place the glass blender jar onto the drive port, ensuring it is seated firmly and locked into place.
4. Operating Instructions
Always ensure the appliance is properly assembled and locked before operation. Do not operate the appliance empty.
4.1 General Operation:
- Plug the appliance into a suitable power outlet.
- Turn the speed control knob to the desired setting (1-6). Start with a lower speed and gradually increase as needed.
- For short bursts of maximum power, use the 'P' (Pulse) setting.
- To stop the appliance, turn the speed control knob to '0' (Off) and unplug.
4.2 Using the Mixer (Kneading, Beating, Whisking):
- Kneading Hook: Use for heavy doughs (e.g., bread, pizza). Add ingredients to the mixing bowl. Start at speed 1-2 and gradually increase to 3-4. Do not overload the bowl.
- Flat Beater: Ideal for medium to heavy mixtures (e.g., cake batter, cookie dough, mashed potatoes). Start at speed 2-3 and increase to 4-5.
- Whisk: For light mixtures (e.g., egg whites, cream, light batters). Start at speed 3-4 and increase to 5-6.

Image 5: The Robby Robimix mixer with the whisk attachment for light mixtures.

Image 6: The Robby Robimix mixer with the kneading hook attachment for heavy doughs.

Image 7: The Robby Robimix mixer with the flat beater attachment for medium to heavy mixtures.
4.3 Using the Meat Grinder:
- Prepare meat by cutting it into small pieces that fit into the feeding tube. Remove bones, gristle, and excessive fat.
- Place a bowl under the grinder outlet to collect the minced meat.
- Turn the speed control knob to speed 3-4.
- Feed meat into the tube using the food pusher. Never use your fingers or other utensils to push food.
- For sausage making, attach the appropriate sausage stuffer accessory after grinding.
4.4 Using the Blender:
- Add ingredients to the glass blender jar. Do not exceed the maximum fill line (1.5 Liters).
- Securely place the lid on the blender jar.
- Turn the speed control knob to the desired speed (typically 4-6 for blending) or use the 'P' (Pulse) function for short bursts.
- Do not operate the blender continuously for more than 1 minute. Allow a short break between cycles.
5. Cleaning and Maintenance
Regular cleaning ensures optimal performance and extends the life of your appliance. Always unplug the appliance before cleaning.
5.1 Motor Unit:
- Wipe the motor unit with a damp cloth. Do not use abrasive cleaners.
- Never immerse the motor unit in water or any other liquid.
5.2 Mixing Bowl and Attachments:
- The stainless steel mixing bowl, splash guard, kneading hook, flat beater, and whisk are dishwasher safe.
- Alternatively, wash them in warm soapy water, rinse, and dry thoroughly.
5.3 Blender Jar:
- The glass blender jar and its lid are dishwasher safe.
- For manual cleaning, disassemble the blade assembly carefully and wash all parts in warm soapy water. Rinse and dry immediately.
5.4 Meat Grinder and Pasta Accessories:
- Disassemble all parts of the meat grinder and pasta accessories immediately after use.
- Wash all components in warm soapy water. Use a brush to clean small openings and remove food residue.
- Rinse thoroughly and dry completely to prevent rust, especially for metal parts like grinding plates and blades.
- These parts are generally not recommended for dishwasher cleaning due to potential discoloration or damage to sharp edges.
6. Troubleshooting
If you encounter issues with your Robby Robimix, refer to the following common problems and solutions:
| Problem | Possible Cause | Solution |
|---|---|---|
| Appliance does not start. | Not plugged in; power switch off; motor head not locked; overload protection activated. | Ensure plug is firmly in outlet. Turn speed knob to '0' then to desired speed. Ensure motor head is fully lowered and locked. Unplug, let cool for 30 minutes, then restart. |
| Motor stops during operation. | Overload protection activated; ingredients too dense/heavy. | Unplug, let cool for 30 minutes. Reduce load or cut ingredients into smaller pieces. Restart. |
| Attachments not mixing properly. | Attachment not correctly installed; insufficient ingredients. | Ensure attachment is securely clicked into place. Add more ingredients if the quantity is too small for the bowl. |
| Meat grinder is jammed. | Too much meat; bones/gristle present. | Switch off and unplug. Disassemble the grinder and clear the obstruction. Ensure meat is properly prepared. |
| Blender leaks. | Lid not properly sealed; blade assembly loose. | Ensure lid is firmly in place. Check that the blade assembly is securely tightened to the blender jar. |
If the problem persists after attempting these solutions, please contact customer support.
7. Specifications
| Feature | Specification |
|---|---|
| Model Name | ROBIMIX |
| Brand | Robby |
| Power | 1000 Watts |
| Voltage | 220-230V ~ 50/60Hz |
| Number of Speeds | 6 + Pulse Function |
| Mixing Bowl Capacity | 5 Liters (Stainless Steel) |
| Blender Capacity | 1.5 Liters (Glass) |
| Special Features | Adjustable Speed Control, Overload Protection |
| Product Dimensions (approx.) | 31P x 16W x 31H cm |
| Care Instructions | Hand wash, Dishwasher safe (for certain parts) |
| Included Components | Meat grinder, 3 metal grinding plates, sausage stuffer accessories, food pusher, 4 fresh pasta accessories, whisk, flat beater, kneading hook, splash guard, glass blender, lid. |
8. Warranty and Support
Your Robby Robimix Multifunction Food Processor comes with a standard manufacturer's warranty. Please refer to the warranty card included in your product packaging for specific terms and conditions, including warranty duration and coverage.
For technical support, spare parts, or warranty claims, please contact the retailer where you purchased the product or refer to the contact information provided in your warranty documentation.
Always have your model number (ROBIMIX) and proof of purchase ready when contacting support.