
1. Introduction
This manual provides essential information for the safe and efficient installation, operation, and maintenance of your MarsRock Small Wind Turbine Generator. This wind turbine is designed to convert wind energy into electricity, suitable for wind-solar hybrid systems.
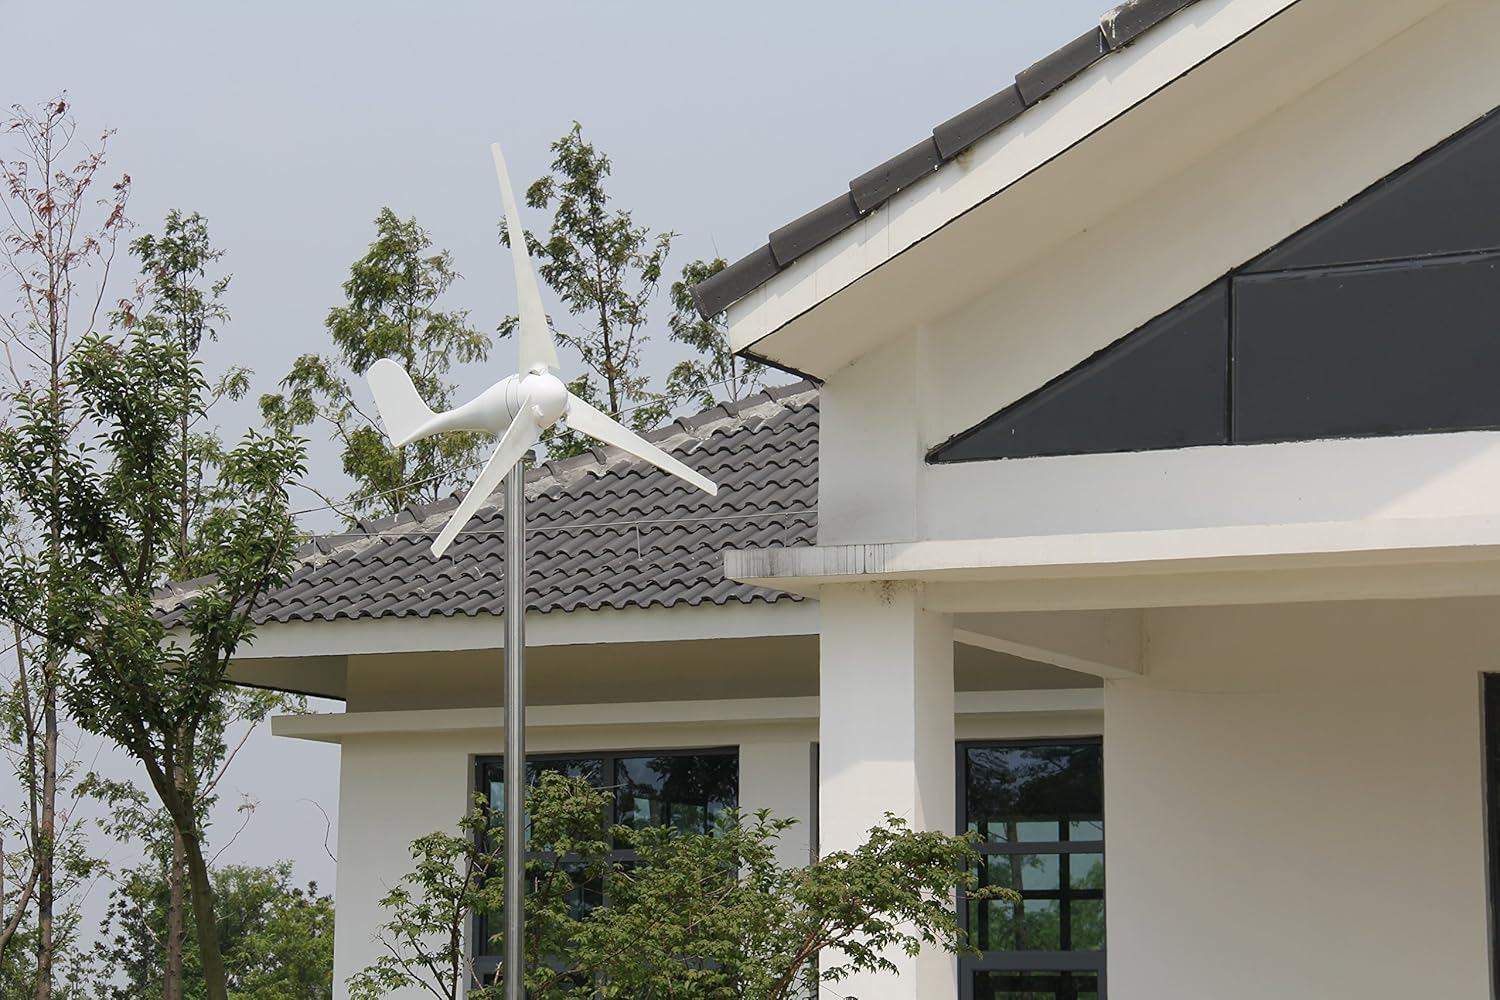
The MarsRock Small Wind Turbine Generator, featuring three blades, is shown installed on a pole beside a residential building, demonstrating a typical application.
2. Safety Information
Read all safety warnings and instructions carefully before installing or operating the wind turbine. Failure to follow these instructions may result in electric shock, fire, serious injury, or property damage.
- Ensure all electrical connections are made by qualified personnel.
- Always disconnect power before performing any maintenance or installation.
- Do not touch rotating blades.
- Install the wind turbine in a location with sufficient clearance from obstacles and power lines.
- Wear appropriate personal protective equipment (PPE) during installation and maintenance.
- Securely mount the wind turbine to prevent collapse in high winds.
- Verify correct voltage (12V or 24V) matches your system before connection.
3. Package Contents
Verify that all components are present and undamaged before proceeding with installation.
- Wind Turbine Generator Body
- 3 Wind Turbine Blades (Nano nylon glass fiber)
- Tail Fin
- Hub
- Nose Cone
- Mounting Hardware (bolts, nuts, washers)
- MPPT/PWM Wind Charge Controller (Model MPPT060)
- Instruction Manual
4. Specifications
The following table details the technical specifications for the MarsRock Small Wind Turbine Generator (Model 3FT.4S).
| Feature | Specification |
|---|---|
| Model | 3FT.4S |
| Rated Power | 300W |
| Maximum Power | 310W |
| Rated Voltage | AC 12V |
| Start-up Wind Speed | 2.0 m/s |
| Rated Wind Speed | 13 m/s |
| Survival Wind Speed | 50 m/s |
| Top Net Weight | 6.5 kg |
| Wheel Diameter | 1.35 m |
| Number of Blades | 3 |
| Blades Material | Nano nylon glass fiber |
| Generator | 3 phase permanent magnet synchronous AC generator |
| Magnet | NdFeB |
| Generator Case | Die-casting aluminum |
| Control System | Electromagnet |
| Speed Regulation | Automatically adjust windward direction |
| Working Temperature | -40°C to +80°C |
| Design Life | 20 years |

A technical diagram illustrating the key dimensions of the wind turbine, including blade length, body length, and rotor diameter, for models ranging from 100W to 400W.
5. Setup and Installation
Proper installation is crucial for the performance and longevity of your wind turbine. Follow these steps carefully.
Component Overview
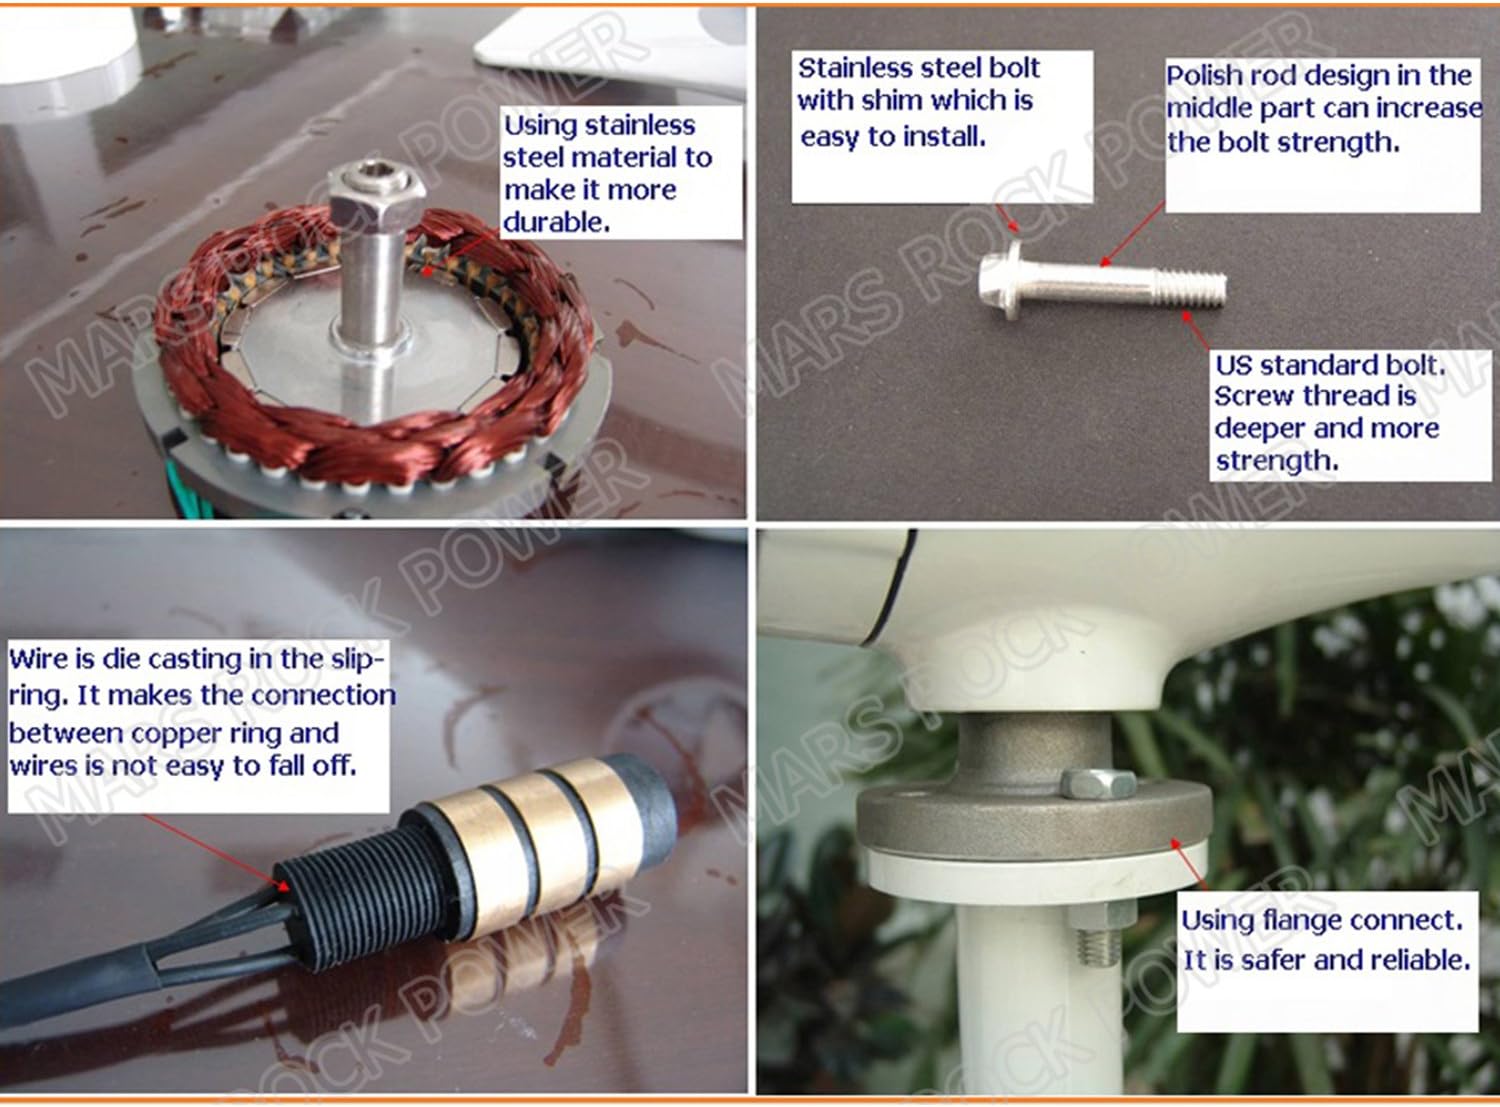
Detailed images showcasing the internal generator coil, a stainless steel bolt with shim for easy installation, the die-cast slip-ring for secure wiring, and the robust flange connection for mounting.

Images highlighting the copper ring built into the blade for protection, the oxidation-treated hub for durability, the close-fitting design of the hub and blades, and the precise 120° allocation of three blades for stable rotation.
System Wiring Diagram
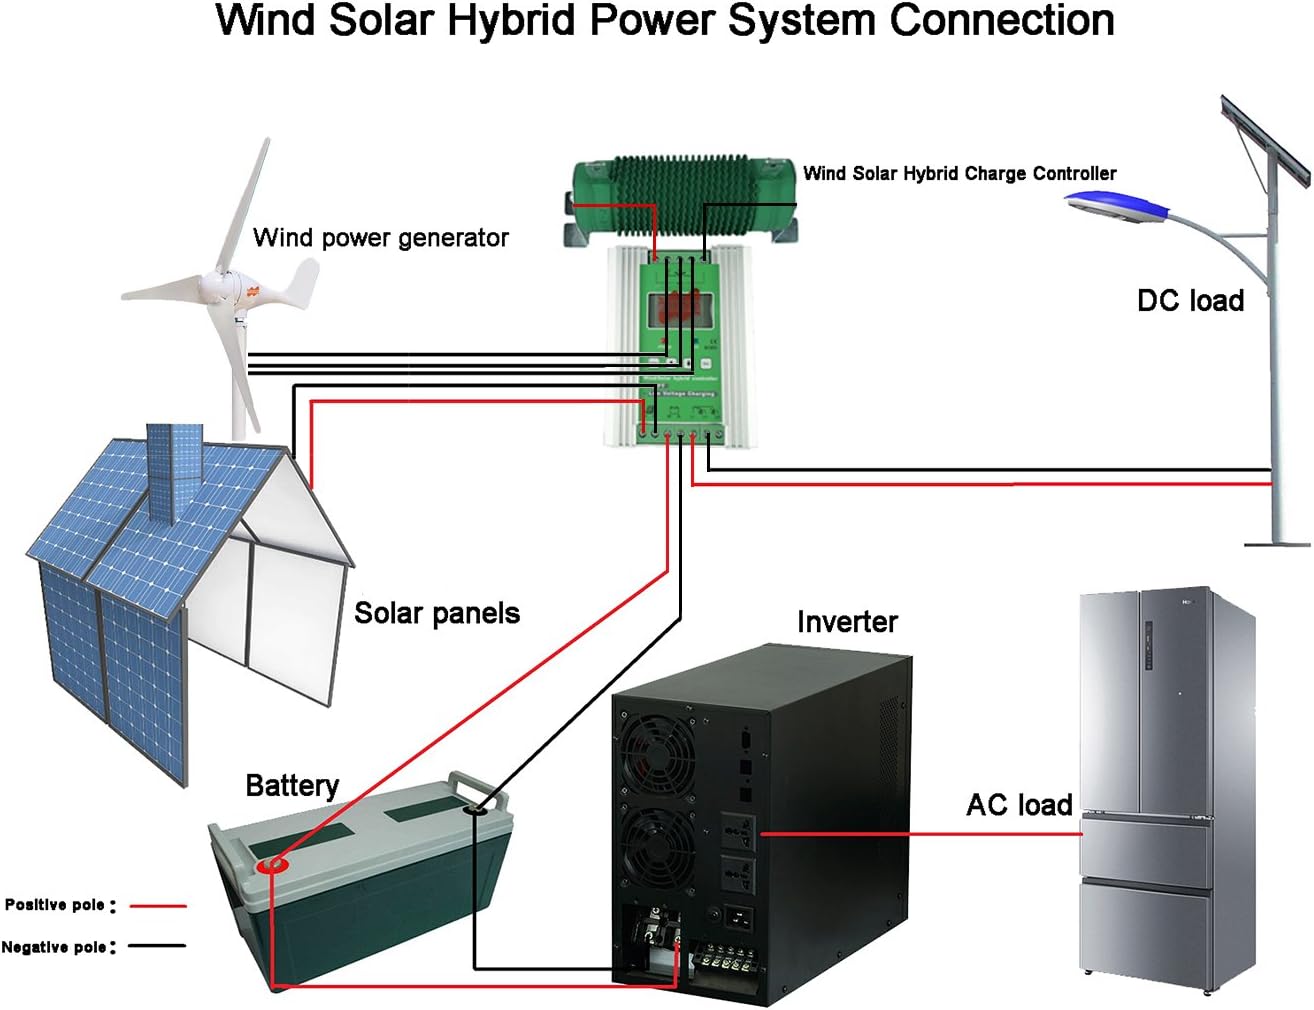
A comprehensive diagram showing how the wind power generator, solar panels, battery, inverter, and DC/AC loads connect to the Wind Solar Hybrid Charge Controller to form a complete power system.
Wind Turbine Assembly
- Mounting the Blades: Attach the three blades to the hub using the provided hardware. Ensure the copper rings are correctly positioned to protect the blade material.
- Attaching the Tail Fin: Secure the tail fin to the generator body.
- Mounting to Pole: Secure the wind turbine generator body to a sturdy mounting pole using the flange connection. Ensure the pole is firmly anchored and provides adequate clearance.
Electrical Connection to Controller
The wind turbine generator produces 3-phase AC power. Connect these three wires to the corresponding input terminals on the MPPT/PWM Wind Charge Controller.
This video demonstrates the connection process for the MPPT/PWM Wind Charge Controller. It shows how to connect the wind generator's output wires to the controller and then connect the controller to a battery. Pay close attention to polarity when connecting to the battery.
- Connect Wind Generator to Controller: Connect the three output wires from the wind generator to the three blue input terminals on the MPPT/PWM Wind Charge Controller (labeled with wind turbine symbols).
- Connect Battery to Controller: Connect the positive (+) and negative (-) terminals of your 12V battery to the corresponding red (+) and black (-) terminals on the charge controller (labeled "Bat"). Ensure correct polarity.
- Connect Loads: Connect your DC loads or inverter to the battery terminals, ensuring appropriate fusing and circuit protection. Refer to the system wiring diagram for a complete overview.
6. Operating Instructions
Initial Startup
Once all connections are secure, the wind turbine will begin generating power when wind speeds exceed the 2m/s start-up speed. The charge controller will manage the charging of your battery.
Normal Operation
The wind turbine operates automatically, adjusting its direction to face the wind. The charge controller continuously monitors battery voltage and wind generator output to optimize charging and prevent overcharging.
Shut Down Procedures
In situations requiring shutdown (e.g., extreme weather, maintenance), activate the braking mechanism on the charge controller if available, or manually secure the blades to prevent rotation. Disconnect the battery from the controller as a primary safety measure.
7. Maintenance
Regular maintenance ensures optimal performance and extends the lifespan of your wind turbine.
- Annual Inspection: Visually inspect all components for wear, corrosion, or damage. Check blades for cracks or chips.
- Bolt Tightness: Periodically check and tighten all mounting bolts and electrical connections.
- Cleaning: Keep blades and the generator body clean from dirt, ice, or debris that could affect performance.
- Electrical Connections: Inspect wiring for fraying or loose connections.
8. Troubleshooting
Refer to this section for common issues and their potential solutions.
| Problem | Possible Cause | Solution |
|---|---|---|
| No Power Output | Low wind speed | Wait for adequate wind conditions (start-up speed 2m/s). |
| No Power Output | Loose electrical connections | Check all wiring connections, especially between generator, controller, and battery. |
| No Power Output | Controller malfunction | Verify controller status indicators. Consult controller manual or contact support. |
| Excessive Noise/Vibration | Loose blades or mounting hardware | Inspect and tighten all blade and mounting bolts. |
| Excessive Noise/Vibration | Damaged blades | Inspect blades for damage. Replace if necessary. |
| Battery Not Charging | Incorrect battery voltage setting on controller | Ensure controller is set for 12V battery system. |
| Battery Not Charging | Faulty battery | Test battery health. Replace if necessary. |
9. Warranty and Support
The MarsRock Small Wind Turbine Generator is designed for a long service life of approximately 20 years. For specific warranty terms and conditions, please refer to your purchase documentation or contact Mars Rock Power directly.
For technical assistance or support, please visit the official Mars Rock Store on Amazon or contact their customer service.
Mars Rock Power: Mars Rock Store