
Introduction
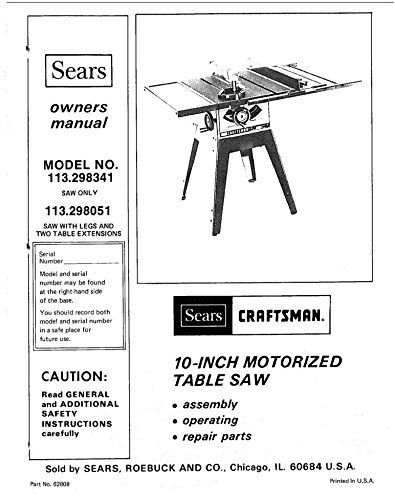
This manual provides essential information for the safe and efficient operation, assembly, maintenance, and repair of your Craftsman 10-inch Motorized Table Saw. It covers models 113.298341 (saw only) and 113.298051 (saw with legs and two table extensions). Please read this manual thoroughly before using your table saw to ensure proper understanding of its features and safety precautions.
For future reference, locate and record the model and serial number of your table saw. This information is typically found on the right-hand side of the saw's base. Keep this manual in a safe and accessible place.
Safety Instructions
Operating any power tool can be dangerous if proper safety precautions are not followed. This section outlines critical general and specific safety guidelines for using your Craftsman table saw. Adhering to these instructions will help prevent serious injury and damage to the tool.
General Safety Rules:
- Always wear eye protection.
- Use hearing protection when operating noisy equipment.
- Keep work area clean and well-lit. Cluttered areas invite accidents.
- Do not operate power tools in explosive atmospheres, such as in the presence of flammable liquids, gases, or dust.
- Keep children and bystanders away while operating a power tool.
- Dress properly. Do not wear loose clothing or jewelry. Keep hair, clothing, and gloves away from moving parts.
- Avoid accidental starting. Ensure the switch is in the off-position before plugging in.
- Do not overreach. Keep proper footing and balance at all times.
- Disconnect the plug from the power source before making any adjustments, changing accessories, or storing power tools.
Specific Table Saw Safety:
- Always use the blade guard and splitter for through-cutting operations.
- Use a push stick or push block when making narrow cuts.
- Never reach over or behind the saw blade.
- Ensure the blade is sharp and clean. Dull blades can cause kickback.
- Support long workpieces to prevent tipping.
- Do not perform freehand cuts. Always use the fence or miter gauge.
- Before starting the saw, ensure the blade is clear of the workpiece and all adjustments are tightened.
Assembly
This section details the steps required to assemble your Craftsman 10-inch Motorized Table Saw. Assembly procedures may vary slightly depending on whether you have model 113.298341 (saw only) or 113.298051 (saw with legs and two table extensions).
Tools Required:
- Adjustable wrench
- Screwdriver (Phillips and flathead)
- Hex key set
- Safety glasses
Assembly Steps (General):
- Unpacking and Inspection: Carefully remove all components from the packaging. Verify that all parts listed in the packing list are present and undamaged. Report any missing or damaged parts immediately.
- Attaching Legs (Model 113.298051 only): Securely attach the four legs to the main saw unit using the provided bolts and nuts. Ensure all connections are tight and stable.
- Installing Table Extensions (Model 113.298051 only): Mount the two table extensions to the sides of the main table, aligning them flush with the main surface. Fasten them securely.
- Mounting the Motor: Attach the motor to the saw frame according to the instructions, ensuring proper alignment with the blade arbor.
- Installing the Saw Blade: Carefully install the 10-inch saw blade onto the arbor, ensuring the teeth are oriented correctly for cutting. Secure with the arbor nut.
- Attaching Blade Guard and Splitter: Install the blade guard and splitter assembly. Ensure it moves freely and provides adequate protection.
- Assembling the Rip Fence: Attach the rip fence assembly to the front rail. Test its movement and locking mechanism.
- Final Checks: Before connecting to power, double-check all fasteners for tightness. Ensure all moving parts operate smoothly without obstruction.
Operating
This section covers the fundamental procedures for operating your Craftsman 10-inch Motorized Table Saw safely and effectively. Familiarize yourself with these operations before making any cuts.
Basic Operations:
- Power Connection: Connect the saw to a grounded electrical outlet. Ensure the power switch is in the "OFF" position before plugging in.
- Blade Height Adjustment: Use the blade height adjustment handwheel to raise or lower the blade. For most cuts, the blade should extend approximately 1/8 inch above the workpiece.
- Bevel Angle Adjustment: Use the bevel adjustment mechanism to tilt the blade for angled cuts. Lock the bevel angle securely before cutting.
- Rip Fence Adjustment: Position the rip fence to the desired width of cut. Ensure it is parallel to the blade and locked firmly in place.
- Miter Gauge Use: For cross-cutting, use the miter gauge. Adjust it to the desired angle and slide it in the table's miter slot.
Cutting Techniques:
- Ripping: Use the rip fence to guide the workpiece for lengthwise cuts. Apply steady, even pressure. Always use a push stick for narrow cuts.
- Cross-Cutting: Use the miter gauge to guide the workpiece for cuts across the grain. Ensure the workpiece is firmly against the miter gauge.
- Dadoing/Grooving (if applicable): If your saw supports dado blades, follow specific instructions for installing and using them to cut grooves or dados.
- Bevel Cuts: Adjust the blade to the desired angle. Ensure the workpiece is properly supported and guided.
Always ensure the blade guard is in place and functioning correctly before starting any cut.
Maintenance
Regular maintenance is crucial for the longevity and safe operation of your Craftsman table saw. Follow these guidelines to keep your tool in optimal condition.
Cleaning:
- After Each Use: Disconnect power. Remove sawdust and debris from the table surface, blade guard, and motor housing using a brush or vacuum.
- Blade Cleaning: Periodically remove the blade and clean off accumulated pitch and resin using a blade cleaner. This improves cutting performance and reduces kickback risk.
Lubrication:
- Apply a light coat of paste wax to the table surface to reduce friction and prevent rust.
- Lubricate moving parts such as the blade height adjustment screw, bevel mechanism, and rip fence rails with a dry lubricant or light machine oil as recommended.
Inspections:
- Blade Condition: Inspect the saw blade for dullness, missing teeth, or cracks. Replace damaged blades immediately.
- Power Cord: Check the power cord for any cuts, fraying, or damage.
- Fasteners: Periodically check all nuts, bolts, and screws for tightness. Tighten as necessary.
- Blade Guard and Splitter: Ensure the blade guard and splitter are intact, properly aligned, and move freely.
Troubleshooting
This section provides solutions to common problems you might encounter with your Craftsman 10-inch Motorized Table Saw. Before attempting any repairs, always disconnect the saw from the power source.
| Problem | Possible Cause | Solution |
|---|---|---|
| Saw does not start | No power to outlet; tripped circuit breaker; faulty switch; loose wiring. | Check power supply; reset breaker; inspect switch and wiring (consult qualified technician if unsure). |
| Blade binds or stalls during cut | Dull blade; misaligned fence; improper feed rate; warped workpiece. | Replace or sharpen blade; ensure fence is parallel to blade; reduce feed rate; use straight lumber. |
| Excessive vibration | Loose blade; damaged blade; loose motor mounts; unstable stand. | Tighten blade arbor nut; replace damaged blade; check motor mount bolts; ensure saw stand is stable. |
| Inaccurate cuts | Misaligned fence or miter gauge; worn blade; play in arbor. | Calibrate fence and miter gauge; replace worn blade; inspect arbor for excessive play. |
| Motor overheats | Overloading; poor ventilation; dull blade. | Reduce load; ensure motor vents are clear; replace or sharpen blade. |
If you encounter a problem not listed here, or if the suggested solutions do not resolve the issue, please contact a qualified service technician or the manufacturer's support.
Repair Parts
When replacement parts are needed for your Craftsman 10-inch Motorized Table Saw, it is recommended to use only genuine Craftsman or Sears authorized replacement parts. Using non-genuine parts may void your warranty, compromise safety, and affect the performance of your tool.
Refer to the parts list diagram (typically found in the original manual) to identify the correct part numbers for your specific model (113.298341 or 113.298051). When ordering parts, always provide the complete model number of your table saw.
For assistance in identifying or ordering parts, you may contact Sears, Roebuck and Co. customer service or visit an authorized service center.
Specifications
The Craftsman 10-inch Motorized Table Saw models 113.298341 and 113.298051 are designed for woodworking applications, offering precision and power for various cutting tasks.
| Feature | Detail |
|---|---|
| Blade Diameter | 10 inches |
| Motor Type | Motorized (specific HP may vary by production run) |
| Voltage | Standard household voltage (e.g., 120V AC, 60Hz) |
| Arbor Size | Typically 5/8 inch |
| Max. Depth of Cut (90°) | Approx. 3 inches |
| Max. Depth of Cut (45°) | Approx. 2 inches |
| Rip Capacity | Varies by model and table extension configuration |
| Weight | Varies by model (saw only vs. with legs/extensions) |
Note: Specific specifications may vary slightly based on the exact manufacturing year and revision of your model. Always refer to the original product labeling for precise details.
Warranty Information
Craftsman products are manufactured to high-quality standards. While specific warranty terms may vary, generally, Craftsman tools are covered against defects in material and workmanship for a specified period from the date of purchase. Please retain your original purchase receipt as proof of purchase for any warranty claims.
This manual reprint does not include specific warranty details. For precise warranty information applicable to your Craftsman 10-inch Motorized Table Saw, please refer to the warranty card included with your original purchase or contact Craftsman/Sears customer service directly.
Note: Warranty coverage typically does not extend to normal wear and tear, misuse, abuse, or unauthorized repairs.
Support and Service
For technical assistance, service, or to order replacement parts for your Craftsman 10-inch Motorized Table Saw, please contact the manufacturer or an authorized service center.
When contacting support, be prepared to provide the full model number (113.298341 or 113.298051) and serial number of your table saw, along with a detailed description of the issue you are experiencing.
Contact Information (Historical - Sears, Roebuck and Co.):
Sears, Roebuck and Co.
Chicago, IL. 60684 U.S.A.
Please note that contact methods and service availability may have changed since the original publication of this manual. Refer to current Craftsman or Sears official websites for the most up-to-date support information.


