Craftsman 315.212400
Owner's Manual
CRAFTSMAN 10 in. MITER SAW
Double Insulated
Model No. 315.212400
Important Information
CAUTION: Read and follow all Safety Rules and Operating Instructions before first use of this product.
Save this manual for future reference. It contains important information regarding the safe operation, maintenance, and parts for your Craftsman 10 in. Miter Saw, Model No. 315.212400.
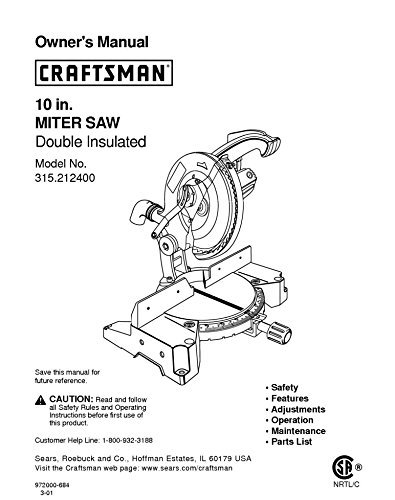
Figure 1: Overview diagram of the Craftsman 10 inch Miter Saw, Model 315.212400. This illustration shows the main components of the saw, including the blade, motor housing, handle, miter table, and base.
1. Safety Rules
Adhering to safety rules is paramount for preventing injury and ensuring proper operation of the miter saw. Always wear appropriate personal protective equipment (PPE) including eye protection, hearing protection, and dust masks.
- Always disconnect power before making adjustments or changing accessories.
- Keep work area clean and well lit.
- Do not operate power tools in explosive atmospheres.
- Keep children and bystanders away.
- Use proper extension cords.
- Maintain tools with care.
- Use clamps or other practical ways to secure and support the workpiece to a stable platform.
- Do not overreach. Keep proper footing and balance at all times.
- Dress properly. Do not wear loose clothing or jewelry.
- Always use the correct type of blade for the material being cut.
2. Features
The Craftsman 10 in. Miter Saw is designed for precision cutting of wood, plastic, and composite materials. Key features include:
- 10-inch Blade Capacity: Accommodates standard 10-inch miter saw blades for versatile cutting.
- Double Insulated Design: Provides enhanced electrical safety.
- Adjustable Miter Table: Allows for precise angle cuts.
- Blade Guard: Retracts automatically during cuts for safety.
- Dust Collection Port: Connects to a vacuum system for cleaner operation.
3. Setup
Proper setup ensures stable and accurate operation. Follow these steps for initial assembly and placement:
- Unpacking: Carefully remove all components from the packaging. Verify all parts are present against the parts list.
- Mounting: Securely mount the miter saw to a stable workbench or stand using appropriate bolts and washers. Ensure the mounting surface is level.
- Blade Installation: Refer to the "Blade Installation" section under "Maintenance" for detailed instructions on safely installing the saw blade.
- Power Connection: Connect the saw to a grounded power outlet. Ensure the power supply matches the specifications listed on the saw's nameplate.
4. Adjustments
Accurate cuts depend on proper adjustments. Familiarize yourself with the following adjustment points:
- Miter Angle Adjustment: Loosen the miter lock handle, pivot the table to the desired angle indicated on the miter scale, and tighten the handle.
- Bevel Angle Adjustment: For bevel cuts, loosen the bevel lock knob, tilt the saw head to the desired angle, and secure the knob.
- Depth Stop Adjustment: Adjust the depth stop for non-through cuts or dadoes.
- Fence Adjustment: Ensure the fence is square to the blade for accurate crosscuts. Adjust if necessary using a square.
5. Operation
Before operating, ensure all safety precautions are understood and followed. Always wear eye and hearing protection.
- Workpiece Placement: Place the workpiece firmly against the fence and the miter table. Use clamps to secure small or unstable pieces.
- Starting the Saw: Depress the trigger switch to start the motor. Allow the blade to reach full speed before beginning the cut.
- Making a Cut: Slowly lower the saw head through the workpiece. Do not force the cut. Allow the blade to do the work.
- Completing the Cut: Once the cut is complete, release the trigger switch and allow the blade to stop completely before raising the saw head.
- Repetitive Cuts: For repetitive cuts, use a stop block to ensure consistent lengths.
6. Maintenance
Regular maintenance extends the life of your miter saw and ensures safe operation. Always disconnect the saw from power before performing any maintenance.
- Blade Cleaning and Replacement:
To replace the blade:
- Disconnect power.
- Remove the blade guard.
- Use the blade wrench to loosen the arbor nut while holding the arbor lock button.
- Remove the old blade and install the new blade, ensuring the teeth are oriented correctly.
- Tighten the arbor nut securely and reattach the blade guard.
- Dust Collection: Regularly empty the dust bag or vacuum system. Clean the dust port to prevent clogs.
- Lubrication: Apply light machine oil to moving parts as recommended in the full manual (if applicable, this is a general instruction).
- Inspection: Periodically inspect the power cord, switch, and all moving parts for damage or wear. Replace worn parts immediately.
7. Troubleshooting
This section provides solutions to common operational issues.
| Problem | Possible Cause | Solution |
|---|---|---|
| Saw does not start | No power, faulty switch, tripped circuit breaker. | Check power connection, test outlet, reset breaker, inspect switch. |
| Blade binds during cut | Dull blade, improper workpiece support, forcing the cut. | Replace blade, ensure workpiece is secure, allow blade to cut at its own pace. |
| Inaccurate cuts | Miter or bevel settings incorrect, fence not square, worn blade. | Verify and adjust settings, check fence squareness, replace blade. |
8. Specifications
Technical specifications for the Craftsman 10 in. Miter Saw, Model No. 315.212400.
- Model Number: 315.212400
- Blade Diameter: 10 inches
- Insulation: Double Insulated
Note: For detailed electrical specifications, refer to the product label on the tool itself.
9. Parts List
A comprehensive parts list is typically included in the full manual for ordering replacement components. For specific part numbers and diagrams, please refer to the original manual or contact customer support.
Common replaceable parts include:
- Saw Blades
- Carbon Brushes
- Blade Guard Assembly
- Dust Bag
- Power Cord
10. Warranty and Support
For warranty information and technical assistance, please contact Craftsman customer support.
- Customer Help Line: 1-800-932-3188
- Manufacturer Address: Sears, Roebuck and Co., Hoffman Estates, IL 60179 USA
- Official Website: Visit the Craftsman web page at www.sears.com/craftsman for additional resources and product information.
This manual is a reprint and may not contain the most current warranty details. Always refer to the official Craftsman website or contact customer support for the latest warranty policy.
Ask a question about this manual
Ask about setup, troubleshooting, compatibility, parts, safety, or missing instructions. Manuals+ will review the question and use this page’s manual context to help answer it.