1. Introduction
The HTRC H150 Duo is a high-performance, twin-channel multi-charger designed for various battery types, including LiPo, LiFe, LiIon, LiHV, NiCd, NiMH, and PB batteries. It features dual independent outputs, allowing simultaneous charging of two different battery packs. This manual provides essential information for safe and efficient operation of your H150 Duo charger.
2. Safety Instructions
Please read all safety warnings and instructions carefully before using this product. Failure to do so may result in fire, injury, or property damage.
- Always supervise the charging process. Never leave the charger unattended while it is connected to a power source or charging/discharging batteries.
- Ensure proper ventilation. Do not operate the charger in an enclosed space or cover it during use.
- Keep the charger away from moisture, heat, direct sunlight, and flammable materials.
- Use only the original cables and connectors provided with the charger.
- Verify battery type, cell count, voltage, and current settings match the battery specifications before starting any operation. Incorrect settings can cause severe damage to the battery and charger.
- Do not attempt to charge damaged, swollen, or leaking batteries.
- Keep out of reach of children.
3. Product Overview
3.1 Package Contents
The HTRC H150 Duo package includes the following items:
- 1 x HTRC H150 AC/DC Duo Device
- 1 x AC Power Cord (US plug)
- 1 x DC Power Cord
- 2 x Charge Cables
- 2 x Charging Boards with Pin Cords

Image: HTRC H150 Duo charger with all included accessories, including power cords, charge cables, and balance boards.
3.2 Component Identification
Familiarize yourself with the various parts of your HTRC H150 Duo charger:
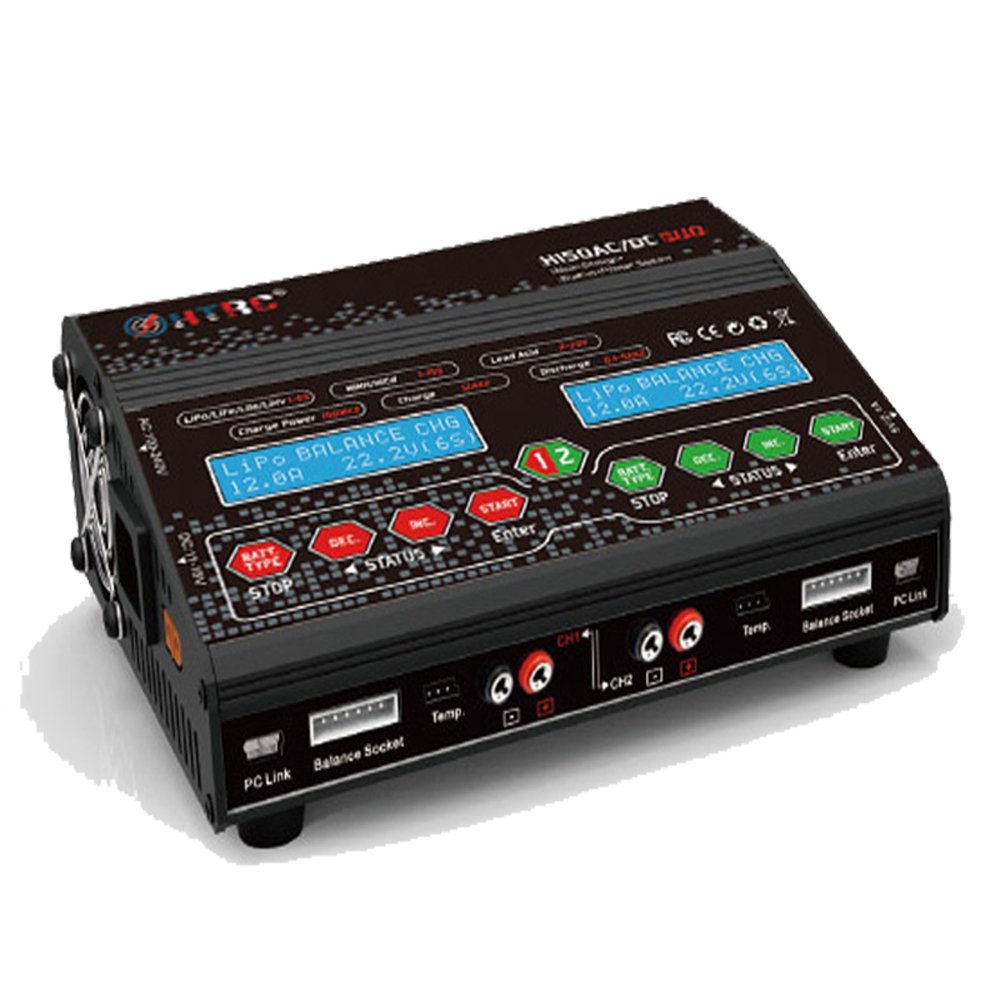
Image: Front view of the HTRC H150 Duo. It features two independent LCD displays, each with dedicated control buttons (BAT.TYPE, DEC, INC, STATUS, ENTER, START/STOP) for managing two charging channels simultaneously. Output ports and balance ports are located at the front bottom.

Image: Side view of the HTRC H150 Duo, illustrating the cooling fans for heat dissipation, PC Link ports, 3-pin output ports, and 6S balance ports. A 5V/2.1A USB output port is also visible.

Image: Rear view of the HTRC H150 Duo, showing the AC input (100-240V) and DC input (11-28V) ports. The waterproof operation buttons are also highlighted.
4. Setup
4.1 Power Connection
The H150 Duo supports both AC and DC power inputs.
- AC Power (110-240V): Connect the provided AC power cord to the AC input port on the charger and then plug it into a wall outlet.
- DC Power (11-28V): Connect the provided DC power cord to the DC input port on the charger and to a suitable DC power source (e.g., a car battery or a regulated DC power supply).
Once connected, the charger will power on, and the LCD displays will illuminate.
5. Operating Instructions
5.1 Basic Operation Flow
- Connect Battery: Connect your battery to the appropriate output port and, if applicable, the balance port.
- Select Battery Type: Press the 'BAT.TYPE' button to cycle through and select the correct battery chemistry (e.g., LiPo, NiMH, PB).
- Set Parameters: Use the 'DEC' and 'INC' buttons to adjust charging current, cell count, and other relevant parameters according to your battery's specifications.
- Confirm Settings: Press the 'ENTER' button to confirm your selections.
- Start Operation: Press and hold the 'START' button for a few seconds to begin the charging or discharging process. The charger will perform a safety check before starting.
- Stop Operation: Press the 'STOP' button at any time to halt the current operation.
5.2 Charging Modes
- Balance Charge (LiPo/LiFe/LiIon/LiHV): This mode charges and balances individual cells of lithium-based batteries, ensuring optimal performance and longevity.
- Charge (NiCd/NiMH, PB): Standard charging mode for Nickel-Cadmium, Nickel-Metal Hydride, and Lead-Acid batteries.
- Discharge: Discharges the battery to a user-defined voltage or capacity.
- Storage: Charges or discharges lithium batteries to their optimal storage voltage, preserving battery health during periods of inactivity.
5.3 USB DC Output
The charger includes a USB DC output port (5V 2.1A) for charging compatible USB devices. Connect your device to this port while the charger is powered on.
6. Maintenance
- Cleaning: Use a soft, dry cloth to clean the charger's exterior. Do not use solvents or abrasive cleaners.
- Storage: Store the charger in a cool, dry place away from direct sunlight and extreme temperatures.
- Inspection: Regularly inspect cables and connectors for any signs of damage. Replace damaged components immediately.
7. Troubleshooting
- Charger not powering on: Ensure both AC or DC power cables are securely connected and the power source is active.
- Error message on display: Refer to the specific error code displayed on the screen. Common errors relate to incorrect battery settings, connection issues, or internal faults. Double-check all connections and settings.
- Battery not charging: Verify that the battery type, cell count, and current settings are correct. Ensure the battery is properly connected to both the main output and balance ports (if applicable).
- Overheating: Ensure the charger's cooling fans are not obstructed and the charger is in a well-ventilated area. Reduce the charging current if overheating persists.
8. Specifications
| Feature | Specification |
|---|---|
| Input Voltage | AC 110-240V / DC 11-28V |
| Charge Circuit Power | 150W x 2 |
| Discharge Circuit Power | 20W x 2 |
| Charge Current Range | 0.1-12A x 2 |
| Discharge Current Range | 0.1-5A x 2 |
| Current Drain for Balancing | 500mA/cell |
| LiPo/LiIon/LiFe/LiHv Cell Count | 1-6 cells x 2 |
| NiCd/NiMH Battery Cell Count | 1-15 cells x 2 |
| Pb Battery Voltage | 2-20V x 2 |
| Smart Battery Support | I/II/III x 2 |
| USB DC Output | 5V 2.1A |
| Dimensions | 195 x 143 x 70mm |
| Net Weight | 1.05kg (2.3 lbs) |
9. Warranty and Support
For warranty information or technical support, please refer to the documentation provided with your purchase or contact HTRC customer service through their official website. Keep your purchase receipt as proof of purchase.