Introduction
This manual provides detailed instructions for the installation, operation, and maintenance of your TORCHSTAR 6 Inch Slim LED Recessed Lighting. Designed for efficiency and ease of use, these ultra-thin LED downlights offer bright, dimmable illumination for various indoor spaces. Please read this manual thoroughly before installation and use to ensure proper function and safety.

Image: A pack of six TORCHSTAR 6 Inch Slim LED Recessed Lights, showing the light fixtures and the accompanying junction boxes.
Safety Information
Always follow basic safety precautions when installing or working with electrical products. Failure to do so may result in serious injury or property damage.
- Turn off power at the circuit breaker before installation or maintenance.
- Ensure all electrical connections comply with local codes and ordinances.
- If you are unsure about the installation, consult a qualified electrician.
- Do not modify the light fixture or its components.
- This product is designed for indoor use and damp locations.
Product Specifications
| Feature | Specification |
|---|---|
| Brand | TORCHSTAR |
| Model Name | Basic Series LED Downlight |
| Model Number | JXLDL6D-6P12W50 |
| Size | 6 Inch |
| Color Temperature | Daylight (5000K) |
| Brightness | 1100 Lumen |
| Wattage | 12 watts |
| Voltage | 120 Volts |
| Material | Aluminum |
| Dimmable Range | 5%-100% |
| Lifespan | 50,000 hours |
| Certifications | ETL, Energy Star (ES), FCC, IC Rated |
| Clearance Required | 2 inches |
| Working Temperature | -4°F to 113°F |
| Included Components | Junction Box |

Image: Detailed product dimensions for the 6-inch slim LED panel light and its junction box.
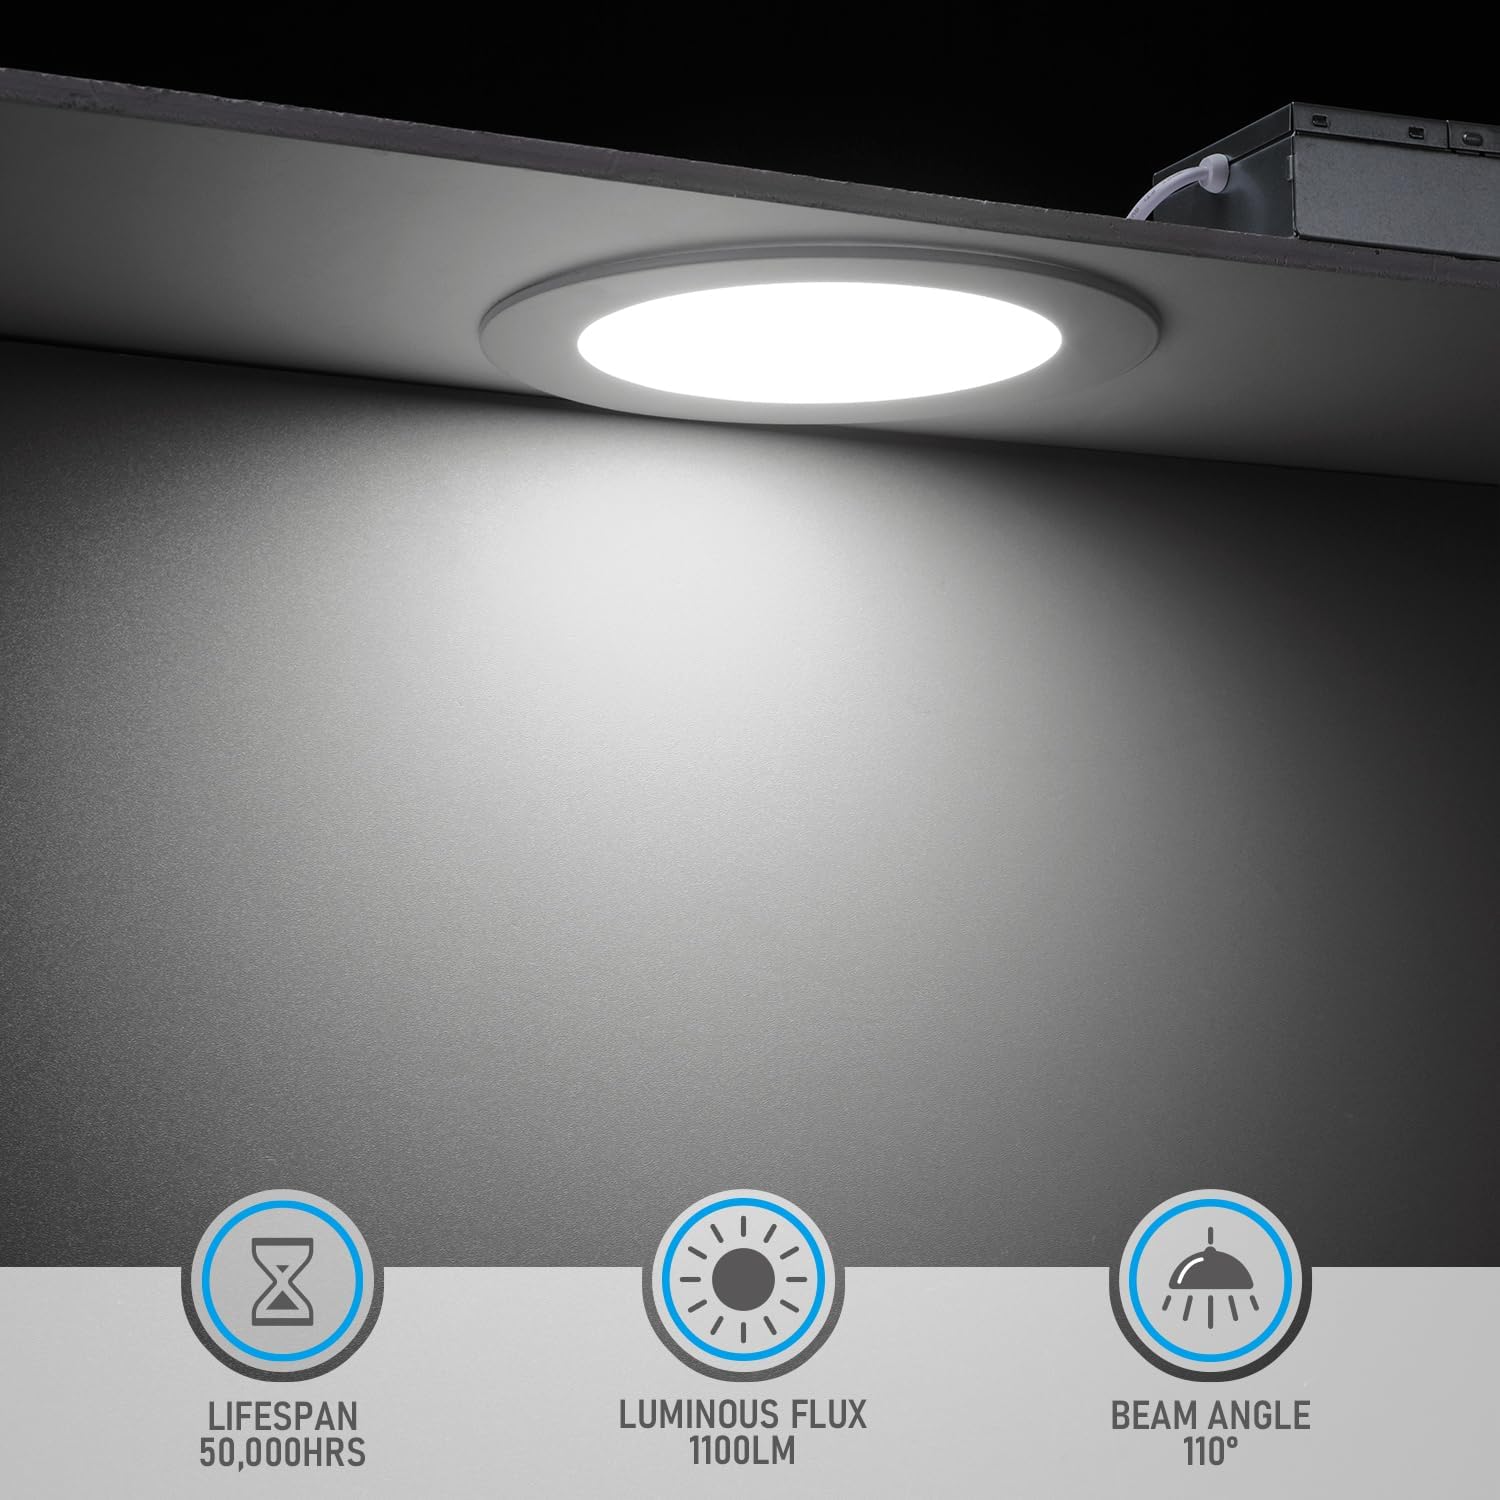
Image: Visual representation of key performance metrics: 50,000 hours lifespan, 1100 lumens luminous flux, and 110-degree beam angle.
Installation Instructions
These ultra-thin LED downlights are designed for easy installation, even in spaces with limited clearance. They are IC rated, allowing direct contact with insulation.
- Prepare the Opening: Cut a 6.10-inch (155mm) diameter hole in the ceiling at the desired location. Ensure there is at least 2 inches of clearance above the ceiling for the fixture.
- Connect Wiring: Open the junction box. Connect the electrical wires from your power supply to the corresponding wires in the junction box (Live, Neutral, Ground) using appropriate wire connectors. Ensure all connections are secure and comply with local electrical codes.
- Connect LED Panel to Driver: Plug the connector from the LED panel into the corresponding port on the driver within the junction box.
- Insert into Ceiling: Gently push the spring-loaded clips on the sides of the LED panel upwards and insert the light fixture into the prepared hole. The clips will secure the light firmly against the ceiling.
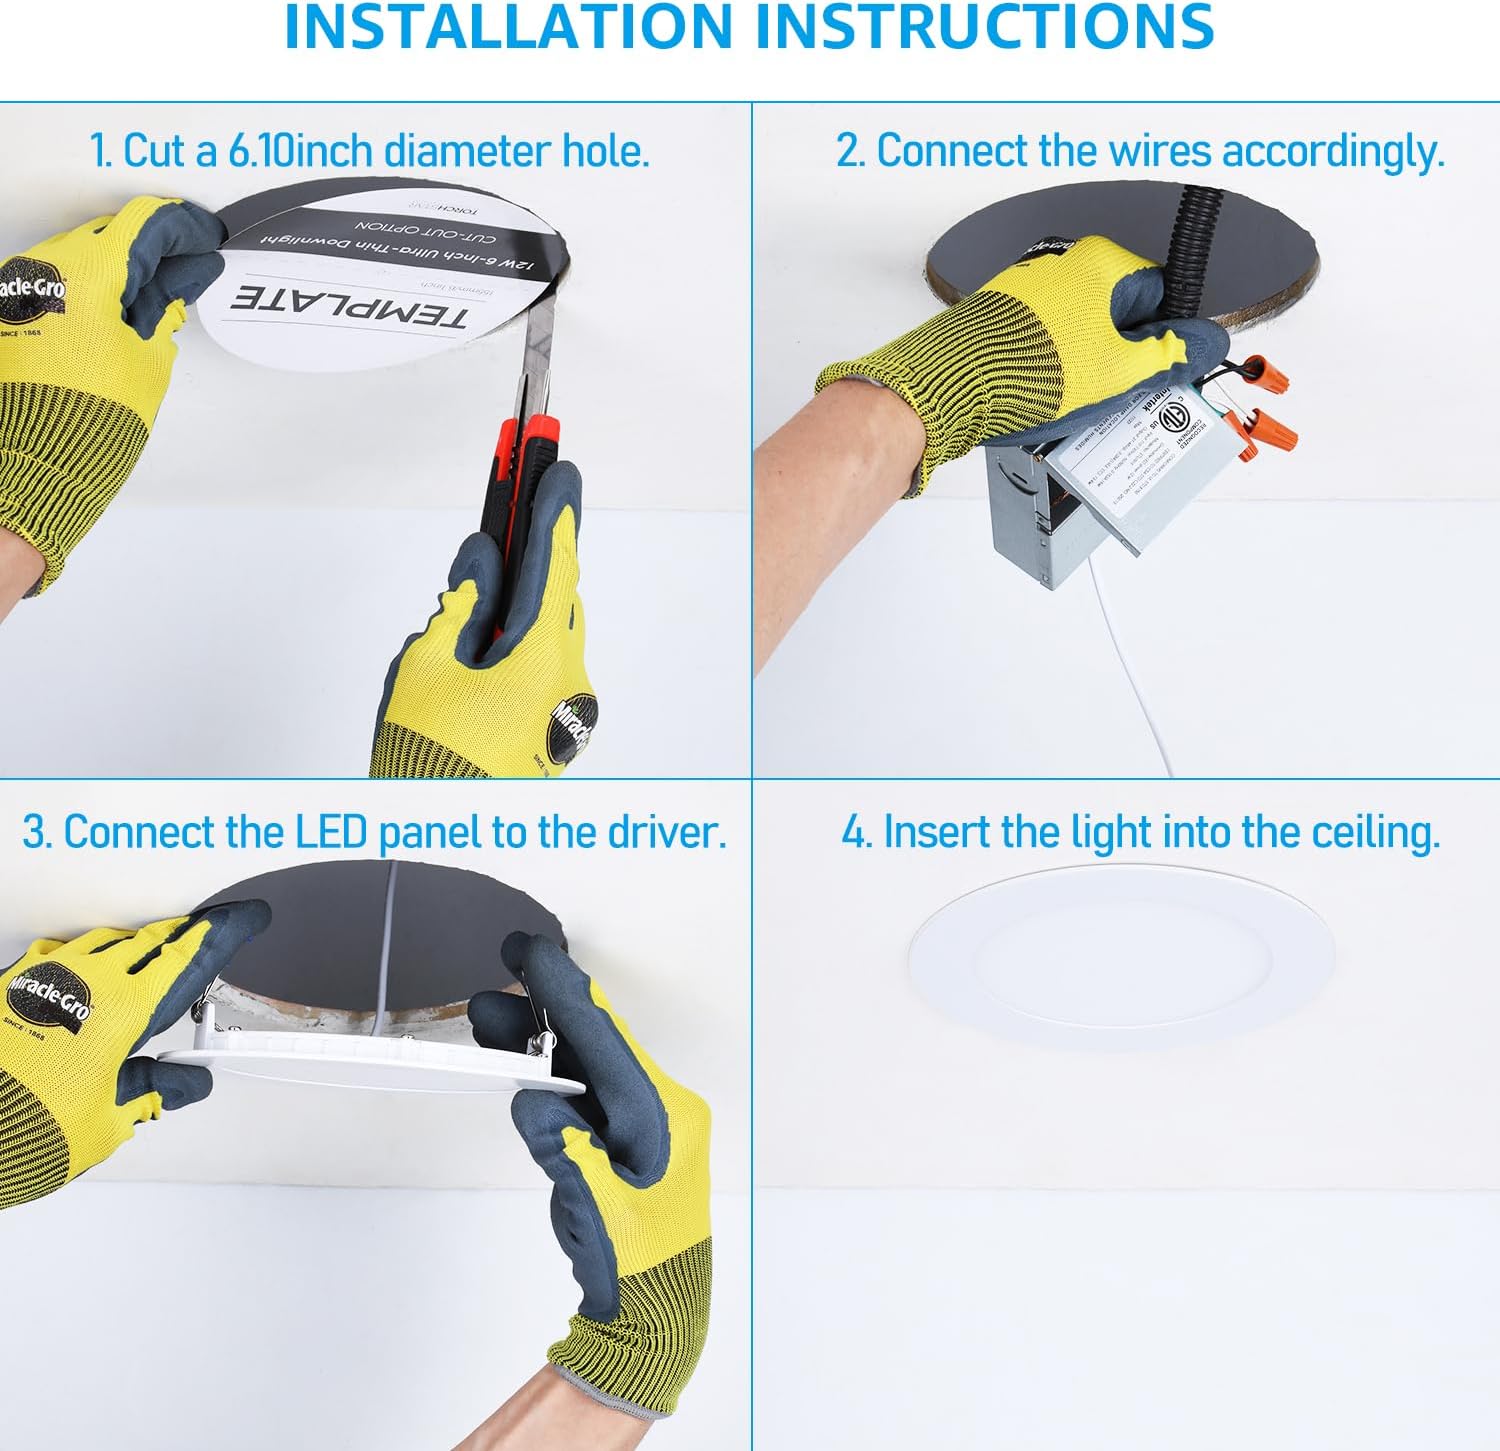
Image: Visual guide demonstrating the four steps of installation: cutting the hole, connecting wires, connecting the LED panel, and inserting the light into the ceiling.
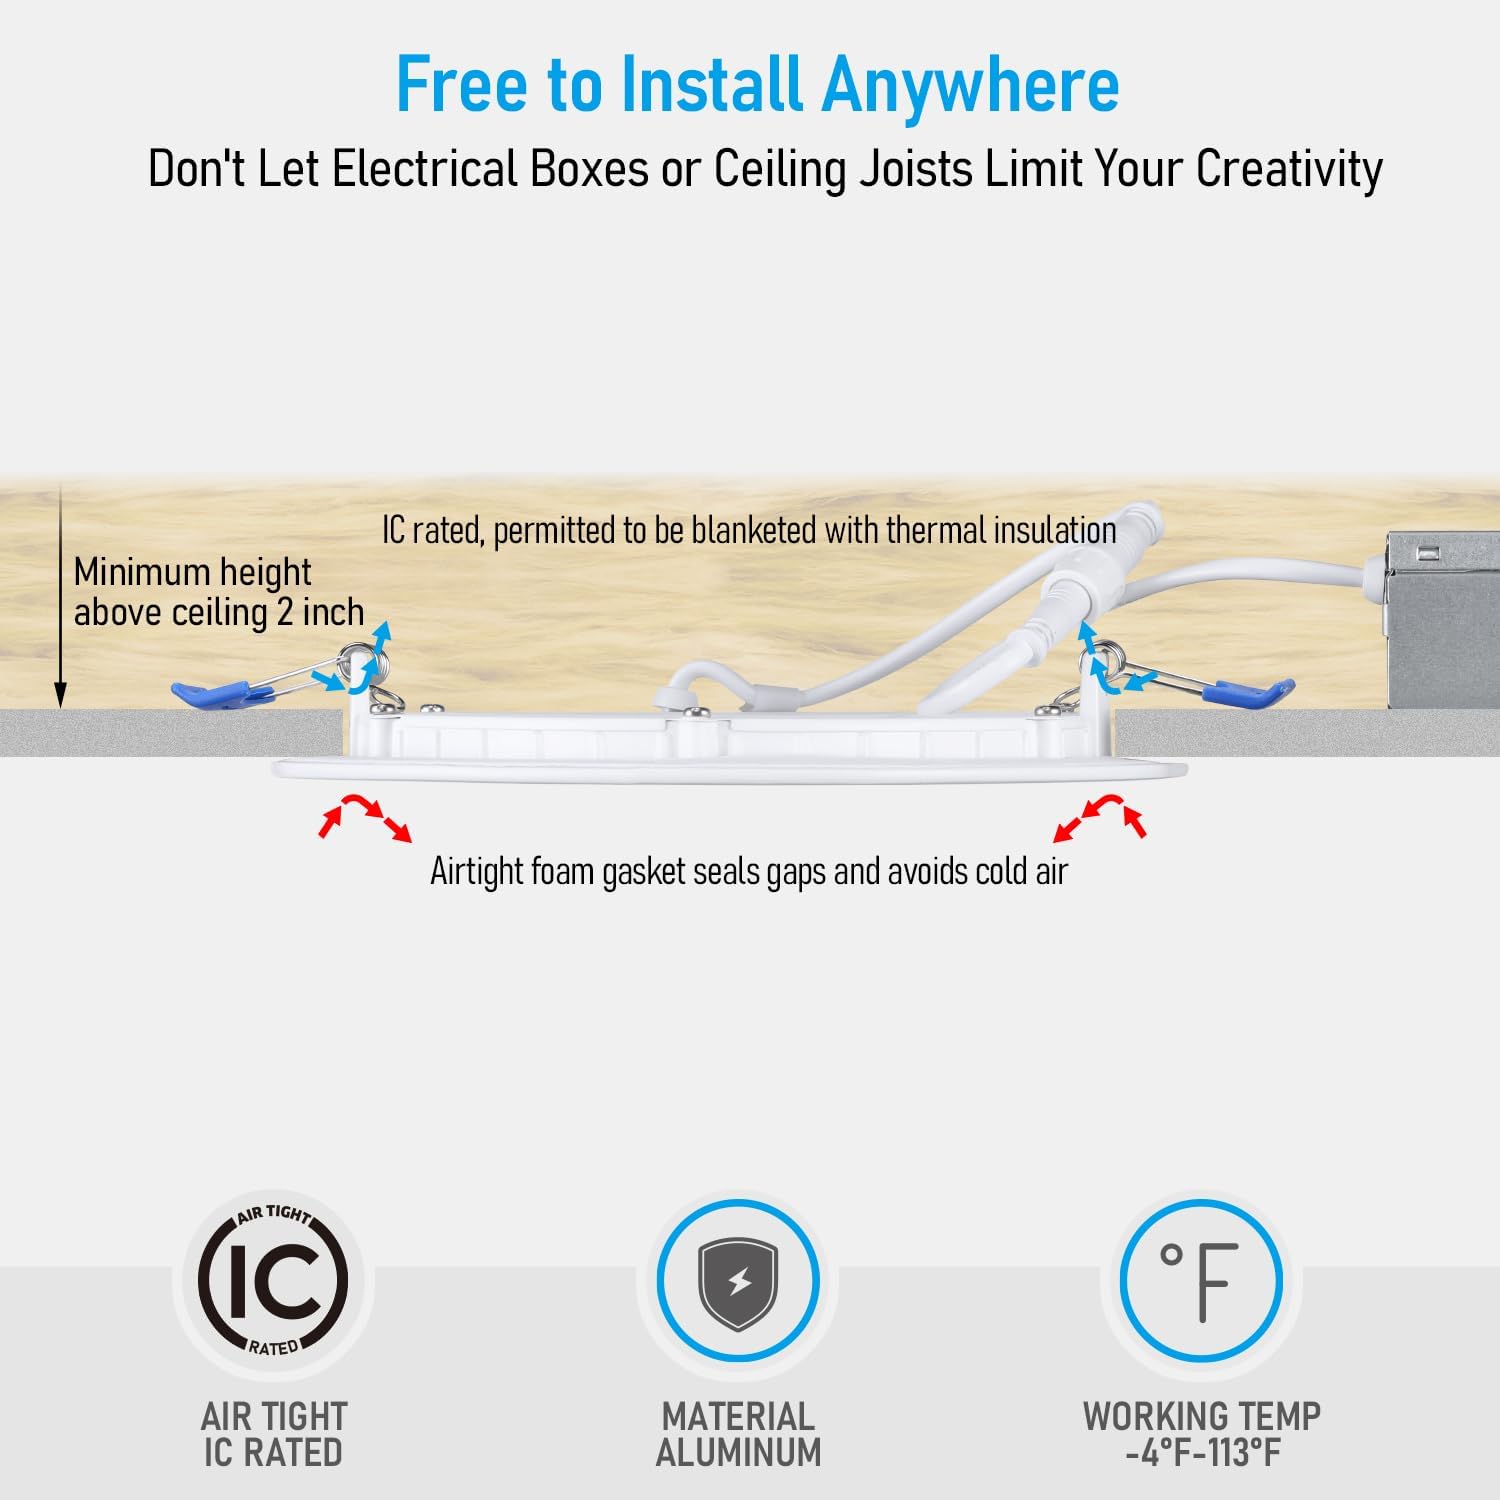
Image: Diagram illustrating the minimum 2-inch height clearance required above the ceiling and confirming the IC rating, allowing contact with thermal insulation. Also shows airtight foam gasket.

Image: An example of TORCHSTAR recessed lights installed in a modern kitchen setting, highlighting their seamless integration and illumination. Certifications (ETL, ES, T24) are also shown.
Operating Instructions
Once installed, your TORCHSTAR LED Recessed Lights are ready for operation. These lights are dimmable, allowing you to adjust the brightness to your preference.
- Power On/Off: Use your standard wall switch to turn the lights on or off.
- Dimming: If connected to a compatible dimmer switch (sold separately), you can adjust the light output from 5% to 100%. Ensure your dimmer switch is designed for LED lighting to prevent flickering or damage.

Image: A living room illuminated by TORCHSTAR recessed lights, showcasing their high CRI90 for accurate color rendering and their dimmable capability (5%-100%). Also indicates suitability for damp locations.
Maintenance
The TORCHSTAR LED Recessed Lights require minimal maintenance due to their long lifespan and durable construction.
- Cleaning: To clean the fixture, ensure the power is off. Use a soft, dry cloth to wipe away dust. For stubborn marks, a slightly damp cloth can be used, but avoid abrasive cleaners or excessive moisture.
- No Bulb Replacement: As these are integrated LED fixtures, there are no bulbs to replace.
Troubleshooting
If you encounter issues with your TORCHSTAR LED Recessed Lights, refer to the following common troubleshooting steps:
| Problem | Possible Cause | Solution |
|---|---|---|
| Light does not turn on | No power supply; Loose wiring connection; Faulty switch | Check circuit breaker; Verify all wire connections are secure; Test the switch. |
| Light flickers or hums | Incompatible dimmer switch; Loose wiring; Overloaded circuit | Ensure dimmer is LED compatible; Check wiring; Reduce load on circuit. |
| Light is not as bright as expected | Dimmer setting too low; Incorrect voltage | Adjust dimmer to 100%; Verify input voltage is 100-130V. |
Warranty and Support
TORCHSTAR products are built with quality and reliability in mind. This product is ETL certified and Energy Star listed, ensuring high standards of performance and safety.
For warranty claims or technical support, please contact TORCHSTAR customer service. Refer to the product packaging or the official TORCHSTAR website for the most current contact information.
Note: The product is designed to be durable and corrosion/rust-resistant due to its aluminum material.