1. Introduction
This manual provides essential information for the proper setup, operation, and maintenance of your Panasonic RF-P50D Pocket AM/FM Radio. Please read these instructions carefully before using the product to ensure optimal performance and safety.

Figure 1: Front view of the Panasonic RF-P50D Pocket AM/FM Radio. This image displays the radio's compact design, speaker grille, tuning dial, and extended telescopic antenna.
The Panasonic RF-P50D is a compact and portable AM/FM radio designed for convenient listening on the go. It features a classic design with a slide-rule tuning dial, an LED tuning indicator, and a built-in speaker. The radio operates on two AA batteries (not included) and includes a hand strap for portability.
2. Safety Information
WARNING: To reduce the risk of electric shock, fire, or injury, observe the following precautions:
- Do not put small parts in your mouth as there is a risk of choking. Keep out of reach of small children.
- Do not expose the unit to rain or moisture.
- Do not disassemble or modify the unit. Refer all servicing to qualified personnel.
- Use only the specified type of batteries. Ensure correct polarity when installing batteries.
- Remove batteries if the unit will not be used for a long period.
3. Package Contents
Verify that all items are present in the package:
- Panasonic RF-P50D Pocket AM/FM Radio
- Hand Strap (may be pre-attached)
- 3.5mm Monaural Earphone (included with some models)
- User Manual (this document)
4. Setup
4.1 Battery Installation
The radio requires two AA (R6/LR6, UM-3) batteries for operation. Batteries are not included.
- Locate the battery compartment cover on the back of the radio.
- Slide the battery compartment cover in the direction indicated by the arrow to open it.
- Insert two AA batteries, ensuring the correct polarity (+ and -) as marked inside the compartment.
- Close the battery compartment cover by sliding it back until it clicks into place.
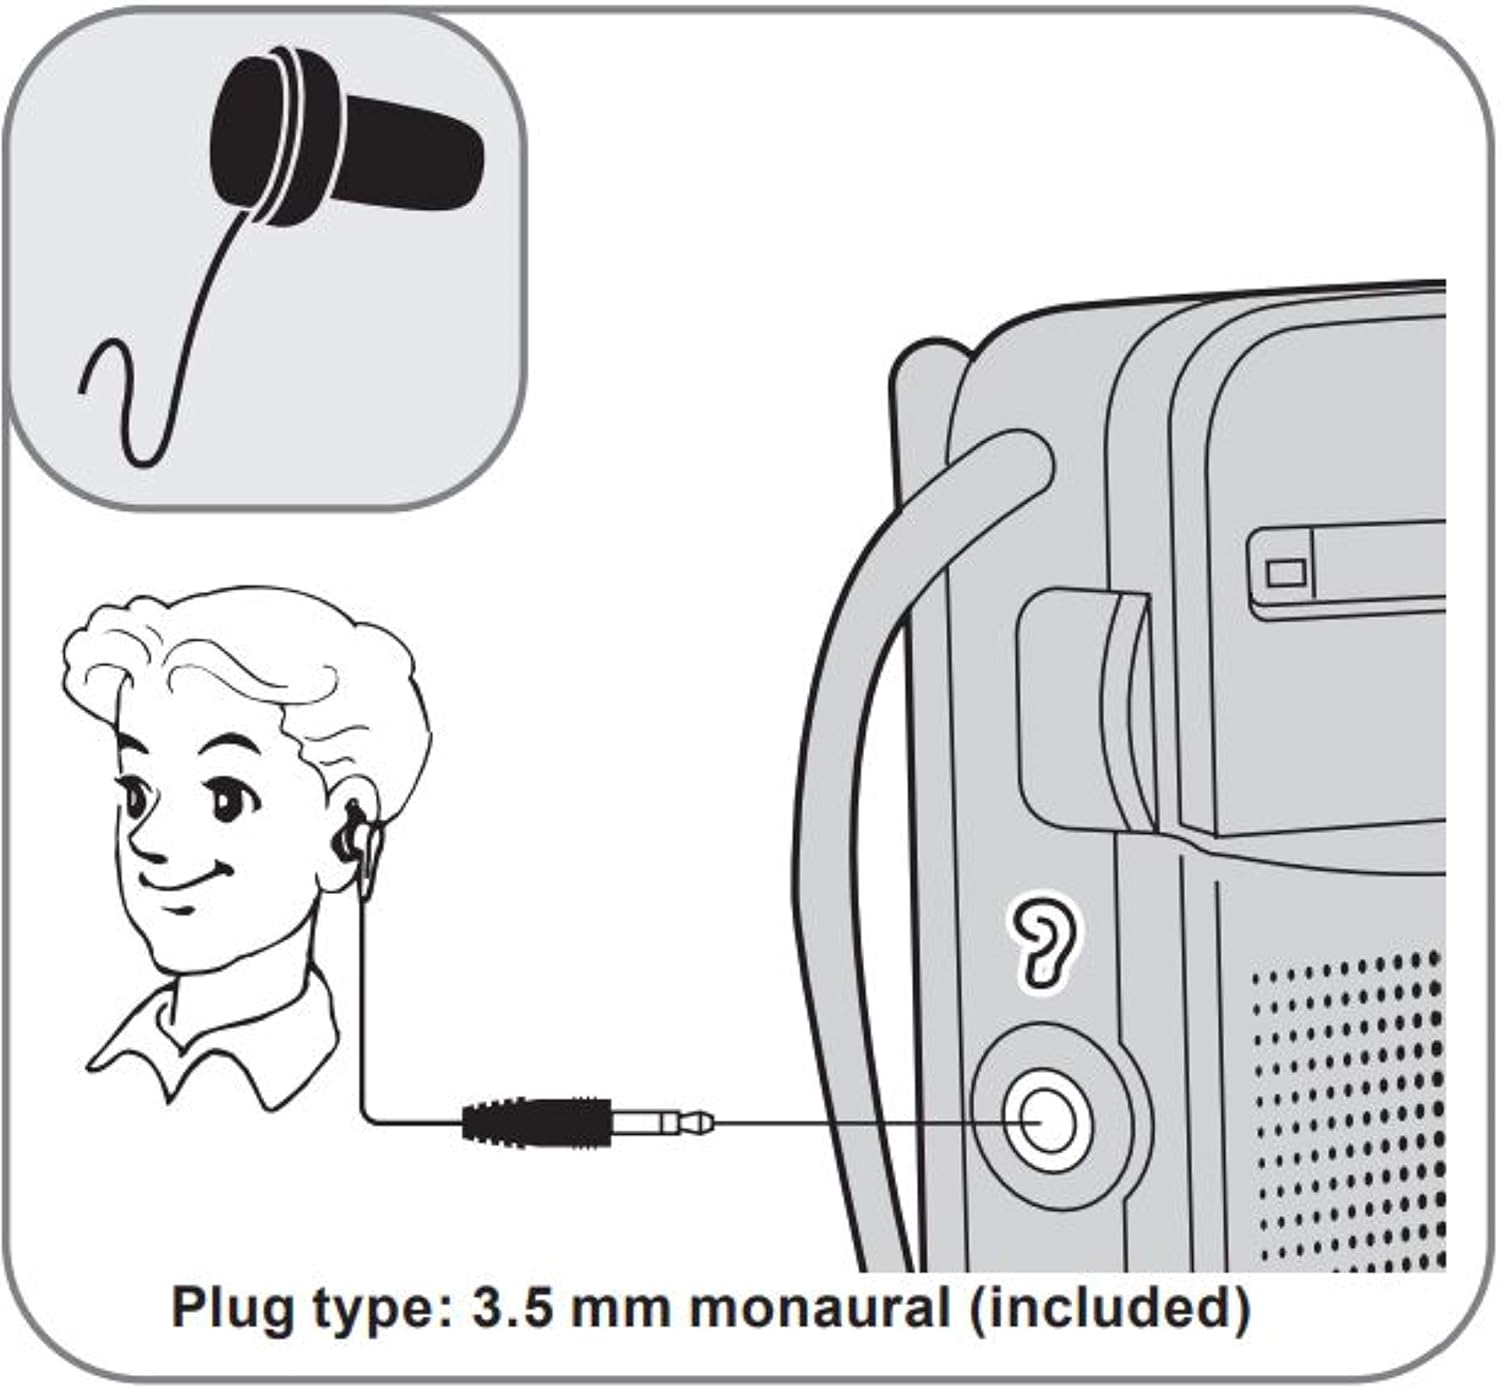
Figure 2: Battery installation diagram. Insert two AA batteries (R6/LR6, UM-3) according to the polarity markings.
4.2 Antenna Adjustment
For optimal FM reception, extend the telescopic antenna fully. For AM reception, the radio has a built-in ferrite bar antenna, so the telescopic antenna is not required. Adjust the radio's orientation for best AM reception.
4.3 Earphone Connection
To listen privately, connect a 3.5mm monaural earphone (included with some models) to the earphone jack located on the side of the radio.
Figure 3: Earphone connection diagram. Plug a 3.5mm monaural earphone into the designated jack.
5. Operating Instructions
5.1 Power On/Off and Volume Control
The radio's power and volume are controlled by a single rotary knob, typically located on the side of the unit. Rotate the knob clockwise to turn the radio on and increase the volume. Rotate counter-clockwise to decrease the volume and turn the radio off.
5.2 Band Selection (AM/FM)
Use the BAND switch, located on the side of the radio, to select between AM and FM bands.
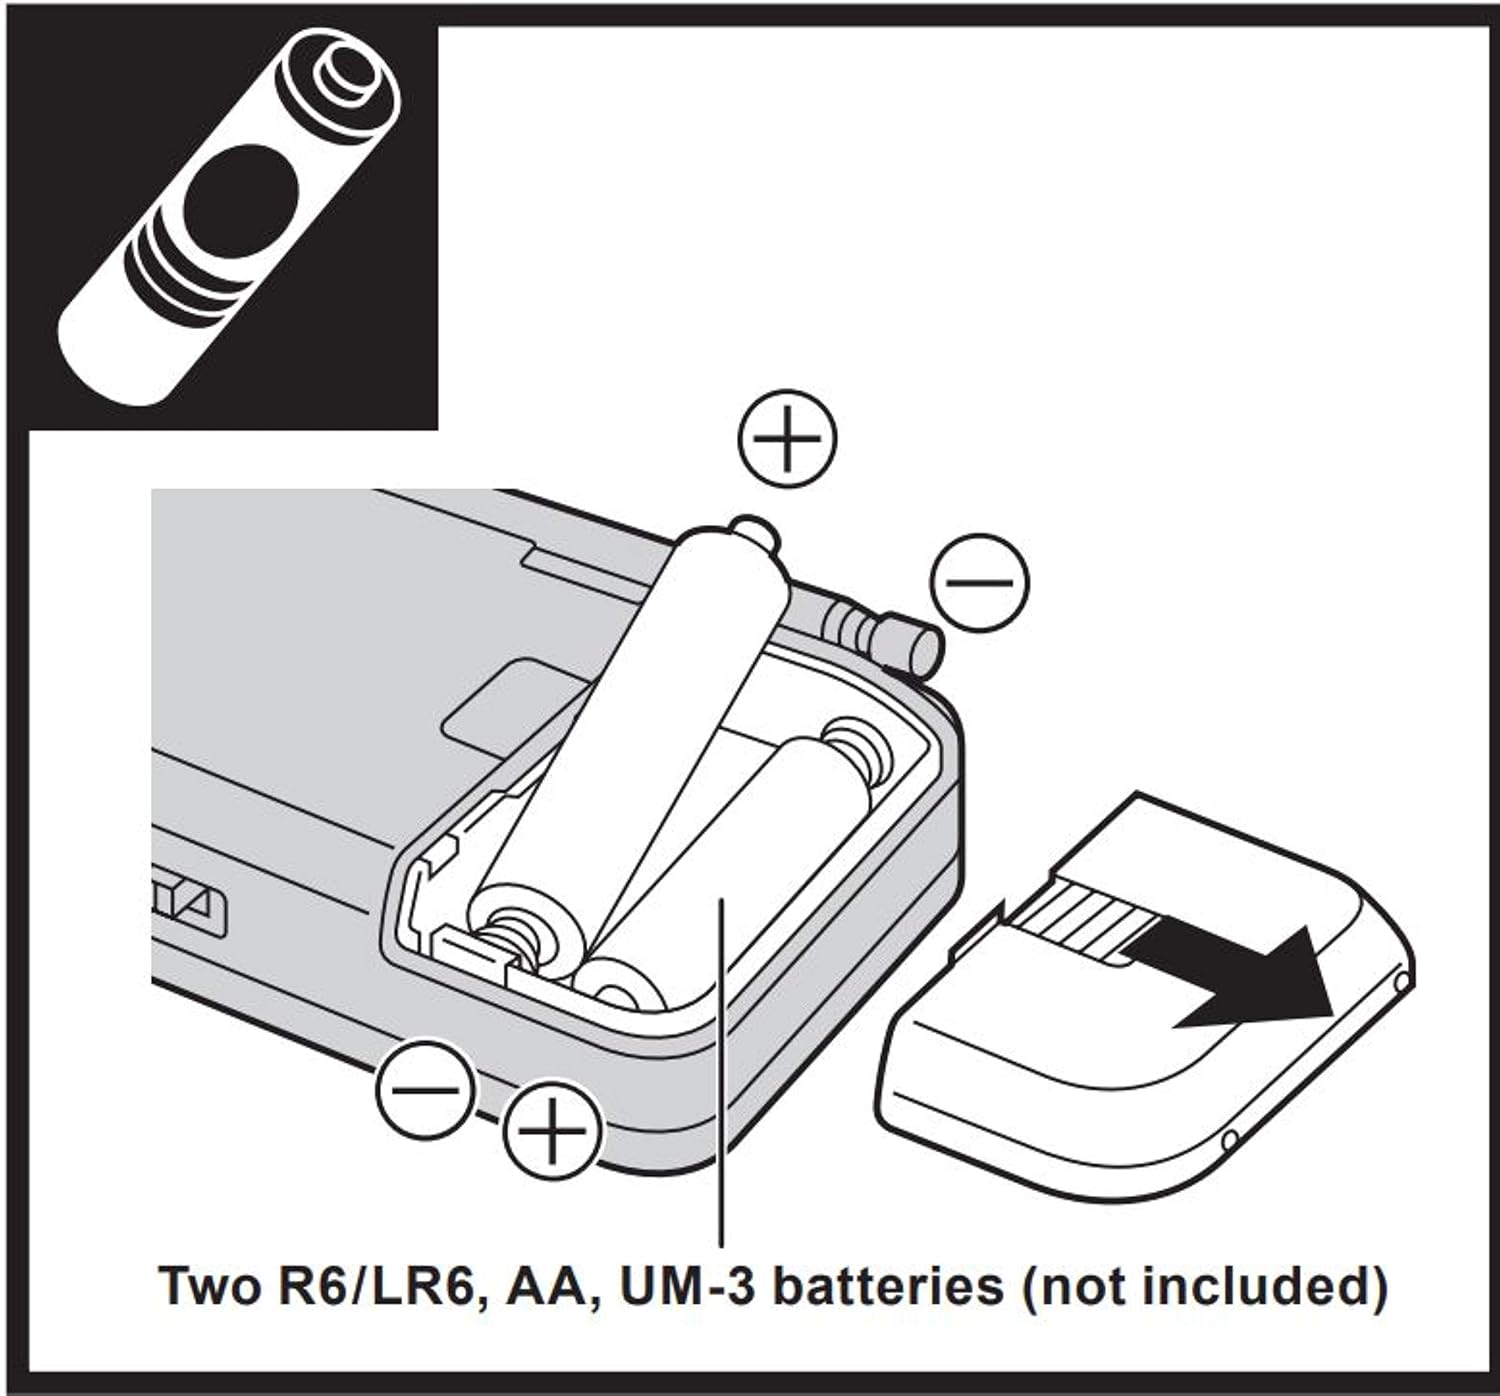
Figure 4: Band selection switch. Slide the switch up for FM and down for AM.
5.3 Tuning to a Station
Use the TUNING dial, a slide-rule mechanism on the side of the radio, to scan for stations. The red TUNING indicator LED will illuminate when a station is properly tuned, indicating optimal reception.

Figure 5: Side view showing the tuning dial and band selector. Use the slide-rule dial to adjust the frequency.
The RF-P50D features a new tuner with AFC (Automatic Frequency Control) for expanded reception range and improved station stability compared to conventional analog tuners.

Figure 6: Comparison of tuner performance. The new tuner with AFC provides an expanded reception range for clearer audio.
6. Maintenance
- Clean the radio with a soft, dry cloth. Do not use abrasive cleaners or solvents.
- Avoid exposing the radio to extreme temperatures, direct sunlight, or high humidity.
- If the radio will not be used for an extended period, remove the batteries to prevent leakage.
7. Troubleshooting
If you encounter issues with your radio, refer to the following common solutions:
| Problem | Possible Cause | Solution |
|---|---|---|
| No power | Batteries are dead or incorrectly installed. | Replace batteries with new AA batteries, ensuring correct polarity. |
| Poor reception / Static | Antenna not extended (FM). Radio orientation (AM). Weak signal. | Fully extend the telescopic antenna for FM. Rotate the radio for better AM reception. Try moving to a different location. |
| No sound | Volume is too low. Earphones connected. | Increase the volume. Disconnect earphones if you want to listen through the speaker. |
8. Specifications
| Feature | Detail |
|---|---|
| Model Number | RF-P50DGC-S |
| Tuner Technology | AM, FM (with AFC) |
| Power Source | 2 x AA Batteries (not included) |
| Connectivity | Auxiliary (3.5mm earphone jack) |
| Product Dimensions (approx.) | 3 x 5 x 2 inches (W x H x D) |
| Item Weight (approx.) | 4 ounces (without batteries) |
| Special Feature | Portable, LED Tuning Indicator |
| Color | Silver |
9. Warranty and Support
For warranty information or technical support, please refer to the warranty card included with your product or visit the official Panasonic website. You may also contact Panasonic customer service directly for assistance.
Panasonic Official Website: www.panasonic.com