1. Introduction
This manual provides detailed instructions for the safe and efficient operation of your KNACRO IMAX B6AC 80W Balance Battery Charger/Discharger. This device is designed to charge and discharge various battery types, including LiIon, LiPo, LiFe, NiCd, NiMh, and Pb batteries. It features advanced functions such as balance charging to prevent overcharging and ensure battery longevity.
2. Safety Instructions
Please read and understand all safety warnings and instructions before using the charger. Failure to do so may result in property damage, injury, or fire.
- Always supervise the charging process, especially when charging lithium batteries, to prevent overcharging which can lead to explosion.
- Ensure proper ventilation around the charger during operation to prevent overheating.
- Do not attempt to charge damaged or swollen batteries.
- Verify battery type, cell count, and charging current settings match your battery specifications before starting any process.
- Keep the charger away from moisture, heat sources, and flammable materials.
- Disconnect power immediately if any malfunction or unusual behavior is observed.
3. Package Contents
Carefully unpack the box and ensure all items listed below are present and in good condition.
- 1 x iMAX B6AC Battery Balance Charger
- 1 x Alligator Clip DC Input Cable
- 1 x XT60 Plug Output Cable
- 1 x Glow Charging Cable
- 1 x XT60 to JST Plug Charging Cable
- 1 x XT60 to JR Plug Charging Cable
- 1 x XT60 to Alligator Clip Charging Cable
- 1 x AC Input Cable
- 1 x English Manual
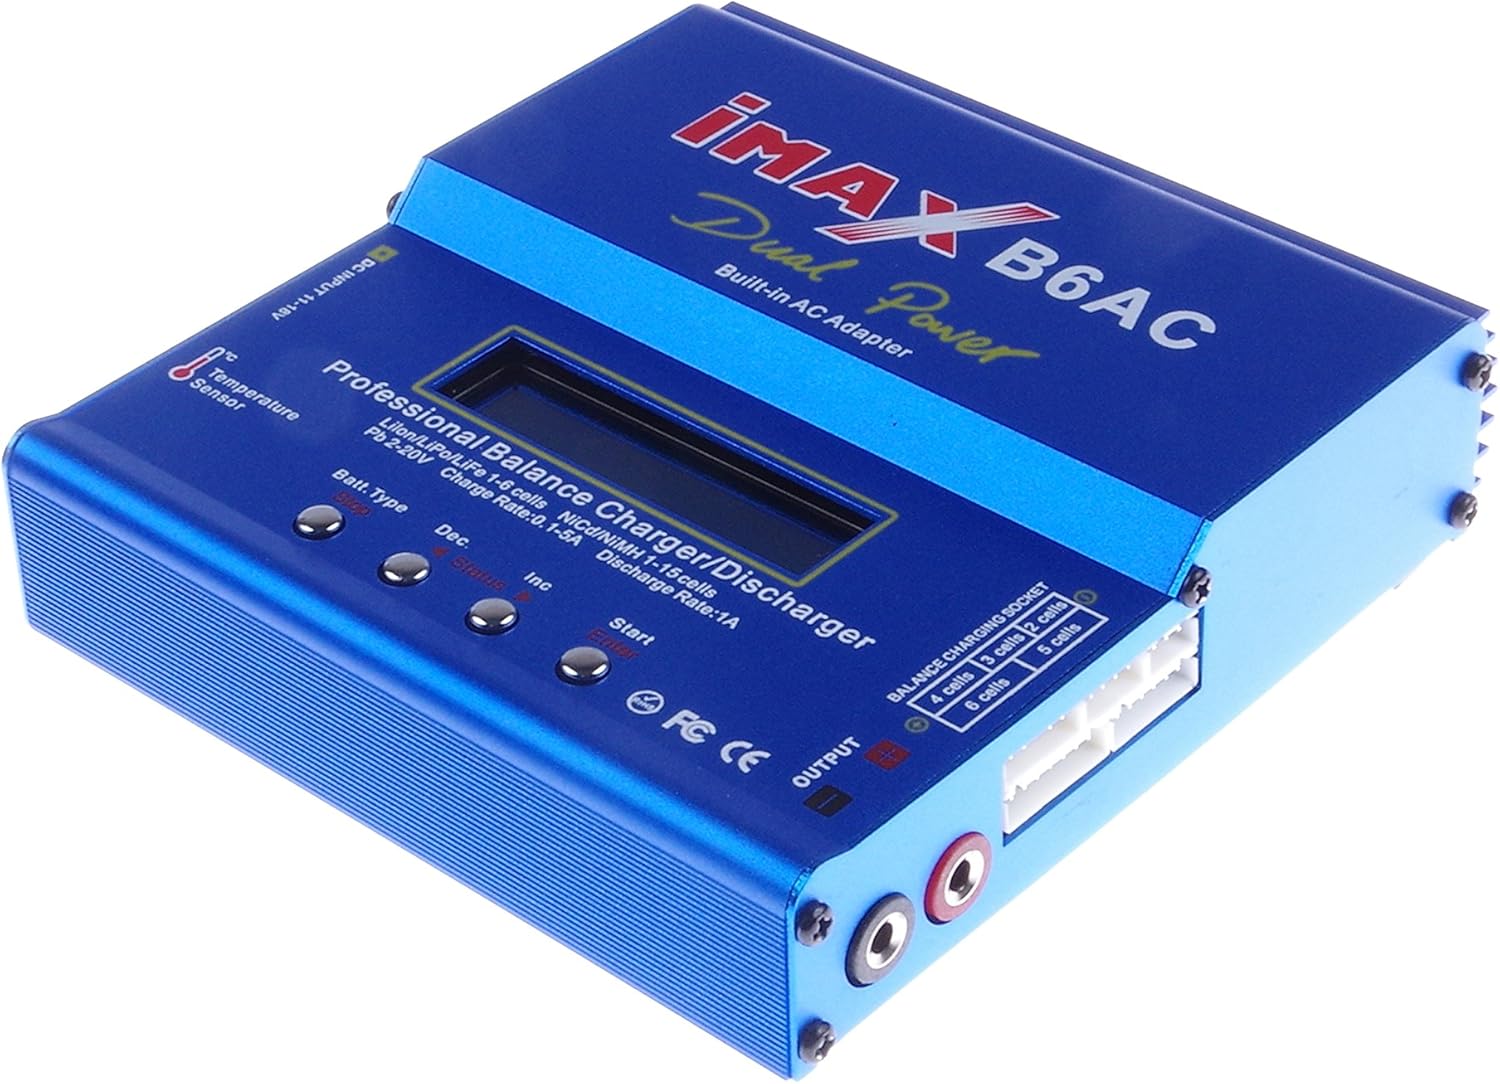
Image 3.1: The IMAX B6AC charger shown with its complete set of included cables and accessories, including the AC power cord, various charging cables with different connectors (XT60, JST, JR, Alligator Clip), and the DC input cable.

Image 3.2: A detailed view of the assortment of charging cables provided with the charger, featuring different connectors such as XT60, JST, JR, and alligator clips, designed for compatibility with various battery types.
4. Product Overview and Features
The KNACRO IMAX B6AC is a versatile professional balance charger/discharger with an integrated AC adapter, offering comprehensive battery management for hobbyists and professionals.

Image 4.1: A clear front view of the blue IMAX B6AC balance charger, highlighting its central LCD screen, control buttons, and various input/output ports. The 'Dual Power Built-in AC Adapter' text is visible.
Key Features:
- Automatic Functionality: Features an 'AUTO' function that sets feeding current during charging or discharging, preventing overcharging, especially for lithium batteries.
- Safety Mechanisms: Automatically disconnects circuits and alarms upon detecting malfunctions, ensuring maximum safety. All settings are user-configurable.
- Integrated Balance Charger: Employs an individual-cell-voltage balancer, eliminating the need for an external balancer for balance charging. Monitors and balances each cell during discharge, terminating the process if any cell voltage is abnormal.
- Versatile Lithium Battery Support: Adaptable to various lithium battery types including Li-ion, LiPo, and LiFe. Offers 'fast' charge for reduced duration and 'store' mode to optimize final voltage for long-term storage, protecting battery lifespan.
- Delta-Peak Sensitivity: Utilizes an automatic charge termination program based on Delta-peak voltage detection, ensuring charging stops when the battery's voltage exceeds a safe threshold.

Image 4.2: This image displays both the front panel and the bottom of the IMAX B6AC charger, revealing the ventilation grilles on the bottom for heat dissipation and important warning labels regarding operation and safety.
5. Setup
5.1 Connecting Power
The IMAX B6AC charger can be powered by either AC (100-240V) or DC (11-18V) input.
- AC Power: Connect the provided AC input cable to the charger's AC input port (located on the side) and then plug it into a wall outlet.
- DC Power: Connect the Alligator Clip DC Input Cable to a 11-18V DC power source (e.g., a car battery or a regulated DC power supply). Ensure correct polarity.

Image 5.1: A side view of the IMAX B6AC charger, clearly showing the AC input port for wall power and the DC input port for external 11-18V power sources. Ventilation grilles are also visible.
5.2 Connecting Batteries
Connect your battery to the charger's output ports. For lithium batteries, always use the balance port in conjunction with the main charging port for safety and optimal performance.
- Main Output: Use the appropriate charging cable (e.g., XT60, JST, JR, Alligator Clip) to connect your battery's main power lead to the charger's output banana sockets.
- Balance Port (for Lithium Batteries): For LiPo, LiFe, and LiIon batteries, connect the battery's balance lead to the corresponding balance port on the charger (2S-6S).

Image 5.2: This image provides a close-up of the charger's output section, detailing the banana sockets for power output and the multi-pin balance charging socket, labeled for 2S to 6S battery configurations.
6. Operating Instructions
6.1 Navigating the Menu
The charger features an LCD screen and four control buttons for navigation and setting adjustments.

Image 6.1: An annotated image of the IMAX B6AC charger's control panel, clearly labeling the functions of each button: 'Batt. Type/Stop' for selecting battery type and stopping programs, 'Dec' for decreasing values, 'Inc' for increasing values, and 'Start/Enter' for initiating processes and confirming selections.
- Batt. Type / Stop: Press to cycle through main menu options or to stop a running program.
- Dec (-): Decreases selected values or moves backward in menus.
- Inc (+): Increases selected values or moves forward in menus.
- Start / Enter: Initiates a program or confirms a selection. Press and hold to start a program.
6.2 Charging Lithium Batteries (LiPo/LiFe/LiIon)
Always connect both the main power lead and the balance lead for lithium batteries.
- From the main menu, use the Batt. Type button to select the appropriate lithium battery type (e.g., LiPo BATTERY).
- Press Start/Enter to enter the program menu.
- Use Inc/Dec to select the desired charging mode (e.g., BALANCE, FAST CHG, STORAGE, DISCHARGE).
- Press Start/Enter to confirm the mode.
- Adjust the charging current and cell count using Inc/Dec. For balance charging, the charger will automatically detect the cell count.
- Press and hold Start/Enter for 3 seconds to begin the process. The charger will perform a battery check. Confirm by pressing Start/Enter again.
Balance Charge:
Recommended for regular charging to ensure all cells are equally charged, maximizing battery life and safety.
Fast Charge:
Charges the battery quickly to approximately 90% capacity without balancing, suitable when time is limited.
Storage Charge:
Charges or discharges the battery to a specific voltage level ideal for long-term storage, preserving battery health.
Discharge:
Discharges the battery to a user-defined voltage. Useful for preparing batteries for storage or cycling.
6.3 Charging NiMH/NiCD Batteries
- From the main menu, select NiMH BATTERY or NiCD BATTERY using the Batt. Type button.
- Press Start/Enter to enter the program menu.
- Select CHARGE or DISCHARGE mode.
- Adjust the charging/discharging current and the Delta-Peak sensitivity (if applicable) using Inc/Dec.
- Press and hold Start/Enter for 3 seconds to begin.
6.4 Charging Pb Batteries
- From the main menu, select PB BATTERY using the Batt. Type button.
- Press Start/Enter to enter the program menu.
- Select CHARGE or DISCHARGE mode.
- Adjust the charging/discharging current and voltage using Inc/Dec.
- Press and hold Start/Enter for 3 seconds to begin.
6.5 User Settings
The charger allows customization of various parameters such as safety timer, capacity limit, temperature cut-off, and buzzer settings. Access these settings from the main menu by cycling through options with the Batt. Type button until 'USER SET PROGRAM' appears.
7. Maintenance
Proper maintenance ensures the longevity and reliable operation of your charger.
- Cleaning: Regularly wipe the charger with a soft, dry cloth. Do not use solvents or abrasive cleaners.
- Storage: Store the charger in a cool, dry place away from direct sunlight and extreme temperatures.
- Inspection: Periodically check cables and connectors for any signs of wear, damage, or corrosion. Replace damaged components immediately.
- Ensure ventilation openings are clear of dust and debris.
8. Troubleshooting
If you encounter issues with your charger, refer to the common problems and solutions below.
- 'CONNECTION BREAK' Error: This indicates a poor connection between the charger and the battery. Check all cables and connectors for secure attachment and damage.
- 'CELL ERROR' or 'VOLTAGE ERROR': This typically occurs with lithium batteries when the cell count detected by the charger does not match the setting, or if a cell voltage is critically low/high. Verify your battery settings and inspect the battery for damage.
- Charger Not Powering On: Ensure the AC or DC input cable is securely connected and the power source is active. Check for any blown fuses in the power supply or charger (if accessible).
- Overheating: If the charger becomes excessively hot, ensure it has adequate ventilation and is not covered. Reduce the charging current if possible.
- Charging Process Stops Prematurely: Check if safety timers, capacity limits, or temperature cut-offs are enabled in the user settings and adjust if necessary.
9. Specifications
| Specification | Value |
|---|---|
| Input Voltage Range | AC 100-240V 50/60 Hz / DC 11.0-18.0 Volt |
| Output Voltage Range | DC 2~20V |
| Max. Charge Power | 80W |
| Max. Discharge Power | 10W |
| Charge Current Range | 0.1-6.0A |
| Discharge Current Range | 0.1-2.0A |
| Current Drain for Balancing Li-Po | 300mAh/cell |
| LiIon/LiPo/LiFe Cells | 1-6 cells |
| NiCd/NiMH Cells | 1-15 cells |
| Pb Battery Voltage | 2~20V |
| Item Size | 133 x 142 x 36mm |
| Item Weight | 800g (approx. 1.76 lbs) |
10. Support and Warranty
For technical support or warranty inquiries, please contact your retailer or the manufacturer directly. Keep your purchase receipt as proof of purchase.
Manufacturer: KNACRO