
1. Introduction
Thank you for purchasing the Andoer HDV-Z20 Digital Camcorder. This manual provides detailed instructions for the proper use, setup, operation, and maintenance of your device. Please read this manual thoroughly before using the camcorder to ensure optimal performance and to prevent damage.
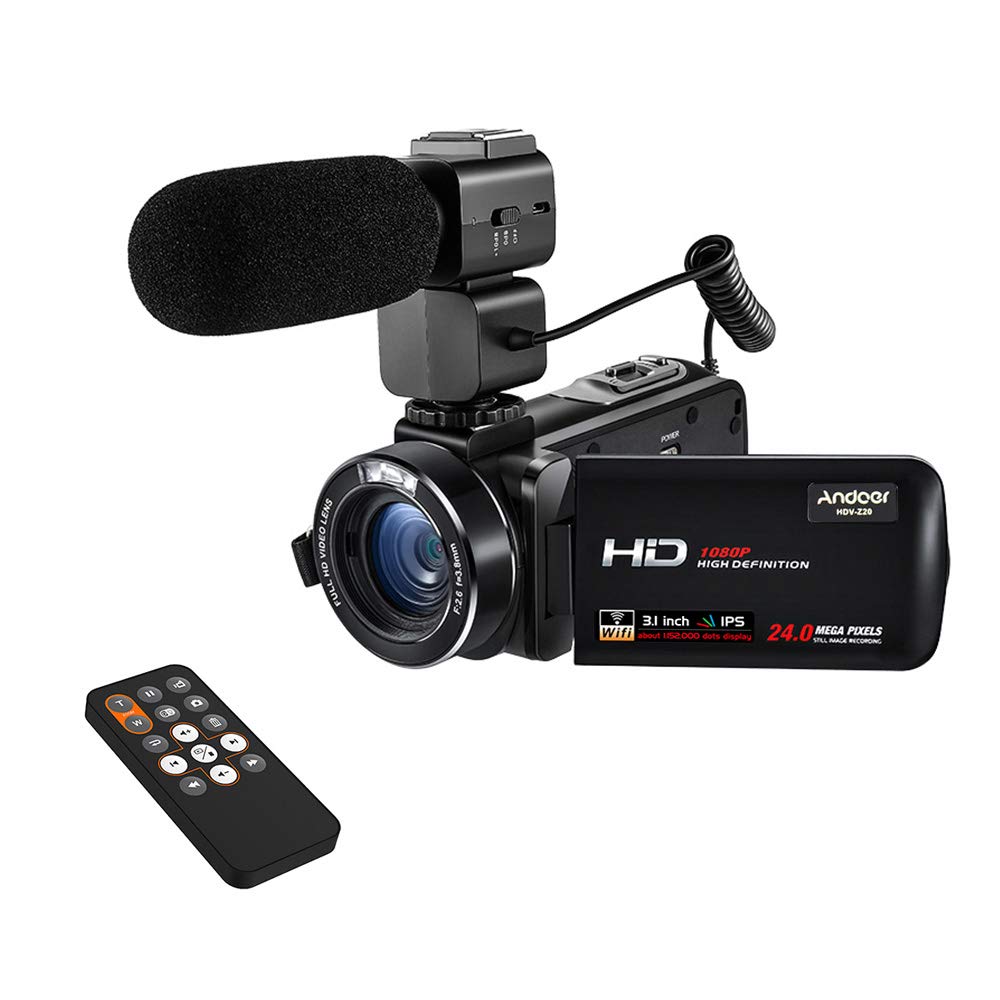
Image 1.1: Andoer HDV-Z20 Digital Camcorder. This image shows the overall design of the camcorder from a front-side angle.
2. Product Overview
2.1 Key Features
- High-Resolution Imaging: Equipped with an 8-megapixel CMOS sensor, capable of 1080P Full HD video recording at 30 frames per second and still images up to 24 megapixels (5600 * 4200).
- External Microphone: Includes an aluminum alloy external microphone with NCR noise reduction technology, a 3-level anti-vibration design, and a windscreen to minimize environmental noise.
- Display: Features a 3.0-inch TFT LCD rotating touchscreen for easy navigation and viewing.
- Zoom and Stabilization: Offers 16x digital zoom and digital image stabilization.
- Connectivity: Supports WiFi for smartphone app control (LzxViewer app), HDMI output for TV connection, and USB for PC connection.
- Storage: Compatible with external SD cards up to 64GB (not included).
- Additional Features: LED fill light for low-light conditions, hot shoe mount for accessories, and a multi-function remote controller.
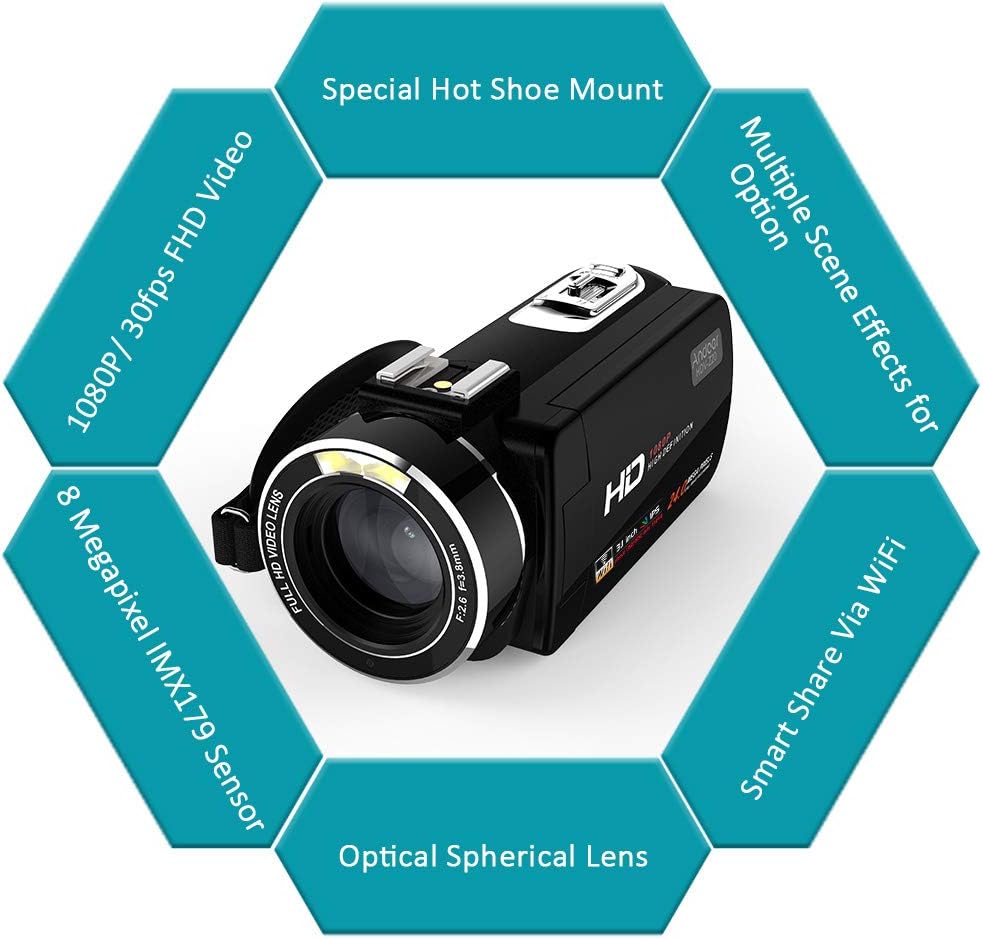
Image 2.1: Key features of the Andoer HDV-Z20 camcorder, including 1080P/30fps FHD Video, 8 Megapixel IMX179 Sensor, Optical Spherical Lens, Smart Share Via WiFi, Multiple Scene Effects, and Special Hot Shoe Mount.
2.2 Package Contents
Please check the package for the following items:
- Andoer HDV-Z20 Digital Video Camera (with NP-40 Li-ion Battery)
- Remote Control (with CR2025 Button Cell Battery)
- External Microphone (with CR2032 Button Cell Battery)
- Lens Cap
- USB Cable
- HD Cable (HDMI)
- Camera Bag
- Strap
- Camera User Manual (English)
- Microphone User Manual (English/Chinese)
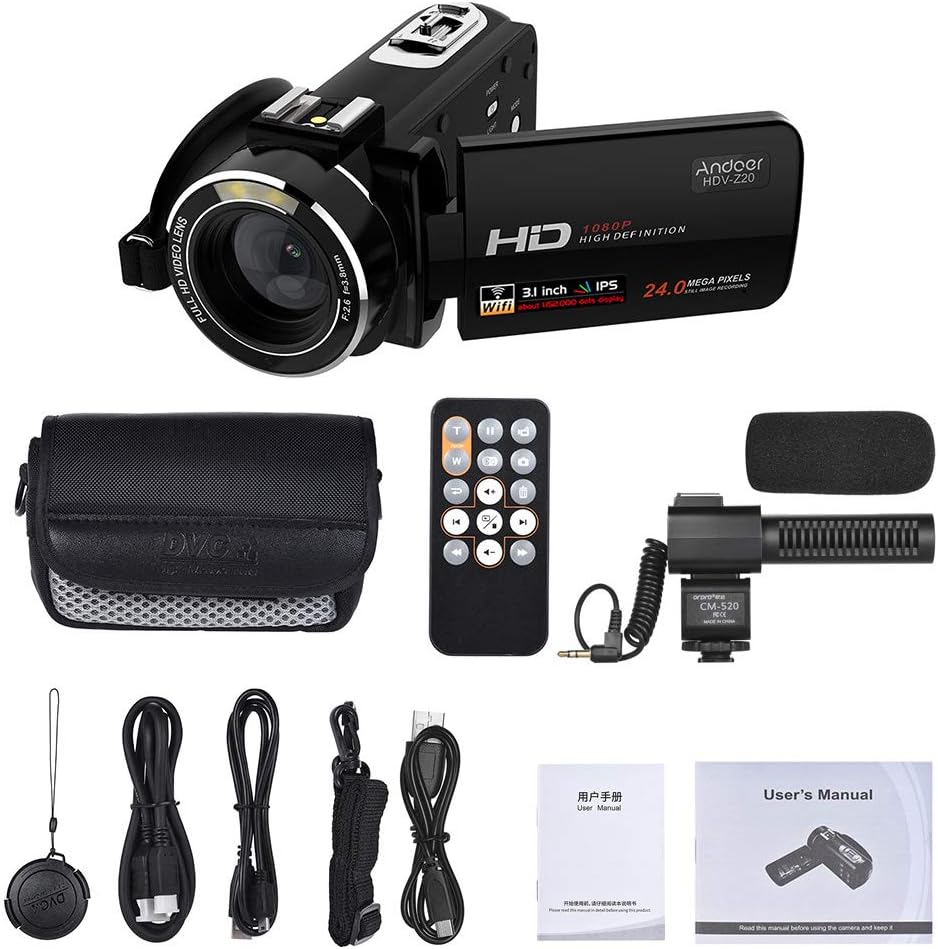
Image 2.2: All items included in the Andoer HDV-Z20 camcorder package, showing the camera, remote, microphone, cables, bag, strap, and manuals.
3. Setup
3.1 Battery Installation
- Open the battery compartment cover located at the bottom of the camcorder.
- Insert the provided NP-40 Li-ion battery, ensuring the correct polarity. Important: Remove any plastic protective sticker from the battery terminals before insertion.
- Close the battery compartment cover securely.
- For first use, fully charge the battery using the supplied USB cable and a compatible USB power adapter (not included).
3.2 Memory Card Installation
The camcorder supports SD cards up to 64GB. A memory card is not included in the package and must be purchased separately.
- Locate the SD card slot, usually on the side or bottom of the camcorder.
- Insert the SD card with the metal contacts facing the correct direction (refer to the diagram near the slot if available) until it clicks into place.
- To remove, gently press the card inward until it springs out.
3.3 External Microphone Installation
- Slide the external microphone onto the hot shoe mount located on top of the camcorder.
- Secure the microphone by tightening the locking mechanism on its base.
- Connect the microphone's 3.5mm audio jack into the microphone input port on the camcorder.
- Ensure the CR2032 button cell battery is installed in the microphone. Important: Remove any plastic protective sticker from the battery terminals before insertion.

Image 3.1: Detailed view of the external microphone, showing its NCR denoise technology, +10dB sensitivity adjustment switch, and windscreen for minimizing environmental noise.
3.4 Initial Power On
- Open the LCD screen. This action typically powers on the camcorder automatically.
- If the camcorder does not power on, press and hold the 'POWER' button.
- Follow any on-screen prompts for initial setup, such as setting the date and time.
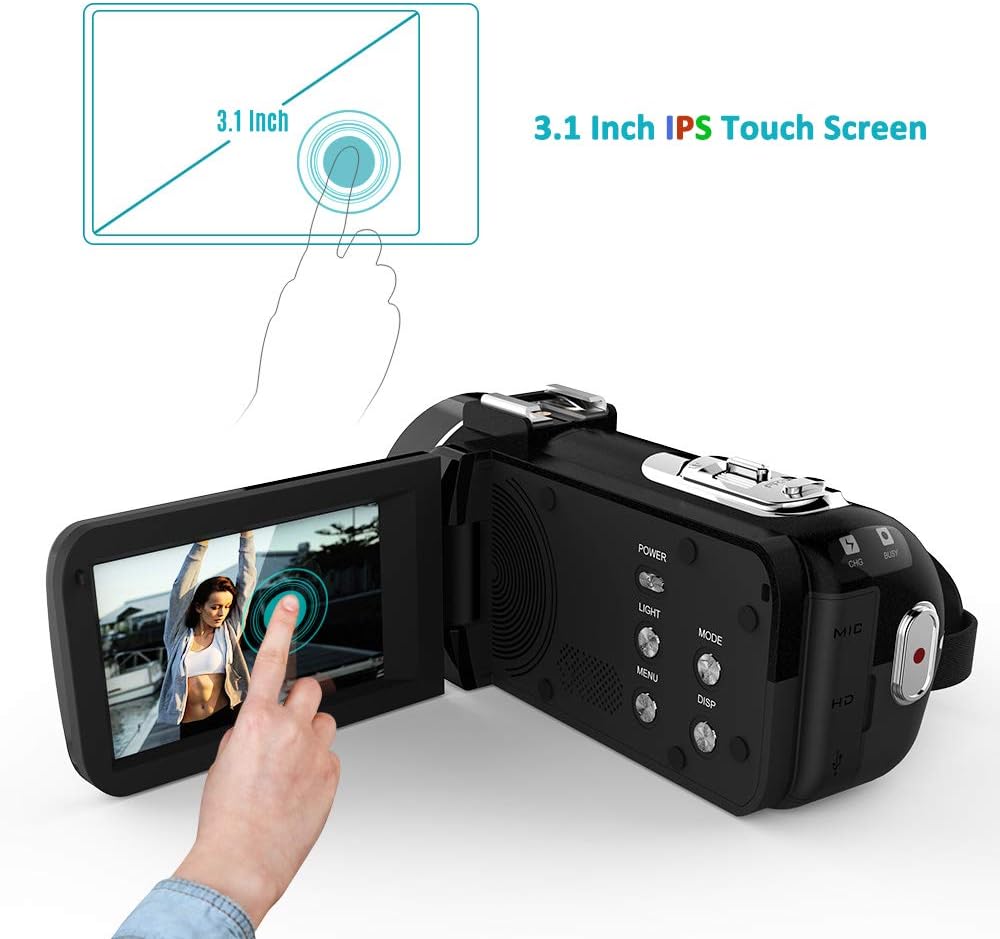
Image 3.2: The 3.0-inch IPS touchscreen of the Andoer HDV-Z20 camcorder, shown open and displaying a live view, with a finger interacting with the screen.
4. Operating Instructions
4.1 Basic Operation
- Power On/Off: Open the LCD screen to power on. Close the LCD screen or press and hold the 'POWER' button to power off.
- Mode Selection: Use the 'MODE' button or the touchscreen interface to switch between video recording mode, photo capture mode, and playback mode.
- Recording Video: In video mode, press the 'RECORD' button (usually a red circle) to start recording. Press it again to stop.
- Capturing Photos: In photo mode, press the 'SHUTTER' button to take a picture.
- Zoom: Use the 'W' (Wide) and 'T' (Telephoto) buttons to adjust the 16x digital zoom.

Image 4.1: Illustration of the 24-megapixel photo capability and the 16x digital zoom function, showing how zooming in magnifies a subject.
4.2 Advanced Features
- WiFi Connectivity & App Control:
- Enable WiFi on the camcorder via the menu settings.
- Download the 'LzxViewer' app on your smartphone (available for iOS and Android).
- Connect your smartphone to the camcorder's WiFi network (SSID and password will be displayed on the camcorder screen).
- Once connected, you can control the camcorder remotely, view live footage, take photos, record videos, and transfer files via the app.
- Remote Control: Use the included remote control for convenient operation from a distance, including starting/stopping recording, taking photos, and navigating menus. Important: Ensure the CR2025 button cell battery is installed in the remote and any plastic protective sticker is removed.
- LED Fill Light: Activate the built-in LED light for additional illumination in dark environments. This option is usually found in the camcorder's menu or via a dedicated button.
- Timing Photography: The camcorder supports timing photography, allowing you to set a delay before a photo is taken, useful for selfies or group shots.

Image 4.2: Illustration of the camcorder's WiFi remote control feature, showing the camcorder connected to smartphones via the LzxViewer app for shooting, recording, and zooming.
4.3 Connecting to TV/PC
- HDMI Output (to TV): Use the supplied HD cable to connect the camcorder's HDMI output port to an HDMI input port on your television. Switch your TV's input source to the corresponding HDMI port to view your recordings.
- USB Connection (to PC): Use the supplied USB cable to connect the camcorder to your computer. The camcorder will typically appear as a removable storage device, allowing you to transfer photos and videos.

Image 4.3: The camcorder connected to a computer via USB and displaying its output on a monitor, demonstrating 1080P/30fps Full HD video recording and HDMI output capabilities.
5. Maintenance
5.1 Cleaning
- Lens: Use a soft, lint-free cloth specifically designed for camera lenses to gently wipe the lens. For stubborn smudges, use a small amount of lens cleaning solution. Avoid touching the lens with your fingers.
- LCD Screen: Wipe the touchscreen with a soft, dry microfiber cloth. Do not use abrasive cleaners or solvents.
- Body: Clean the camcorder body with a soft, dry cloth. If necessary, slightly dampen the cloth with water, then wipe dry immediately.
5.2 Storage
- Store the camcorder in a cool, dry place away from direct sunlight, extreme temperatures, and high humidity.
- When storing for extended periods, remove the battery from the camcorder and store it separately.
- Use the provided camera bag to protect the camcorder from dust and scratches.
6. Troubleshooting
| Problem | Possible Cause | Solution |
|---|---|---|
| Camcorder does not power on. | Battery is dead or not installed correctly. Protective sticker on battery terminals. | Charge the battery. Ensure the battery is inserted with correct polarity. Remove any plastic protective sticker from battery terminals. |
| Cannot record video or take photos. | No SD card or SD card full/corrupted. Incorrect mode selected. | Insert a compatible SD card. Format the SD card (this will erase all data). Switch to video or photo mode. |
| Poor audio quality with external microphone. | Microphone not connected properly. Microphone battery low/dead. Sensitivity setting incorrect. | Ensure microphone is securely connected to the hot shoe and audio jack. Check/replace microphone battery. Adjust microphone sensitivity (+10dB switch). |
| WiFi connection issues. | Incorrect WiFi password. App not installed or outdated. Distance too far. | Verify WiFi password. Ensure 'LzxViewer' app is installed and updated. Stay within 3 meters of the camcorder for optimal connection. |
| Images/videos are blurry. | Lens is dirty. Digital image stabilization off. | Clean the lens. Ensure digital image stabilization is enabled in settings. |
7. Specifications
| Feature | Detail |
|---|---|
| Model Name | HDV-Z20 |
| Image Sensor | 8 Megapixel CMOS Sensor |
| Video Resolution | 1080P (1920*1080) 30fps, 720P, VGA |
| Image Resolution | 24M (5600*4200), 20M, 16M, 12M, 10M, 7MHD, 5M, 3M, 2MHD, VGA |
| Video Format | MOV |
| Image Format | JPEG |
| Lens | F=3.8mm, fno: 2.6, 37mm wire |
| Zoom | 16x Digital Zoom |
| Display Screen | 3.0-inch TFT LCD Touchscreen |
| Storage Media | SD Card, Max 64GB (not included) |
| Connectivity | USB, HDMI, WiFi |
| Camera Battery | 3.7V 1250mAh NP-40 Li-ion Battery |
| Remote Control Battery | CR2025 3V Button Cell Battery |
| Microphone Battery | CR2032 3V Button Cell Battery |
| Microphone Frequency Response | 50Hz – 16kHz |
| Microphone Sensitivity | -37dB ± 3dB (0dB=1V/Pa at 1kHz), +10dB enhancement |
| Dimensions (Camera) | 12.6 * 6.1 * 5.8 cm / 5 * 2.4 * 2.3 in (L*H*W) |
| Weight (Camera) | 320 g / 11.3 oz |
8. Warranty and Support
For warranty information and technical support, please refer to the documentation provided with your purchase or contact Andoer customer service through their official website. Please retain your proof of purchase for any warranty claims.
