onlyfire F-FPA5086-BR1
All-in-One Propane Gas Fire Pit Ignition System Kit
Brand: onlyfire
Product Overview
The onlyfire All-in-One Propane Gas Fire Pit Ignition System Kit provides a comprehensive solution for building a propane-fueled fire pit. This kit includes all necessary components, simplifying the setup process and ensuring safe and efficient operation. It is designed for use with propane tanks and integrates an electronic igniter for convenient lighting, a key valve for gas control, and an air mixer valve for clean burning.

Image: The complete onlyfire All-in-One Propane Gas Fire Pit Ignition System Kit, showcasing the control panel, hoses, and regulator.
Package Contents
Please ensure all the following components are present in your kit:
- Electronic Igniter
- Shut-off Key Valve with 3-inch Key
- Stainless Steel Installation Box
- High Pressure Regulator with 5-feet Hose (for propane tank connection)
- Flexible 5-feet PVC Hose with 5/8 UNF Female Nut at each end
- Air Mixer Valve
- Connect Fittings

Image: A detailed view of the kit's components, including the spark ignition kit, 5ft hose with air mixer, 5ft 0-20PSI propane hose, and the valve key.
Setup and Installation
Important Safety Notice: Always run a leak test after installation. Ensure a low gas flow when igniting. Consult related professionals if necessary for installation or if you are unsure about any steps.
- Prepare the Installation Area: Ensure the fire pit structure is ready to accommodate the stainless steel installation box and the gas lines.
- Mount the Installation Box: Securely mount the stainless steel installation box in the desired location on your fire pit structure.
- Connect the Gas Lines: Attach the flexible 5-feet PVC hose to the fire pit burner and the air mixer valve. Connect the high-pressure regulator with its 5-feet hose to your propane tank.
- Integrate the Electronic Igniter: Install the electronic igniter into the control panel of the installation box. Ensure all electrical connections are secure.
- Install the Key Valve: Insert the shut-off key valve into the control panel. The 3-inch key will be used to operate this valve.
- Perform Leak Test: Before first use, apply a soapy water solution to all gas connections. Open the propane tank valve slowly. If bubbles appear, there is a leak. Tighten connections or replace faulty parts as needed. Do not use the fire pit if a leak is detected.

Image: An illustrative diagram showing the typical installation of the control box, gas lines, and regulator within a fire pit structure.
Operating Instructions
- Open Propane Tank Valve: Slowly open the valve on your propane tank.
- Turn Key Valve: Insert the 3-inch key into the key valve on the control panel. Turn the key slowly to allow a small amount of gas to flow into the burner.
- Ignite the Burner: Press and hold the button on the electronic igniter. You should hear a clicking sound and see a spark. The gas should ignite. If it does not ignite immediately, release the igniter button, wait a few seconds for gas to dissipate, and repeat the process.
- Adjust Flame Height: Once ignited, use the key valve to adjust the flame height to your desired level. Turning the key clockwise will decrease the flame, and counter-clockwise will increase it.
- To Turn Off: Turn the key valve clockwise until the gas flow stops and the flames extinguish. Then, close the valve on your propane tank.

Image: A close-up of the control panel, demonstrating how the key valve is used to easily control the flame height of the fire pit.
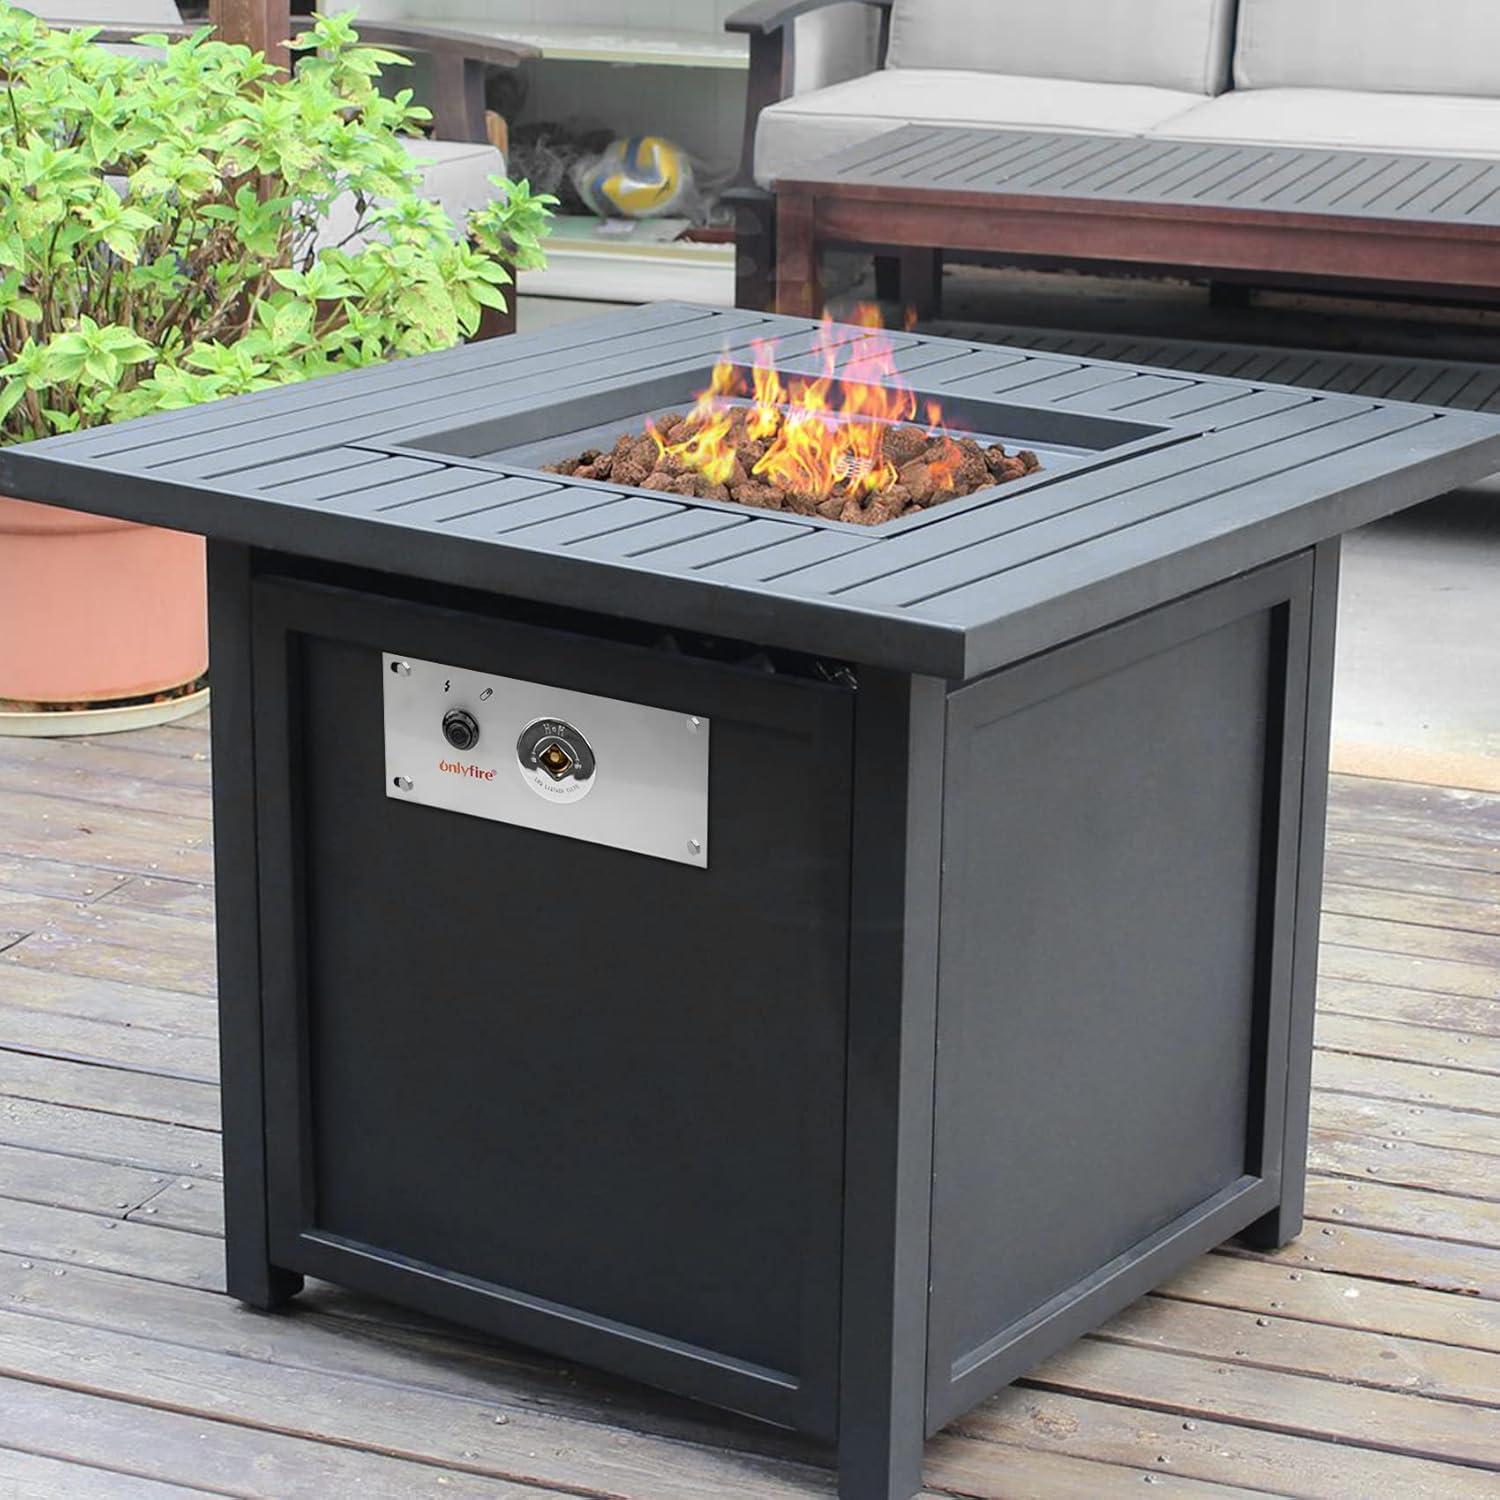
Image: A modern patio fire pit table with the onlyfire ignition system control panel visibly integrated on the side, showing flames.

Image: A rustic stone fire pit featuring the onlyfire ignition system, demonstrating its integration into various outdoor designs.

Image: A close-up of a fire pit burner filled with blue glass media, showing the vibrant flames produced by the system.
Maintenance
- Regular Inspection: Periodically inspect all hoses and connections for signs of wear, damage, or leaks.
- Cleaning: Keep the control panel and surrounding areas clean from debris. Use a soft, damp cloth for cleaning. Do not use abrasive cleaners.
- Storage: When not in use for extended periods, disconnect the propane tank and store the kit in a dry, protected area.
Troubleshooting
| Problem | Possible Cause | Solution |
|---|---|---|
| Burner does not ignite | No gas flow, igniter malfunction, low propane in tank | Check propane tank level and ensure valve is open. Verify all gas connections. Test igniter for spark. |
| Low flame or inconsistent flame | Low gas pressure, partially closed valve, clogged burner ports | Ensure propane tank valve is fully open. Check key valve position. Clean burner ports if necessary. |
| Gas odor detected | Gas leak | Immediately turn off gas at the tank. Perform a leak test with soapy water. Tighten connections or replace faulty parts. Do not operate until leak is resolved. |
Specifications
| Feature | Detail |
|---|---|
| Package Dimensions | 13.3 x 9.49 x 5 inches |
| Item Weight | 6.58 pounds |
| Manufacturer | only fire |
| ASIN | B0753DQJM6 |
| Item Model Number | F-FPA5086-BR1 |
Warranty and Support
For product support or inquiries, please visit the official onlyfire store on Amazon. While specific warranty details are not provided here, extended protection plans may be available for purchase to cover your product beyond standard manufacturer coverage. Please check the product listing for current protection plan options.
Visit the onlyfire Store for more information.