
1. Introduction
The Unihertz Jelly Pro is a compact 4G smartphone designed for portability and full Android functionality. Running on Android 8.1 Oreo, it offers a complete smartphone experience in a miniature form factor. This manual provides essential information for setting up, operating, maintaining, and troubleshooting your device.

Image 1.1: The Unihertz Jelly Pro fits comfortably in the palm of a hand, highlighting its compact design.

Image 1.2: The Jelly Pro's ultra-compact size allows it to fit into small pockets, emphasizing its portability.
2. Package Contents
Verify that all items are present in your Unihertz Jelly Pro package:
- Unihertz Jelly Pro Smartphone
- USB Cable
- User Manual (this document)
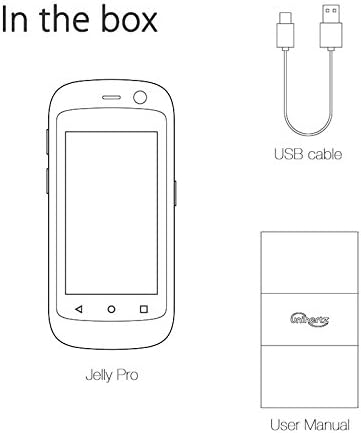
Image 2.1: Illustration of the standard contents included in the Jelly Pro retail box.
3. Device Overview
Familiarize yourself with the physical components of your Unihertz Jelly Pro.

Image 3.1: Front view of the Unihertz Jelly Pro, showing the display and typical Android interface.
Key Components:
- Display: 2.45-inch screen for interaction.
- Front Camera: For video calls and selfies.
- Rear Camera: Main camera for photos and videos.
- Power Button: Located on the side, used to turn the device on/off or wake/sleep the screen.
- Volume Buttons: Located on the side, used to adjust media and call volume.
- Micro USB Port: For charging and data transfer.
- 3.5mm Audio Jack: For connecting headphones.
4. Getting Started
4.1 SIM Card and Battery Installation
- Carefully remove the back cover of the phone.
- Insert your Nano SIM card(s) into the designated slot(s). The Jelly Pro supports Dual SIM Dual Standby.
- Insert the 950mAh battery into its compartment, ensuring the contacts align correctly.
- Replace the back cover, pressing firmly until it clicks into place.

Image 4.1: The Unihertz Jelly Pro's removable battery, model LBA1509, for installation or replacement.
4.2 Powering On/Off
- To Power On: Press and hold the Power button until the Unihertz logo appears.
- To Power Off: Press and hold the Power button until the power options menu appears, then select "Power off."
- To Restart: Press and hold the Power button until the power options menu appears, then select "Restart."
4.3 Initial Setup
Upon first power-on, follow the on-screen prompts to configure your device, including language, Wi-Fi connection, Google account, and security settings.
5. Basic Operations
5.1 Touchscreen Navigation
The Jelly Pro features a responsive touchscreen. Use standard gestures such as tap, double-tap, swipe, pinch-to-zoom, and long-press to interact with the interface.
5.2 Calls and Messaging
- Making Calls: Open the Phone app, enter the number, and tap the call icon.
- Answering Calls: Swipe up on the screen when a call comes in.
- Sending Messages: Open the Messages app, tap to compose a new message, enter the recipient and text, then send.
5.3 Internet and Applications
Access the internet via Wi-Fi or mobile data. The Jelly Pro supports 4G LTE networks. Download and manage applications through the Google Play Store.

Image 5.1: The Jelly Pro's screen showcasing the Android 8.1 Oreo interface and pre-installed applications.
6. Connectivity
The Jelly Pro offers various connectivity options:
- Wi-Fi: Connect to wireless networks for internet access. Go to Settings > Network & Internet > Wi-Fi.
- Bluetooth 4.1: Pair with Bluetooth headphones, speakers, or other devices. Go to Settings > Connected devices > Bluetooth.
- GPS: Built-in GPS for navigation and location services.
- 4G LTE: Supports global 4G LTE bands for high-speed mobile data. Compatible with AT&T and T-Mobile networks in the US.

Image 6.1: The Jelly Pro supports major US carriers like AT&T and T-Mobile for 4G LTE connectivity.
7. Camera Usage
The Jelly Pro is equipped with an 8MP AF rear camera and a 2MP FF front camera, capable of recording 1080p video.
- Taking Photos: Open the Camera app, frame your shot, and tap the shutter button.
- Recording Videos: Switch to video mode in the Camera app and tap the record button to start/stop.
8. Storage and Memory
The device comes with 2GB RAM and 16GB ROM. Storage can be expanded using a MicroSD card up to 256GB. To manage storage, go to Settings > Storage.
9. Maintenance and Care
- Cleaning: Use a soft, dry cloth to clean the device. Avoid harsh chemicals.
- Battery Care: Avoid extreme temperatures. For optimal battery life, charge the device regularly and avoid fully draining it frequently.
- Software Updates: Keep your device's software updated for improved performance and security. Go to Settings > System > System update.
- Environmental Conditions: Protect the device from water, dust, and direct sunlight.
10. Troubleshooting
Common Issues and Solutions:
- Device not powering on: Ensure the battery is charged. Connect to a charger for at least 15 minutes before attempting to power on again.
- Poor network signal: Check if the SIM card is correctly inserted. Verify your location has network coverage. Restart the device.
- Battery drains quickly: Reduce screen brightness, close unused apps, disable Wi-Fi/Bluetooth/GPS when not in use. Check battery usage in Settings to identify power-hungry apps.
- Apps crashing or freezing: Clear the app's cache (Settings > Apps & notifications > [App Name] > Storage & cache > Clear cache). If the issue persists, restart the device or reinstall the app.
- Unable to connect to Wi-Fi: Ensure Wi-Fi is enabled. Check if the network password is correct. Restart your router and the phone.
11. Specifications
| Feature | Specification |
|---|---|
| Dimensions | 92.4 x 43 x 13 mm (3.64 x 1.69 x 0.51 inches) |
| Weight | 60.4g (2.13 ounces with battery) |
| Operating System | Android 8.1 Oreo |
| CPU | Quad Core 1.1GHz |
| RAM | 2GB |
| ROM | 16GB |
| Battery | 950mAh Lithium Ion |
| Display Size | 2.45 inches |
| Resolution | 240 x 432 pixels |
| Rear Camera | 8MP AF |
| Front Camera | 2MP FF |
| Video Recording | 1080p |
| SIM | Dual Nano SIM, Dual Standby |
| WIFI | 802.11 a/b/g/n 2.4GHz/5GHz |
| Bluetooth | Bluetooth 4.1 |
| GPS | Built-in GPS |
| Sensors | G-Sensor, Compass, Gyroscope |
| Card Extend | Support MicroSD card up to 256 GB |
| Audio Jack | 3.5mm |
| USB | Micro USB |
| Supported Bands | GSM: 850/900/1800/1900MHz WCDMA: 850/900/1700/1900/2100MHz FDD-LTE: Band 1/2/3/4/5/7/8/12/17/19/20 TD-LTE: Band 40 |
12. Warranty and Support
For warranty information and customer support, please refer to the official Unihertz website or contact your retailer. Keep your proof of purchase for warranty claims.
You can find more information and support resources on the Unihertz Brand Store.


