
JL AUDIO C1-650
JL Audio C1-650 2-Way Speaker System User Manual
Model: C1-650
Introduction
Thank you for choosing the JL Audio C1-650 2-Way Speaker System. This manual provides essential information for the proper installation, operation, and maintenance of your new car audio speakers. Please read this manual thoroughly before attempting installation or operation.
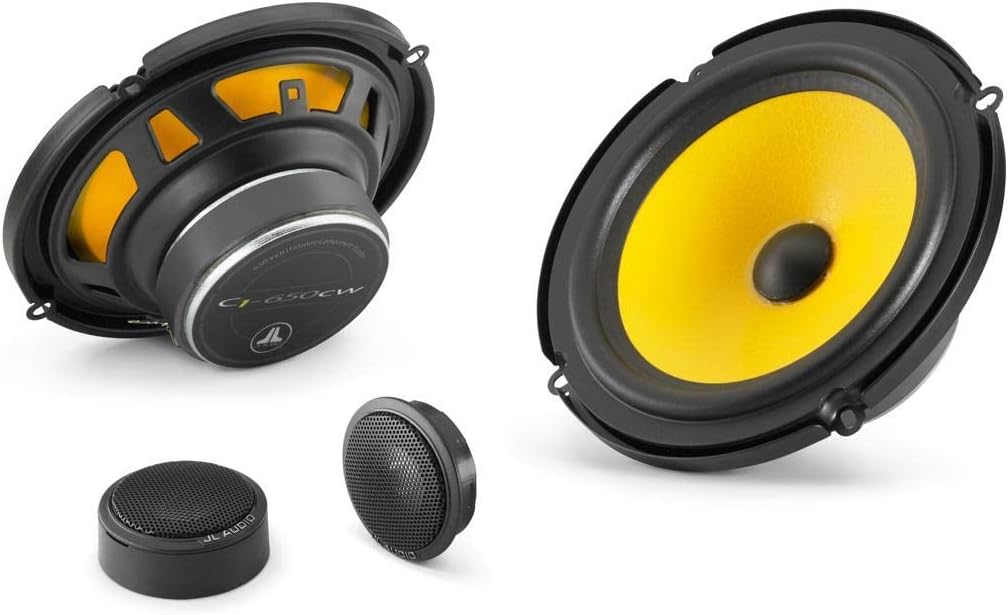
Image: The JL Audio C1-650 2-Way Speaker System, showing the main 6.5-inch woofer, separate tweeter, and passive crossover network.
Safety Information
Always observe the following safety precautions:
- Disconnect the vehicle's battery before beginning any electrical installation.
- Ensure all wiring is properly insulated and secured to prevent short circuits.
- Do not mount speakers in locations that obstruct vehicle operation or safety features.
- Wear appropriate safety gear, including eye protection, during installation.
- Consult a professional installer if you are unsure about any part of the installation process.
What's in the Box
Your JL Audio C1-650 system includes the following components:
- Two (2) 6.5-inch (165mm) Woofers
- Two (2) 0.75-inch (19mm) Aluminum Dome Tweeters
- Two (2) In-line Passive Crossover Networks
- Mounting Hardware (screws, clips)
- Grilles (if applicable, not explicitly listed but common)
- Mounting rings (as shown in image)
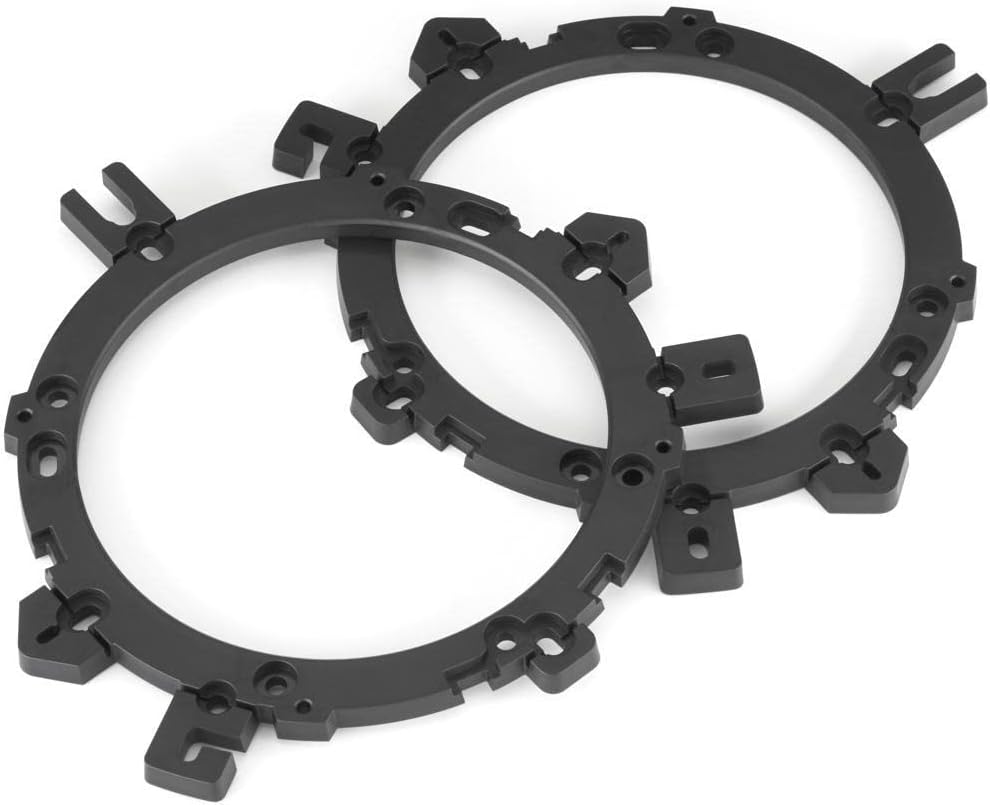
Image: Two black speaker mounting rings, designed to facilitate installation in various vehicle applications.

Image: A compact black in-line passive crossover network with red and black wires, used to separate audio frequencies for the woofer and tweeter.
Setup and Installation
Proper installation is crucial for optimal performance. Follow these general steps:
- Planning: Determine the best mounting locations for the woofers and tweeters in your vehicle. Consider speaker dimensions and available space.
- Disassembly: Carefully remove existing speakers or trim panels to access mounting locations.
- Wiring:
- Connect the vehicle's speaker wires to the input side of the passive crossover network.
- Connect the woofer to the "Woofer" output of the crossover.
- Connect the tweeter to the "Tweeter" output of the crossover.
- Ensure correct polarity (+ to + and - to -) for all connections.
- Mounting Woofers:
- Secure the woofers using the provided mounting hardware.
- Refer to the woofer dimension diagram for cutout and mounting depth requirements.
- Mounting Tweeters:
- The tweeters can be flush-mounted or surface-mounted.
- For flush mounting, create a cutout of the specified diameter.
- For surface mounting, use the included surface-mount cups.
- Refer to the tweeter dimension diagram for precise measurements.
- Testing: Before reassembling panels, connect the vehicle's battery and test the speakers to ensure they are functioning correctly.
- Reassembly: Carefully reassemble all removed panels and trim.
Dimensional Diagrams

Image: Technical diagram illustrating the dimensions of the C1-650 woofer, including outer diameter (A), grille tray diameter (B), motor diameter (C), mounting hole diameter (F), and mounting depth (G).

Image: Technical diagram showing the dimensions for the C1-650 tweeter, including flush-mount diameter (A1), surface-mount diameter (A2), mounting hole diameter (B), flush-mount depth (C), and front protrusion (D1, D2).

Image: Technical diagram detailing the dimensions of the C1-650 passive crossover, including width (W), height (H), and depth (D).
Operating Your Speaker System
Once installed, your JL Audio C1-650 speakers will operate as part of your vehicle's audio system. Ensure your head unit or amplifier is properly configured to deliver audio signals to the speakers. Avoid excessive volume levels that cause audible distortion, as this can damage the speakers.
The C1-650 system is designed for optimal sound reproduction across a wide frequency range, providing clear vocals and robust mid-bass. For best results, consider adjusting your audio system's equalizer settings to suit your personal listening preferences.
Maintenance
The JL Audio C1-650 speakers require minimal maintenance:
- Keep the speaker grilles clean by gently wiping them with a soft, dry cloth.
- Avoid exposing the speakers to excessive moisture or direct sunlight for prolonged periods.
- Do not apply any chemicals or abrasive cleaners to the speaker cones or surrounds.
- Periodically check wiring connections to ensure they remain secure.
Troubleshooting
If you experience issues with your C1-650 speaker system, refer to the following common problems and solutions:
| Problem | Possible Cause | Solution |
|---|---|---|
| No sound from speakers | Loose wiring connection; Incorrect polarity; Amplifier/head unit off or faulty; Blown fuse. | Check all wiring connections; Verify polarity; Ensure audio source is on and functioning; Check vehicle's audio system fuse. |
| Distorted sound | Volume too high; Amplifier clipping; Incorrect crossover settings; Damaged speaker. | Reduce volume; Check amplifier gain settings; Ensure crossover is correctly wired; Inspect speaker for physical damage. |
| One speaker not working | Loose connection to that speaker; Faulty speaker wire; Damaged speaker or crossover. | Check connections for the specific speaker; Test speaker wire continuity; Isolate and test the speaker and crossover. |
If problems persist after troubleshooting, contact JL Audio customer support or a qualified car audio technician.
Specifications
Detailed technical specifications for the JL Audio C1-650 2-Way Speaker System:
| Feature | Specification |
|---|---|
| Continuous Power Handling (RMS) | 50 W |
| Peak Music Power | 225 W |
| Recommended Amplifier Power (RMS) | 10 - 75 W / Ch. |
| System Efficiency | 91.0 dB @ 1 W / 1 m |
| System Nominal Impedance | 4 Ω |
| System Frequency Response | 59 Hz - 22 KHz ± 3 dB |
| Woofer Outer Diameter | 6.5 inches / 165 mm |
| Woofer Mounting Hole Diameter | 5.56 inches / 141 mm |
| Woofer Mounting Depth | 2.44 inches / 62 mm |
| Tweeter Flush-Mount Diameter | 48 mm |
| Tweeter Flush-Mount Depth | 0.76 inches / 19 mm |
| Crossover Dimensions (W x H x D) | 50 mm x 23 mm x 34 mm (approx.) |
| Product Weight | 2.45 kg |
Warranty and Support
JL Audio products are designed and manufactured to the highest quality standards. For information regarding your product's warranty coverage, please refer to the warranty card included with your purchase or visit the official JL Audio website.
For technical support, installation assistance, or service inquiries, please contact JL Audio customer service through their official channels. You can typically find contact information on their website or in your product packaging.
Online Resources: For additional information, FAQs, and product registration, please visit www.jlaudio.com.
Related documentsC1-650


Ask a question about this manual
Ask about setup, troubleshooting, compatibility, parts, safety, or missing instructions. Manuals+ will review the question and use this page’s manual context to help answer it.