Introduction
This manual provides detailed instructions for the assembly, operation, and maintenance of your ALEKO PWT2030 Outdoor Event Gazebo Canopy Tent. Designed for outdoor events, this 20 x 30 x 10 feet tent features a durable steel frame and a weather-resistant PVC roof with removable sidewalls. Please read these instructions carefully before setup to ensure proper installation and safe use of the product.
Safety Information
For your safety and to prevent damage to the product, observe the following precautions:
- Secure the tent properly using all provided anchoring equipment, especially in windy conditions.
- Handle metal frame components with care during assembly and disassembly to avoid injury.
- Avoid damaging the fabric canopy and sidewalls with sharp objects.
- Keep the tent away from open flames, heaters, and other heat sources.
- Do not use the tent in severe weather conditions, such as heavy winds, snow, or thunderstorms. Disassemble and store the tent if such conditions are expected.
- Ensure adequate ventilation if using any heating or cooking appliances inside the tent.
Package Contents
Before beginning assembly, verify that all components are present and undamaged. The package should include:
- Powder-coated steel framework (various poles and connectors)
- Heavy-duty waterproof and weatherproof PVC-coated polyethylene fabric canopy
- Removable sidewalls with windows
- Metal joint fittings
- 10 corkscrew pegs
- Ropes and elastic ball bungees for securing the canopy and sidewalls
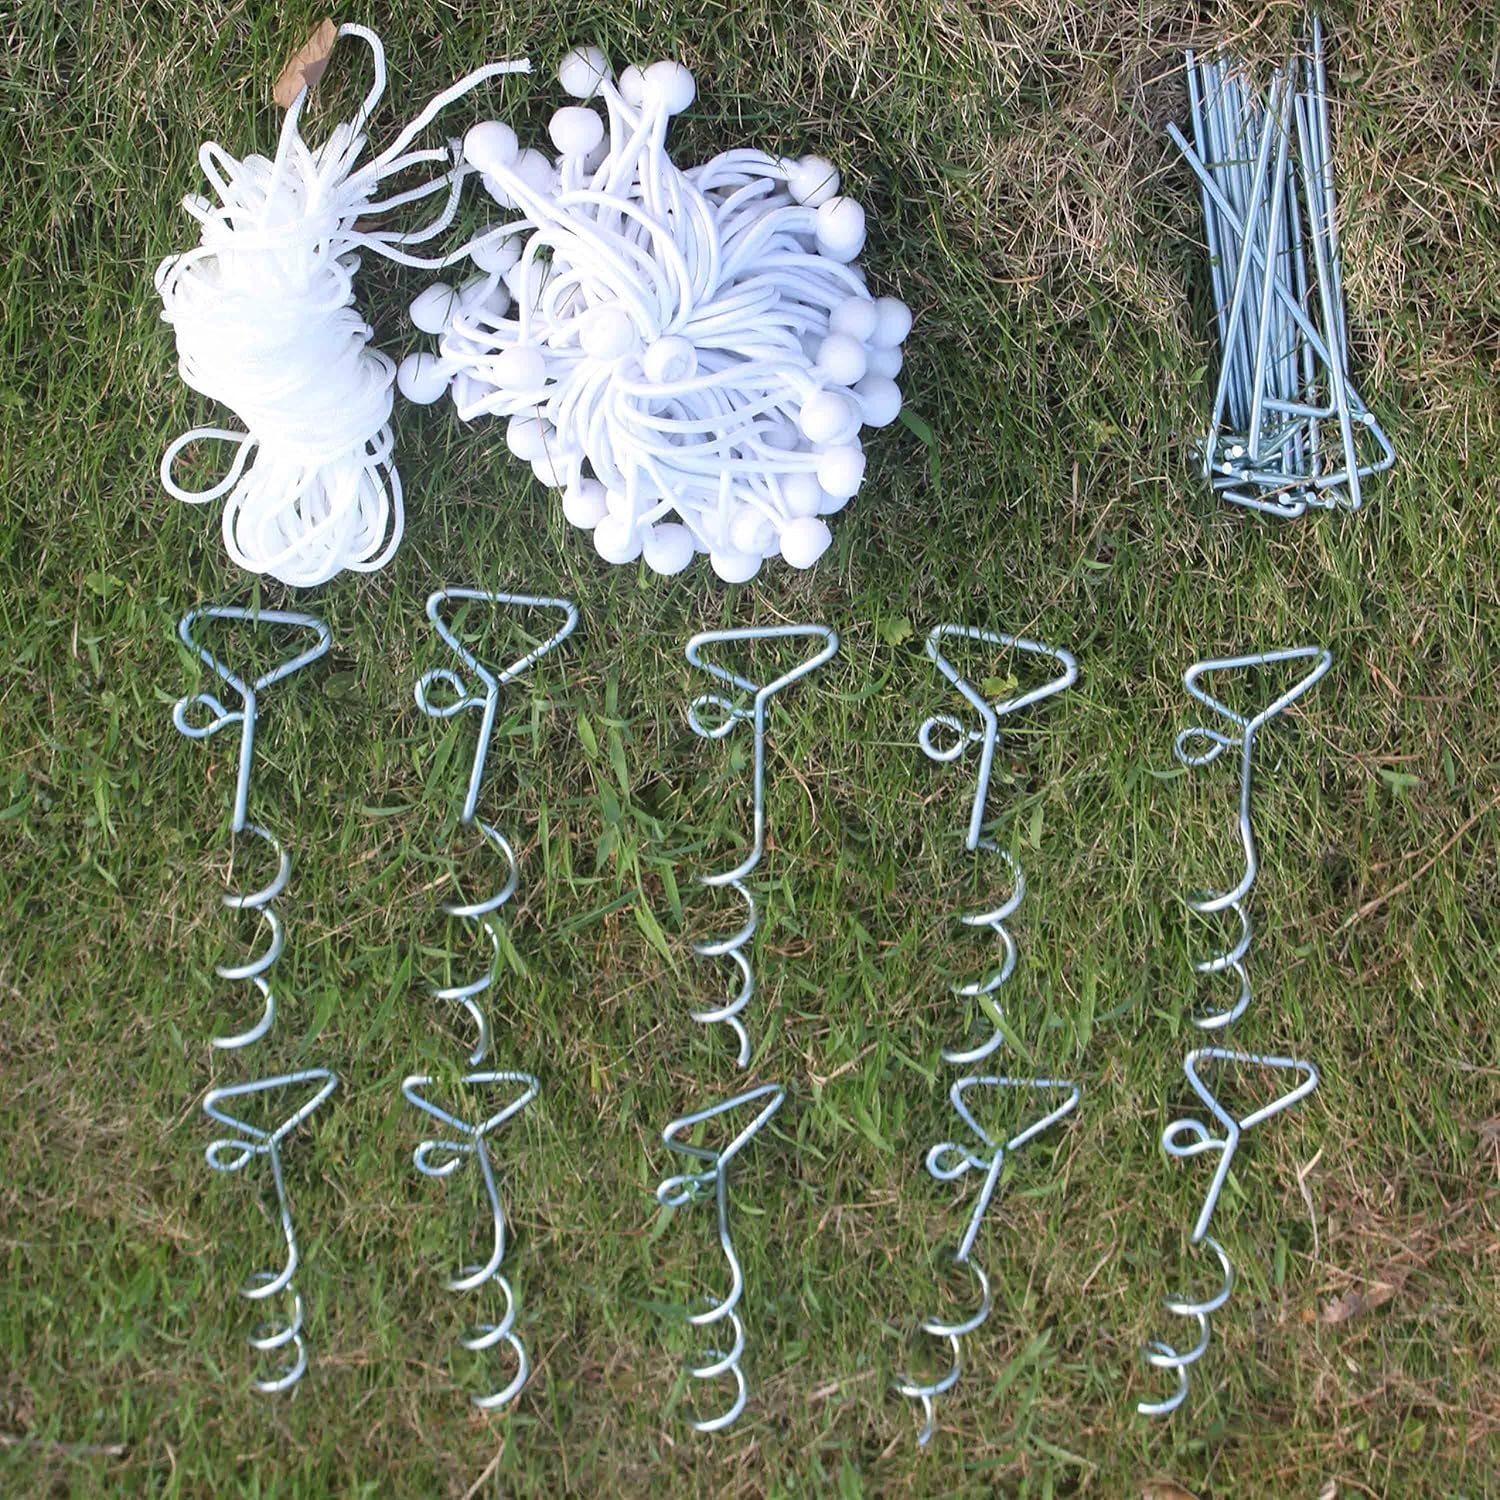
Image: Corkscrew pegs, ropes, and elastic ball bungees for securing the tent.
Setup and Assembly Instructions
Assembly typically requires at least 2-4 people. Choose a flat, level area for setup, clear of overhead obstructions and sharp objects.
Step 1: Assemble the Roof Frame
- Unpack all steel poles and connectors. Identify the different lengths and types of poles (ridge poles, eave poles, leg poles) and connectors (peak connectors, corner connectors).
- Begin by connecting the ridge poles and eave poles using the appropriate metal joint fittings to form the rectangular roof sections.
- Gradually build the roof structure by connecting these sections with the peak and corner connectors. Ensure all connections are secure.
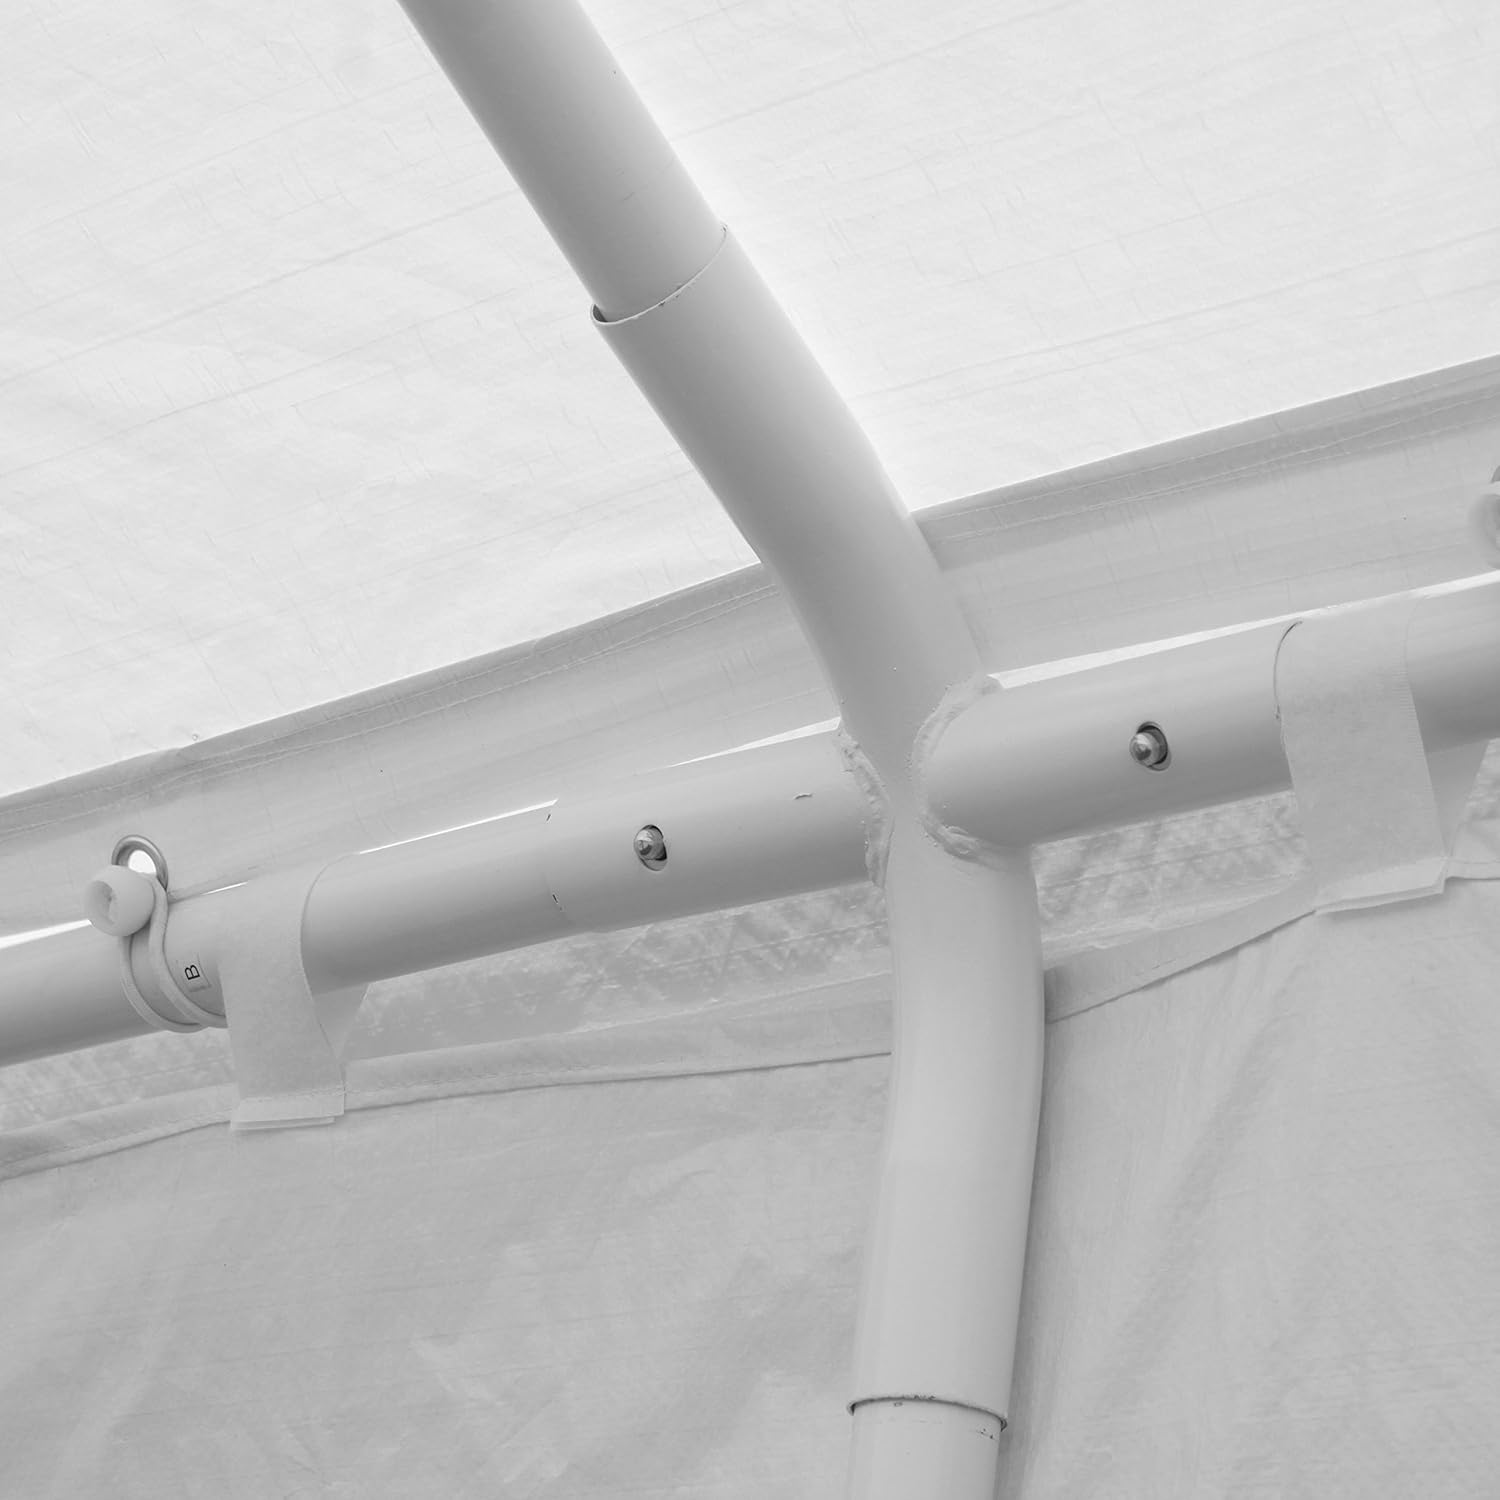
Image: The fully assembled steel frame structure of the tent, showing the roof and leg poles connected.

Image: Close-up view of the robust metal joint fittings used to connect the steel poles, ensuring structural integrity.
Step 2: Attach the Canopy Cover
- Carefully unfold the main canopy cover and drape it over the assembled roof frame. Ensure the canopy is centered and evenly distributed.
- Secure the canopy to the frame using the elastic ball bungees or ties provided, attaching them through the grommets on the canopy to the frame poles.
Step 3: Install Leg Poles and Sidewalls
- Attach the leg poles to the corner and intermediate connectors of the roof frame. Lift the frame gradually, inserting the leg poles one by one.
- Once the frame is fully upright, attach the sidewalls. The sidewalls typically attach to the eave poles and leg poles using bungees, Velcro, or zippers.
- Ensure the sidewalls with windows are positioned as desired.

Image: The tent with all sidewalls and windows installed, providing full enclosure.

Image: Frontal view of the ALEKO PWT2030 tent, showcasing the clear window panels on the sidewalls.
Step 4: Secure the Tent
- Use the provided corkscrew pegs and ropes to anchor the tent securely to the ground. Attach ropes to the tent frame at various points and stake them firmly into the ground.
- Ensure all connections are tight and the tent is stable.

Image: The ALEKO PWT2030 tent fully assembled with all sidewalls in place, ready for use.

Image: The assembled tent with one sidewall partially opened, demonstrating the removable and flexible design.
Operating and Usage
- Sidewalls: The tent features removable sidewalls. These can be attached or removed as needed to adjust privacy, ventilation, and protection from elements.
- Weather Conditions: This tent is designed for temporary use in fair weather conditions. It is not intended for permanent installation or use in extreme weather.
- Ventilation: Ensure proper ventilation, especially if the tent is fully enclosed with sidewalls, to prevent condensation and maintain air quality.
Maintenance
- Cleaning: Clean the PVC-coated fabric canopy and sidewalls with mild soap and water. Avoid harsh chemicals or abrasive cleaners that could damage the material. Rinse thoroughly and allow to air dry completely before storage.
- Frame Inspection: Periodically inspect the steel frame for any signs of rust, bending, or damage. Replace damaged components immediately.
- Storage: When not in use, disassemble the tent and store all components in a dry, cool place, away from direct sunlight and extreme temperatures. Ensure the fabric is completely dry to prevent mold and mildew.
- Anchoring: Regularly check the security of the anchoring pegs and ropes, especially after strong winds or heavy rain.
Troubleshooting
- Tent Instability: Ensure all frame connections are fully engaged and tightened. Verify that all corkscrew pegs are securely driven into the ground and ropes are taut. In very soft ground, consider using additional or larger stakes.
- Water Accumulation on Roof: Ensure the canopy is stretched tightly over the frame to prevent sagging, which can lead to water pooling. Adjust bungee cords or ties as needed.
- Difficulty Assembling Frame: Double-check that you are using the correct poles and connectors for each section as per the assembly diagram (refer to Step 1). Some force may be required to fully seat connections.
Specifications

Image: Diagram illustrating the key dimensions of the ALEKO PWT2030 tent.
| Feature | Detail |
|---|---|
| Model Number | PWT2030 |
| Dimensions (L x W x H) | 30 feet x 20 feet x 10 feet (peak height) |
| Sidewall Height | 6.5 feet |
| Frame Material | Powder-coated steel (Tube DIA 1.5 Inches / 38 mm) |
| Canopy/Sidewall Material | 180 gsm PE (polyethylene woven), PVC coated for UV protection |
| Color | White |
| Weight | 88.45 kg (approximately 195 lbs) |
| Included Accessories | Metal joint fittings, 10 corkscrew pegs, ropes, elastic ball bungees |
Warranty and Support
For warranty information or technical support, please contact ALEKO customer service. Refer to your purchase documentation for specific warranty terms and contact details.