1. Product Overview
The CarLights360 Headlight Assembly is a premium aftermarket replacement designed for the driver's side of Toyota Camry models from 2012 to 2014 (L, LE, XLE). This assembly is CAPA and DOT Certified, ensuring it meets stringent quality and safety standards. It includes bulbs, lens, housing, and socket, arriving factory-sealed and ready for installation.
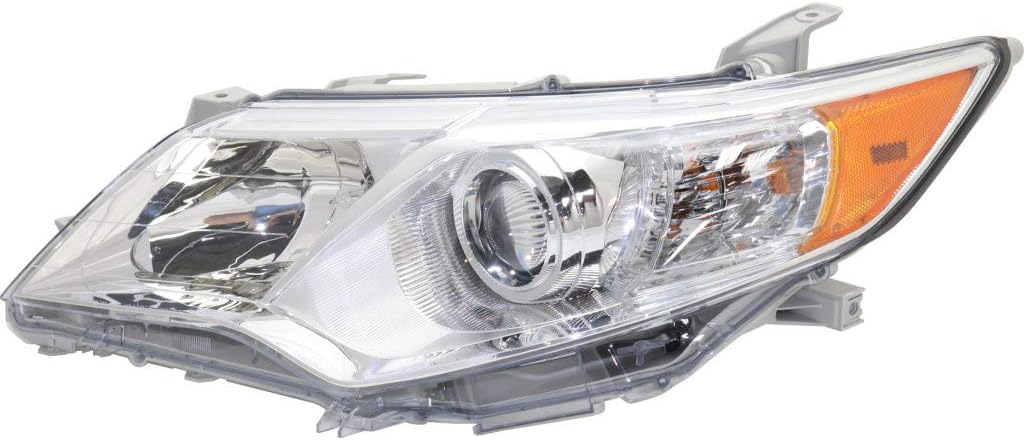
Figure 1: CarLights360 Headlight Assembly, front view.
Key Features:
- Exact Fit: Designed to precisely match Partslink #: TO2502211 and OEM #: 81150-06470.
- Certified Quality: CAPA and DOT Certified, ensuring compliance with quality and safety standards.
- Complete Assembly: Includes bulbs, lens, housing, and socket for a comprehensive replacement.
- Durable Construction: Made with high-quality polycarbonate lens material and a waterproof design for reliable performance.
Product Showcase:
Video 1: Overview of the 2012-2014 Toyota Camry Headlight Assembly, highlighting its components and features.
Video 2: Detailed look at the headlight assembly, showcasing its design and waterproof features.
2. Specifications
| Attribute | Value |
|---|---|
| Brand | CarLights360 |
| Model | CAMRY |
| Part Name | Headlight |
| Position | Driver Side (Front Left) |
| Assembly | With Bulb(S) |
| Light Source | Halogen |
| Type | Composite |
| Certification | CAPA Certified, DOT and SAE Certified |
| Partslink Number | TO2502211 |
| OEM Number | 81150-06470 |
| Lens Material | Polycarbonate |
| Special Feature | Waterproof |
| Wattage | 110 watts |
| Item Dimensions (L x W x H) | 28.63 x 12.41 x 10.97 inches |
| Item Weight | 10.63 pounds |
| UPC | 742271772124 |
3. Installation
This headlight assembly is designed for a vehicle-specific fit. Professional installation is recommended. Ensure the vehicle's battery is disconnected before beginning any electrical work.
General Steps:
- Preparation: Park the vehicle on a level surface and engage the parking brake. Disconnect the negative terminal of the car battery.
- Access: Depending on your vehicle model, you may need to remove the front bumper or other components to access the headlight assembly mounting bolts.
- Remove Old Assembly: Locate and remove the mounting bolts/screws securing the old headlight assembly. Carefully disconnect all electrical connectors and remove the old unit.
- Install New Assembly: Connect the electrical wiring to the new CarLights360 headlight assembly. Carefully position the new assembly into place and secure it with the mounting bolts/screws.
- Reconnect Battery: Reconnect the negative terminal of the car battery.
- Test Functionality: Turn on the headlights (low beam, high beam, turn signal) to ensure all functions are working correctly.

Figure 2: Rear view of the headlight assembly, illustrating bulb sockets and mounting points.
4. Operating (Headlight Adjustment)
Proper headlight aim is crucial for safe driving. After installation, it is recommended to adjust the headlight beam to ensure optimal visibility without blinding oncoming traffic.
Adjustment Procedure:
- Preparation: Park the vehicle on a level surface approximately 25 feet from a wall. Ensure tire pressure is correct and the vehicle is not heavily loaded.
- Marking the Wall: Measure the height from the ground to the center of the headlight lens. Mark this height on the wall. Also, mark the horizontal center of the headlight.
- Adjusting the Beam: Locate the adjustment screws on the back of the headlight assembly. There is typically one for vertical adjustment and sometimes one for horizontal adjustment.
- Vertical Adjustment: Turn the vertical adjustment screw to raise or lower the beam. For the driver's side, the top of the low beam cut-off should be approximately 4 inches below the center mark at 25 feet.
- Horizontal Adjustment: If available, adjust the horizontal screw to center the beam.

Figure 3: Rear view of the headlight assembly, indicating the location of the beam adjustment screw.
Headlight Aiming Guide:
Video 3: A detailed guide on how to properly aim and align your 2012-2014 Camry headlights for optimal performance and safety.
5. Maintenance
To ensure the longevity and optimal performance of your CarLights360 Headlight Assembly, follow these maintenance guidelines:
- Regular Cleaning: Clean the headlight lenses regularly with a soft cloth and mild soap and water. Avoid abrasive cleaners or harsh chemicals that can damage the lens coating.
- Inspect for Damage: Periodically check the headlight assembly for any cracks, chips, or signs of moisture intrusion. Address any issues promptly to prevent further damage.
- Bulb Replacement: If a bulb burns out, replace it with a bulb of the correct type and wattage as specified in your vehicle's owner's manual or the product specifications.
- Wiring Inspection: Ensure all wiring connections are secure and free from corrosion.
6. Troubleshooting
If you encounter any issues with your headlight assembly, consider the following common troubleshooting steps:
- Headlight Not Working: Check the bulb for damage or burnout. Verify that the electrical connector is securely attached. Inspect the fuse related to the headlight circuit in your vehicle's fuse box.
- Dim or Flickering Light: This could indicate a loose connection, a failing bulb, or an issue with the vehicle's electrical system. Check connections and consider replacing the bulb.
- Moisture Inside Lens: While the assembly is designed to be waterproof, minor condensation can sometimes occur due to temperature changes. This usually dissipates on its own. If excessive moisture persists, inspect the seals for damage or improper installation.
- Improper Beam Pattern: Refer to the 'Operating (Headlight Adjustment)' section to correctly adjust the headlight beam.
If problems persist after attempting these steps, it is recommended to consult a qualified automotive technician.
7. Warranty and Support
This CarLights360 Headlight Assembly is a direct replacement aftermarket product. It is not an OEM part and is neither manufactured nor sold by the original vehicle manufacturer. For specific warranty information, please refer to the documentation provided with your purchase or contact the seller directly.
For further assistance or technical support, please reach out to the CarLights360 customer service team.
Legal Disclaimer: This product is a direct replacement aftermarket product. It is not OEM and is neither manufactured nor sold by the vehicle manufacturer listed. We are not affiliated with the vehicle manufacturer.