1. Introduction
This manual provides essential information for the safe and effective operation of your CEM LDM-100 Digital Laser Distance Meter. Please read this manual thoroughly before using the device and keep it for future reference. The LDM-100 is designed for precise distance, area, and volume measurements using laser technology.
2. Safety Information
WARNING: Laser Radiation
The LDM-100 emits Class 2 laser radiation. Do not stare into the laser beam or direct it at other people or animals. Avoid direct eye exposure. Use of controls or adjustments or performance of procedures other than those specified herein may result in hazardous radiation exposure.
- Do not attempt to modify the device.
- Keep the device out of reach of children.
- Do not use the device in explosive environments.
- Protect the device from moisture and direct sunlight.
- Ensure batteries are inserted with correct polarity.
3. Product Overview
The CEM LDM-100 is a compact and robust laser distance meter. Familiarize yourself with its components:

Figure 1: Front view of the CEM LDM-100 Digital Laser Distance Meter, showing the display, measurement buttons, and function keys.

Figure 2: Close-up of the LDM-100 display, showing measurement readings and icons for various functions like area, volume, and Pythagorean calculations.
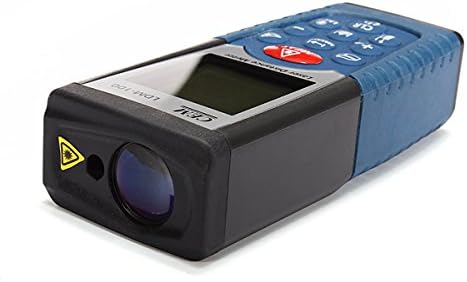
Figure 3: Side view of the LDM-100, highlighting the laser emission aperture and the receiving lens.
Key Components:
- Laser Emission Aperture: Where the laser beam exits.
- Receiving Lens: Detects the reflected laser beam.
- Display Screen: Shows measurements, battery status, and function indicators.
- MEAS Button: Activates laser and initiates measurements.
- Function Buttons: For area, volume, Pythagorean calculations, and continuous measurement.
- Unit Button: Changes measurement units (m, ft, in).
- CLR/OFF Button: Clears current measurement or turns off the device.
- +/- Buttons: For adding/subtracting measurements or navigating menus.
4. Setup
4.1 Battery Installation
The LDM-100 requires batteries for operation. Batteries are not included with the device.
- Locate the battery compartment cover on the back of the device.
- Slide or unclip the cover to open the compartment.
- Insert the required batteries (e.g., AAA batteries, refer to the compartment for specific type) ensuring correct polarity (+/-).
- Close the battery compartment cover securely.
Note: Remove batteries if the device will not be used for an extended period to prevent leakage.
5. Operating Instructions
5.1 Power On/Off
- To power on: Press the MEAS button. The laser will activate.
- To power off: Press and hold the CLR/OFF button for a few seconds. The device will also automatically power off after a period of inactivity.
5.2 Basic Distance Measurement
- Turn on the device by pressing MEAS.
- Point the laser at the target surface.
- Press MEAS again to take a measurement. The distance will be displayed on the screen.
5.3 Changing Measurement Units
Press the Unit button repeatedly to cycle through available units: meters (m), feet (ft), inches (in).
5.4 Area Measurement
- Press the Function button (often indicated by a square icon) until the area icon appears on the display.
- Measure the first side (e.g., length) by pressing MEAS.
- Measure the second side (e.g., width) by pressing MEAS again.
- The calculated area will be displayed.
5.5 Volume Measurement
- Press the Function button until the volume icon (cube) appears.
- Measure the length by pressing MEAS.
- Measure the width by pressing MEAS.
- Measure the height by pressing MEAS.
- The calculated volume will be displayed.
5.6 Pythagorean Measurement (Indirect Measurement)
This function allows indirect measurement of heights or distances using the Pythagorean theorem.
- Press the Function button until the Pythagorean icon appears (e.g., a triangle).
- Follow the on-screen prompts or diagram to measure the required sides (e.g., hypotenuse, base).
- The device will calculate and display the unknown side.
5.7 Continuous Measurement (Tracking)
- Press and hold the MEAS button or activate the continuous measurement function (often indicated by a MAX/MIN icon).
- Move the device slowly towards or away from the target. The display will update measurements in real-time, often showing current, maximum, and minimum distances.
- Press MEAS again to stop continuous measurement.
6. Maintenance
- Cleaning: Use a soft, damp cloth to clean the device. Do not use abrasive cleaners or solvents. Clean the laser lens with a soft cloth, similar to cleaning eyeglasses.
- Storage: Store the device in a dry, cool place, away from direct sunlight and extreme temperatures. If storing for extended periods, remove the batteries.
- Calibration: The device is factory calibrated. If you suspect inaccuracies, contact customer support.
7. Troubleshooting
| Problem | Possible Cause | Solution |
|---|---|---|
| Device does not turn on. | Dead or incorrectly inserted batteries. | Replace batteries or check polarity. |
| Inaccurate measurements. | Dirty laser lens; unstable measuring surface; extreme temperatures. | Clean lens; ensure stable position; operate within specified temperature range. |
| Laser not visible. | Bright ambient light; laser not activated. | Use in lower light conditions; press MEAS to activate laser. |
| Error message on display. | Measurement out of range; internal error. | Ensure target is within measuring range; restart device. If error persists, contact support. |
8. Specifications
| Feature | Detail |
|---|---|
| Model | LDM-100 |
| Brand | CEM |
| Measurement Range | Up to 50m (as per product title) |
| International Protection Rating | IP54 |
| Item Weight | 0.31 Pounds (approx. 140.61 g) |
| Batteries | Not included (type typically AAA, refer to device) |
| Laser Class | Class 2 |
9. Warranty and Support
For warranty information or technical support, please refer to the documentation provided at the time of purchase or contact your retailer. Keep your purchase receipt as proof of purchase.