1. Introduction
This manual provides essential information for the installation, operation, and maintenance of your new USonline911 replacement carburetor kit. This carburetor is designed to restore optimal fuel delivery and engine performance for compatible Briggs & Stratton Intek V-Twin engines.
Please read these instructions carefully before attempting any installation or maintenance. Proper installation and care will ensure the longevity and efficient operation of your engine.
2. Package Contents
Verify that all items listed below are included in your package:
- 1x Carburetor with backfire solenoid
- 7x Gaskets (various sizes for installation)
- 2x Spark Plugs
- 1x Fuel Filter

Image: Overview of the USonline911 carburetor kit components.
3. Compatibility
This carburetor is compatible with Briggs & Stratton Intek V-Twin engines ranging from 20HP to 25HP. Refer to your engine's model number to confirm compatibility.
Compatible Engine Models:
- 20HP, 21HP, 23HP, 24HP, 25HP V-Twin engines
- Specific Models: 405777, 406777, 407777, 446677, 445577, 441777, 442577, 40G777, 40H777, 446777, 44677A, 407677, 40F777, 406777, 445677, 40G777, 44677A, 446777, 445705, 445777
4. Safety Information
Always prioritize safety when working with engine components and fuel systems. Failure to follow safety precautions can result in serious injury or property damage.
- Disconnect Battery: Always disconnect the spark plug wire or battery before performing any service to prevent accidental engine starting.
- Fuel Handling: Gasoline is highly flammable. Work in a well-ventilated area, away from open flames, sparks, or heat sources. Use approved containers for fuel.
- Eye Protection: Wear safety glasses or goggles to protect your eyes from debris and fuel splashes.
- Gloves: Wear appropriate gloves to protect your hands from fuel, oil, and sharp edges.
- Engine Cool Down: Allow the engine to cool completely before working on it to avoid burns.
- Ventilation: Ensure adequate ventilation to avoid inhaling fuel vapors.
5. Installation Instructions
This carburetor is designed for direct replacement. If you are unsure about any step, it is recommended to consult a qualified technician or refer to your engine's specific service manual.
General Installation Steps:
- Preparation: Ensure the engine is cool and the fuel tank is drained or the fuel line is clamped. Disconnect the battery or spark plug wire for safety.
- Document Old Carburetor: Before removal, take clear photographs of the existing carburetor from multiple angles, noting all hose connections, linkages, and wiring. This will serve as a valuable reference for reassembly.
- Remove Air Filter Assembly: Carefully remove the air filter housing and any associated ducting to gain access to the carburetor.
- Disconnect Fuel Line and Linkages: Disconnect the fuel line from the carburetor. Detach all throttle and choke linkages. Be mindful of small clips or springs.
- Remove Mounting Bolts: Unbolt the old carburetor from the engine manifold. Remove any old gaskets.
- Clean Mounting Surfaces: Thoroughly clean the engine manifold and air filter housing mounting surfaces to ensure a proper seal with the new gaskets.
- Install New Carburetor: Place new gaskets on the manifold. Mount the new USonline911 carburetor, ensuring the backfire solenoid is correctly oriented. Secure with mounting bolts, tightening them evenly.

Image: Intake side of the carburetor, showing throttle plates.

Image: Throttle linkage connection area on the carburetor.
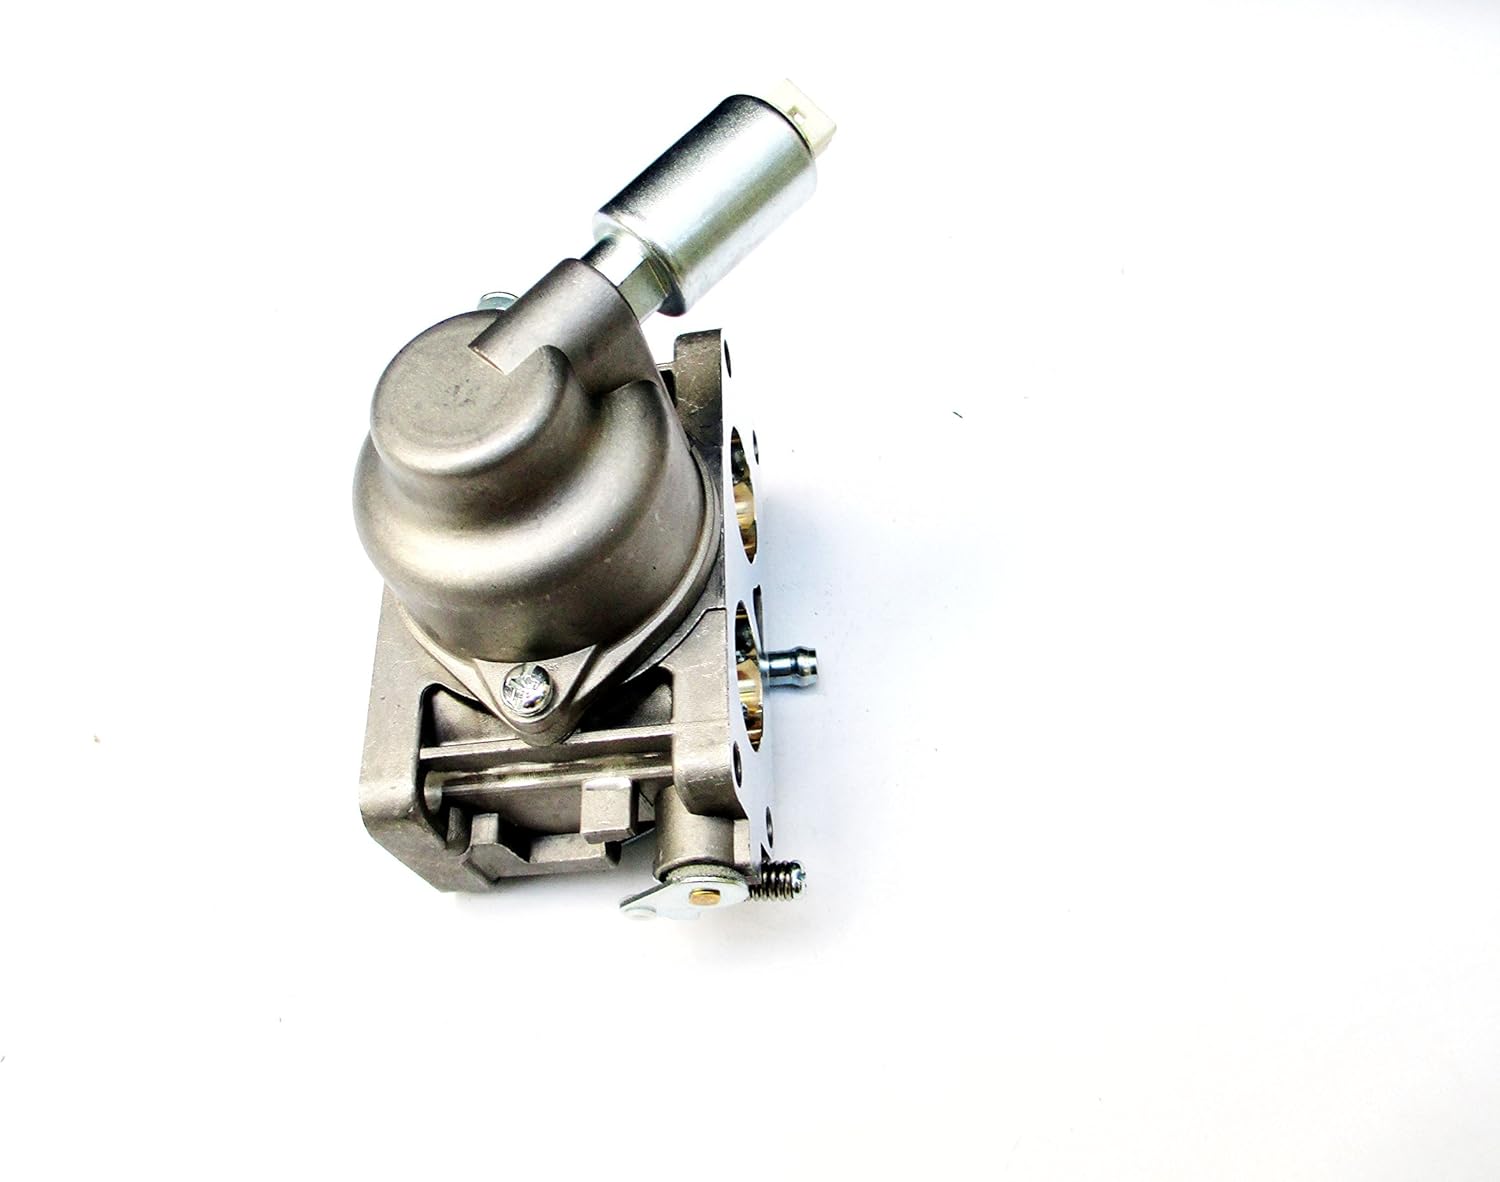
Image: Angled view of the carburetor, highlighting the fuel inlet and backfire solenoid.
- Reconnect Linkages and Fuel Line: Reattach all throttle and choke linkages, referring to your photographs. Connect the fuel line, ensuring it is secure and free of leaks. Install the new fuel filter provided.
- Install Spark Plugs: Replace old spark plugs with the new ones provided. Ensure they are properly gapped according to your engine's specifications (if known) and tightened to the manufacturer's recommended torque.
- Reinstall Air Filter Assembly: Reattach the air filter housing and any other components removed earlier.
- Final Checks: Double-check all connections, ensuring everything is secure and no tools or debris are left in the engine compartment. Reconnect the battery or spark plug wire.
- Test Run: Start the engine and allow it to warm up. Check for any fuel leaks, unusual noises, or improper operation. Adjust idle speed if necessary (refer to engine manual).
6. Operating Principles
The carburetor's primary function is to mix air and fuel in the correct ratio for combustion. After installation, the engine should start and run smoothly. The backfire solenoid prevents engine backfiring during shutdown by cutting off fuel flow to the main jet.
Ensure your engine's air filter is clean for optimal performance, as a clogged filter can restrict airflow and affect the fuel-air mixture.
7. Maintenance
Regular maintenance helps prolong the life of your carburetor and engine.
- Fuel Quality: Always use fresh, clean gasoline. Stale or contaminated fuel is a common cause of carburetor issues. Consider using a fuel stabilizer, especially during storage.
- Fuel Filter: Replace the fuel filter annually or more frequently if operating in dusty conditions. A clogged fuel filter can restrict fuel flow to the carburetor.
- Air Filter: Regularly inspect and clean or replace the engine's air filter. A dirty air filter can cause the engine to run rich and reduce power.
- Storage: Before long-term storage, run the engine until it runs out of fuel, or drain the fuel system to prevent fuel from gumming up the carburetor.
8. Troubleshooting
If you encounter issues after installing the new carburetor, consider the following common problems and solutions:
| Problem | Possible Cause | Solution |
|---|---|---|
| Engine will not start | No fuel, clogged fuel filter, incorrect choke setting, spark plug issue, loose electrical connection to solenoid. | Check fuel level, replace fuel filter, ensure choke is set correctly, check spark plugs, verify solenoid wiring. |
| Engine runs rough or stalls | Air leak around carburetor gaskets, dirty air filter, fuel quality issue, incorrect idle adjustment. | Inspect gaskets for proper seal, clean/replace air filter, use fresh fuel, adjust idle screw (if applicable). |
| Engine lacks power | Dirty air filter, restricted fuel flow, spark plug issue. | Clean/replace air filter, check fuel filter and lines, inspect/replace spark plugs. |
| Fuel leaks | Loose fuel line connection, damaged gasket, float bowl issue. | Tighten fuel line clamps, replace gaskets, inspect carburetor float and needle valve. |
9. Specifications
| Feature | Detail |
|---|---|
| Brand | USonline911 |
| Manufacturer | USonline911 |
| Compatible Engine HP | 20HP, 21HP, 23HP, 24HP, 25HP |
| Engine Type | Briggs & Stratton Intek V-Twin |
| Flange Type | Bolt On |
| Item Weight (approx.) | 0.01 ounces (product listing weight, actual kit weight may vary) |
| Manufacturer Part Number | 20HP (generic reference) |
10. Warranty and Support
Specific warranty details for this product are not provided in this manual. For warranty claims or technical support, please contact USonline911 directly through their official channels or the retailer from whom the product was purchased.