1. Introduction
Thank you for purchasing the allen + roth Harpwell 9-Light Oil-Rubbed Bronze Traditional Tinted Glass Tiered Chandelier. This manual provides essential information for the safe installation, operation, and maintenance of your new lighting fixture. Please read all instructions carefully before beginning installation and retain this manual for future reference.
The Harpwell chandelier features a 25-inch diameter, 9-light design with an oil-rubbed bronze finish and beautiful amber-tinted glass shades, creating a warm and inviting ambiance. Its unique Mediterranean transitional design makes it a suitable addition to informal or formal dining rooms, as well as kitchen eating areas.
2. Safety Information
WARNING: To avoid the risk of electric shock, always disconnect power at the main circuit breaker or fuse box before beginning installation, servicing, or cleaning. Ensure the power is off before touching any electrical components.
- All electrical connections must be in accordance with local codes, ordinances, or the National Electric Code (NEC). Consult a qualified electrician if you are unfamiliar with proper electrical wiring connections.
- This product is UL listed, demonstrating it has met minimum requirements of widely accepted product safety standards.
- CA Residents: This product may expose you to chemicals including lead, which is known to the State of California to cause cancer and birth defects or other reproductive harm. For more information go to www.P65Warnings.ca.gov.
- Do not install this fixture in wet or damp locations. It is rated for dry usage only.
- Do not exceed the maximum wattage specified for the bulbs.
- Always use the correct type and wattage of bulbs as specified in the specifications section.
3. Package Contents
Carefully unpack all components and inspect for any damage. Keep all packaging materials until you are sure all parts are present and in good condition.
- Chandelier fixture assembly
- Mounting hardware kit
- Instruction manual
- Note: Nine 60-watt medium base A19 bulbs are required and are not included.
4. Setup and Installation
This chandelier is designed for ceiling mount installation and can be installed as an uplight only. The adjustable chain allows the light to hang down to 60 inches, providing flexibility for various ceiling heights.
4.1 Tools Required (Not Included)
- Phillips screwdriver
- Flathead screwdriver
- Wire strippers
- Electrical tape
- Ladder
4.2 Installation Steps
- Turn off Power: Locate the circuit breaker that supplies power to the light fixture outlet box. Turn the breaker to the OFF position.
- Prepare Mounting: Attach the mounting bracket to the electrical box in the ceiling using the screws provided in the hardware kit. Ensure it is securely fastened.
- Adjust Chain Length: Determine the desired hanging height for your chandelier. The chain can be adjusted up to 60 inches. Use pliers to open and close chain links to achieve the desired length.
- Wire Connections: Carefully connect the electrical wires from the chandelier to the wires in the outlet box. Connect the bare copper ground wire from the fixture to the ground wire from the outlet box (or to the green ground screw on the mounting bracket). Connect the white (neutral) wire from the fixture to the white (neutral) wire from the outlet box. Connect the black (hot) wire from the fixture to the black (hot) wire from the outlet box. Secure all connections with wire nuts and wrap with electrical tape for added safety.
- Secure Fixture: Carefully lift the chandelier and attach the canopy to the mounting bracket, securing it with the provided screws or nuts. Ensure all wires are tucked neatly into the outlet box.
- Install Bulbs: Screw nine 60-watt medium base (E-26) A19 bulbs (not included) into the sockets.

Figure 1: Full view of the Harpwell chandelier, illustrating the adjustable chain for height customization.
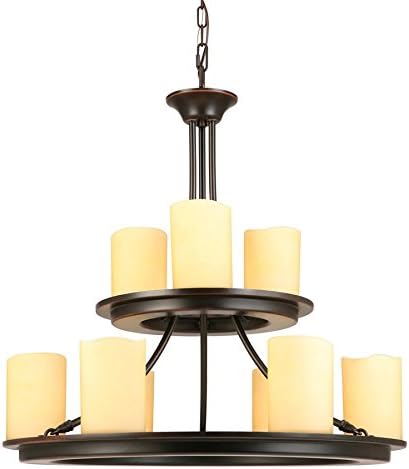
Figure 2: Front view of the chandelier, highlighting the oil-rubbed bronze finish and the nine candle-like shades.
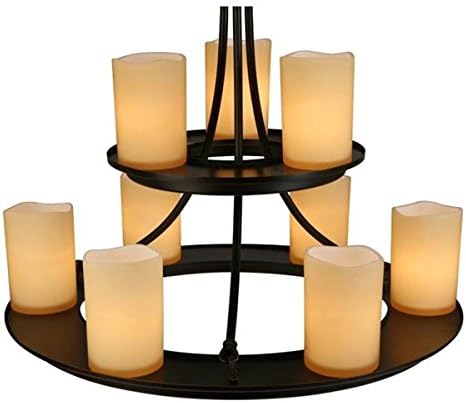
Figure 3: Detailed view of the chandelier's two-tiered design and the amber-tinted glass shades.
5. Operating Instructions
Once installed and bulbs are in place, restore power at the circuit breaker. The chandelier can be operated using a standard wall switch (push button type). This fixture is dimmable, allowing you to adjust the light output to create your desired ambiance.
- To dim the light, use incandescent bulbs or LED bulbs specifically rated for dimmable functionality.
- Ensure all bulbs are securely screwed into their sockets for proper operation.
6. Maintenance
Regular maintenance will help preserve the appearance and functionality of your chandelier.
- Cleaning: Always turn off the power and allow the fixture to cool before cleaning. Wipe the fixture with a soft, dry cloth. Do not use abrasive cleaners, solvents, or polishes as they may damage the finish. For glass shades, a mild glass cleaner can be used on a cloth, then wipe dry.
- Bulb Replacement: Ensure power is off and bulbs have cooled. Unscrew the old bulb and replace it with a new 60-watt medium base (E-26) A19 bulb.
- Inspection: Periodically check all connections and mounting hardware to ensure they remain secure.
7. Troubleshooting
If you experience issues with your chandelier, refer to the following common problems and solutions:
| Problem | Possible Cause | Solution |
|---|---|---|
| Light does not turn on. | No power to the fixture. Loose wire connections. Faulty bulb. | Check circuit breaker or fuse. Verify all wire connections are secure (ensure power is off first). Replace bulb(s). |
| Light flickers. | Loose bulb. Incorrect dimmer switch (if applicable). Loose wire connection. | Tighten bulb. Ensure dimmer switch is compatible with bulb type (incandescent or dimmable LED). Check wire connections (ensure power is off first). |
| Bulbs burn out quickly. | Incorrect wattage bulb. Voltage fluctuations. | Use bulbs with the correct wattage (max 60W). Consult an electrician to check household voltage. |
8. Specifications
- Brand: allen + roth
- Model: Harpwell IXP8119A
- Fixture Type: Chandelier
- Number of Lights: 9
- Dimensions: 25 in. (W) x 26 in. (H)
- Adjustable Height: Yes, up to 60 in. (chain)
- Material: Metal
- Finish: Oil-Rubbed Bronze
- Shade Material: Tinted Glass (Tea-stained appearance)
- Light Bulb Base Type: Medium base (E-26)
- Recommended Light Bulb Shape: A19
- Max Wattage per Bulb: 60 watts
- Dimmable: Yes (with incandescent or dimmable LED bulbs)
- Lighting Direction: Uplighting
- Mounting Type: Ceiling Mount
- Safety Listing: UL Listed (Dry Usage)
- Recommended Room Use: Kitchens, Dining Rooms, Foyers, Bedrooms, Living Rooms
- UPC: 725916105389
9. Warranty and Support
For warranty information or technical support, please refer to the documentation provided at the point of purchase or contact allen + roth customer service. Keep your purchase receipt as proof of purchase for any warranty claims.
For further assistance, please visit the official allen + roth website or contact their customer support line.


