1. Introduction
The Benro BV10H 100mm Professional Video Head is designed for professional filmmakers requiring robust support and precise control for heavy camera setups. This video head features a 100mm half-ball base, a 22 lb (10 kg) load capacity, 5-step counterbalance, and 4-step pan/tilt drag controls. Its versatile design allows for smooth, steady camera movements and efficient workflow in various production environments.
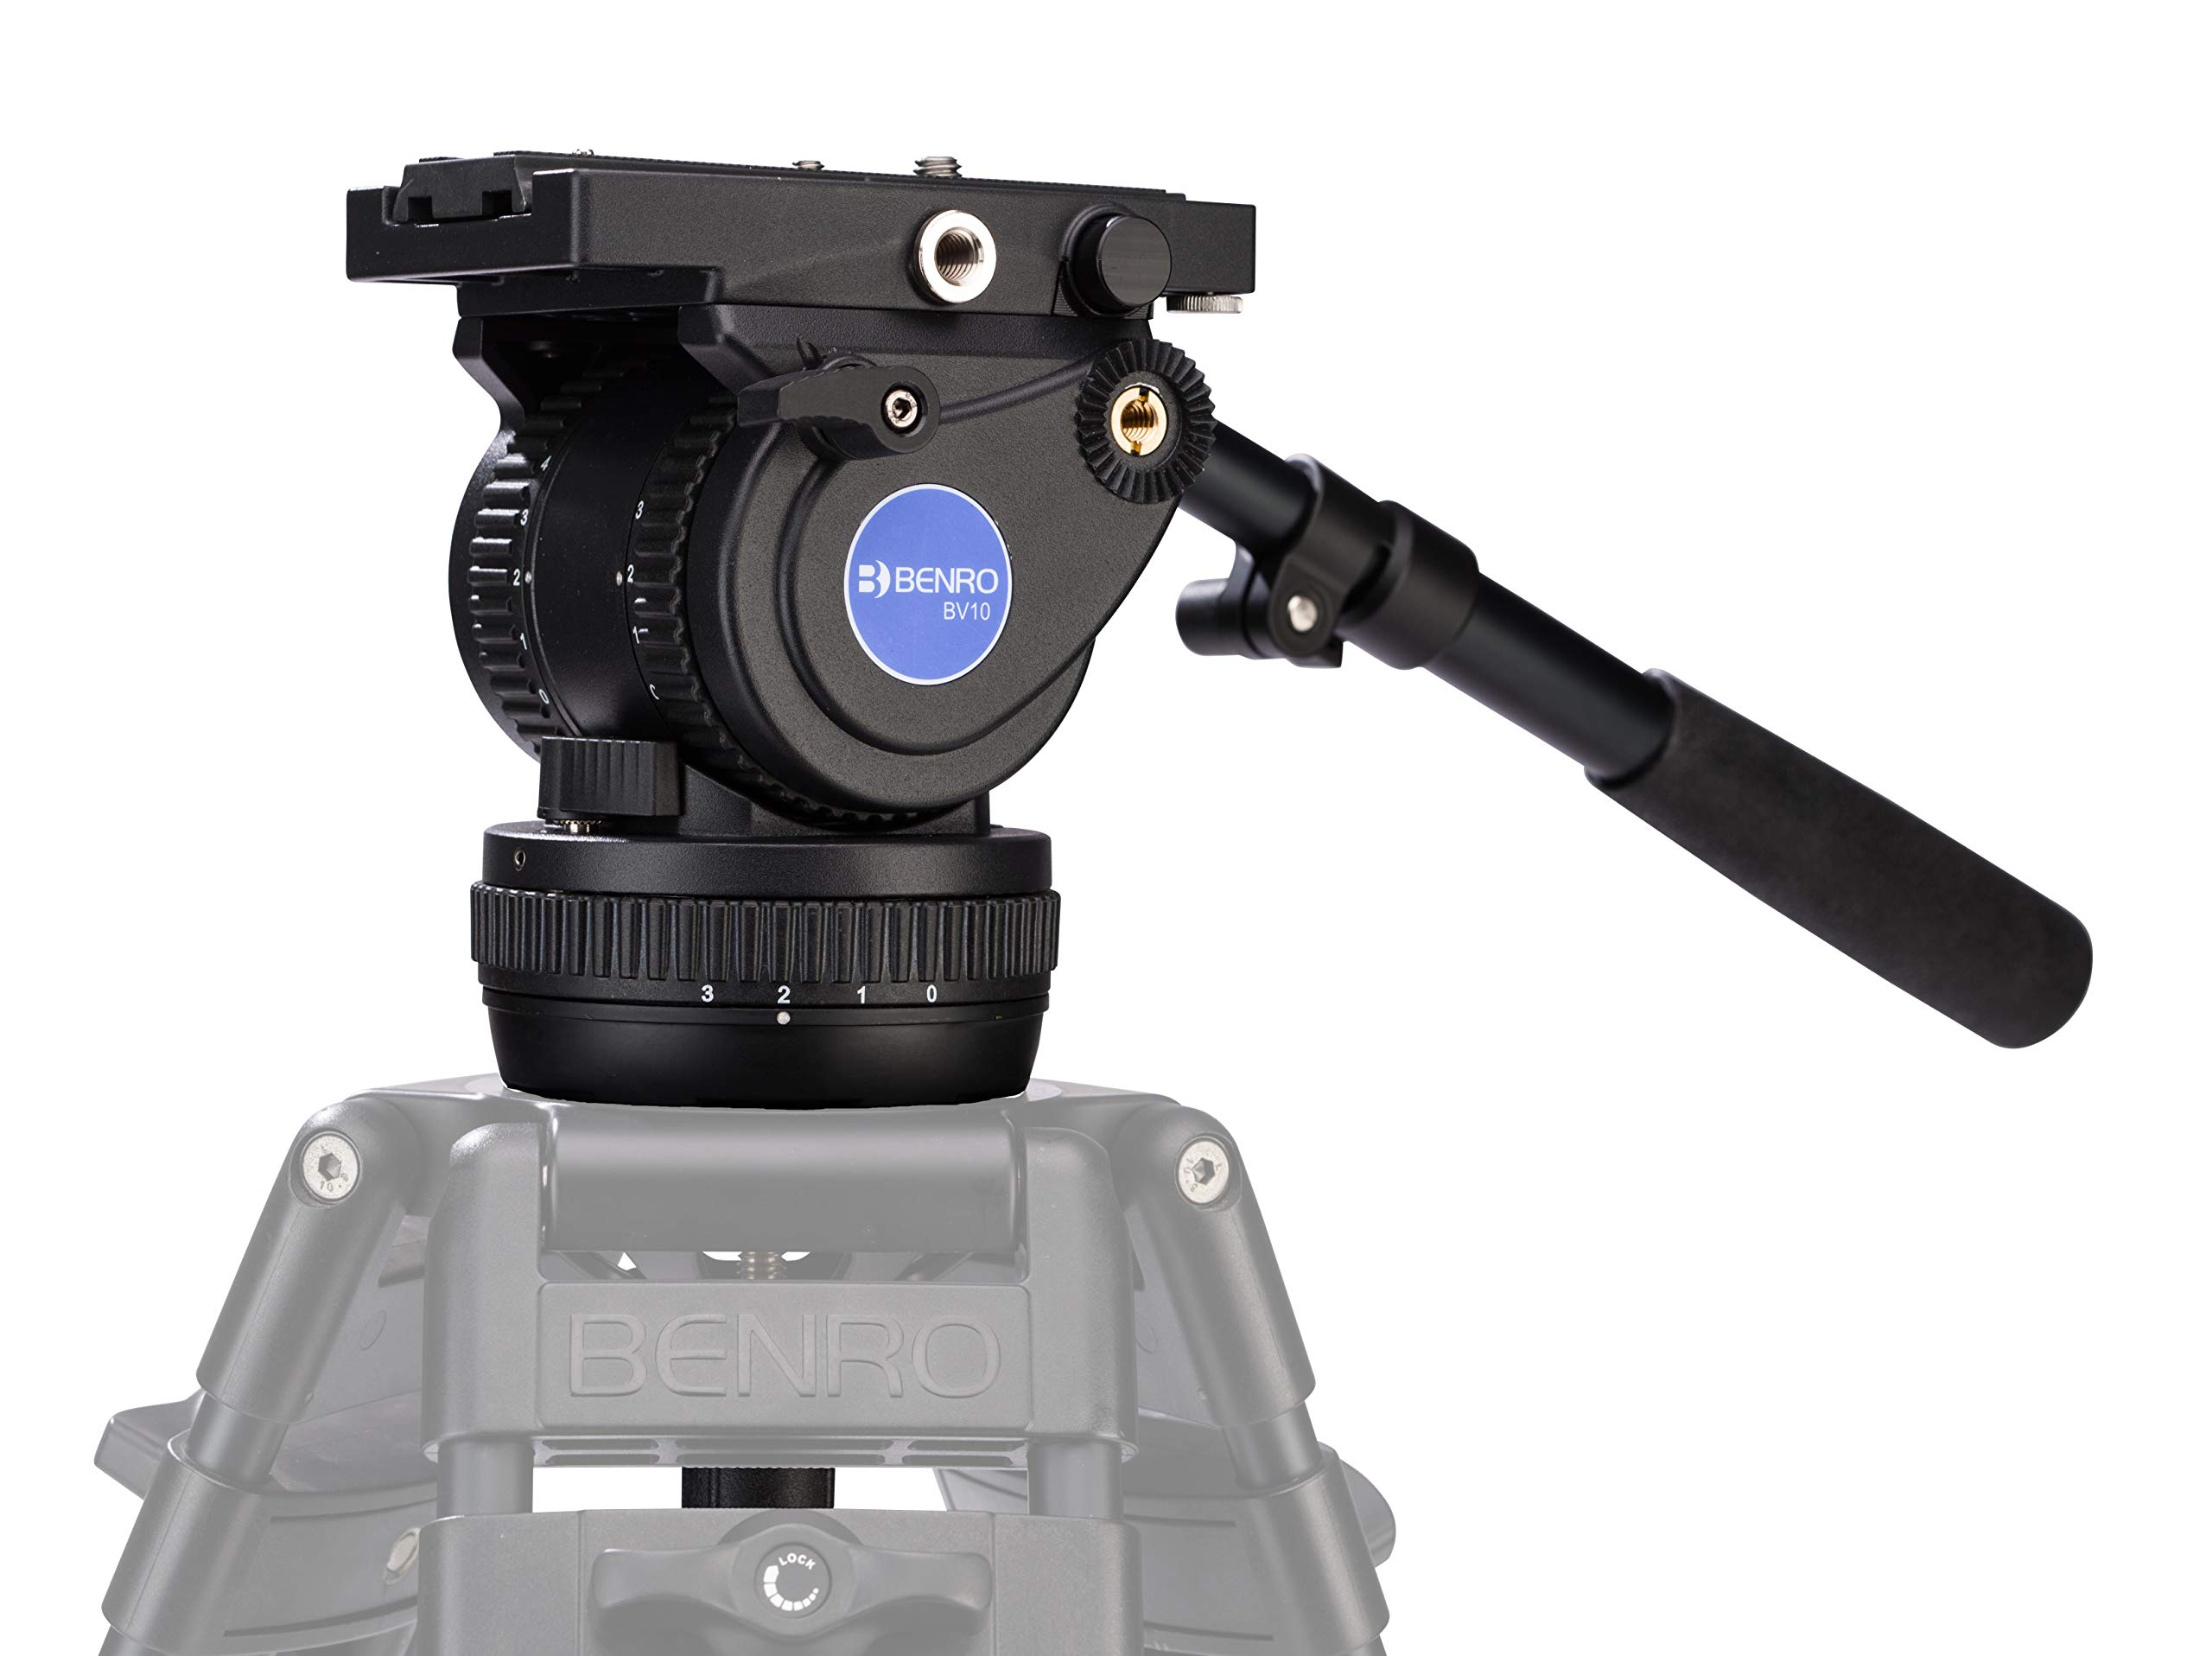
Figure 1: Benro BV10H 100mm Professional Video Head with camera setup.
2. Key Features
- Studio-Grade Support: Engineered with a 100mm half-ball base and rated for up to 22 lb (10 kg) of camera equipment, providing a strong foundation for professional video rigs and heavy mirrorless or DSLR systems.
- Advanced Motion Control: Features stepped pan and tilt drag controls plus independent locks on each axis for precise, repeatable camera movement, ideal for cinematic tracking and ENG workflows.
- Sophisticated Counterbalance: A 5-step counterbalance system (0, 4, 6, 8, 10 kg) allows you to match resistance to rig weight, keeping your camera balanced and reducing drift when tilting or panning under load.
- Professional-Ready Features: Includes a 501/504PL compatible sliding camera plate, Arca-Swiss style interface, dual rosettes for pan-handle mounting, and a built-in 3/8"-16 accessory mount for monitors or audio gear.
- Efficient Setup & Workflow: Quick leveling via the 100mm bowl eliminates leg adjustments, while left-side operator-oriented controls and an integrated bubble level streamline setup and field operation.
3. What's in the Box
Upon unpacking, please ensure all the following items are present:
- Benro BV10H 100mm Video Head
- Tie-down Handle
- QR13 Camera Plate (501/504PL compatible)
4. Setup
4.1 Attaching to a Tripod
- Ensure your tripod is stable and securely positioned.
- Place the BV10H video head onto the tripod's 100mm bowl.
- Tighten the tie-down handle securely to fasten the video head to the tripod.
4.2 Leveling the Video Head
The integrated bubble level allows for quick and accurate leveling of your camera setup.
- Loosen the tie-down handle slightly to allow the half-ball to move freely.
- Adjust the video head until the bubble in the integrated level is centered.
- Once level, securely tighten the tie-down handle.

Figure 2: Adjusting the bubble level for precise camera leveling.
4.3 Mounting the Camera
The BV10H features a sliding quick-release plate system for easy camera mounting and removal.
- Attach the QR13 camera plate to the bottom of your camera using the appropriate screw (usually 1/4"-20 or 3/8"-16).
- Ensure the camera plate is securely fastened to your camera.
- Slide the camera plate with the attached camera into the receiver on the video head.
- Engage the safety lock to prevent accidental slipping.
- Adjust the camera plate's position forward or backward to achieve optimal balance for your camera setup. This compensates for varying centers of gravity.
- Once balanced, lock the quick-release plate securely.
Video 1: Demonstrates the quick-release plate system and camera mounting process.
5. Operation
5.1 Counterbalance Adjustment
The 5-step counterbalance system (0-4) helps prevent the camera from tipping forward or backward, ensuring smooth tilt movements.
- With the camera mounted and balanced, adjust the counterbalance dial (typically on the left side of the head) to match your camera's weight and center of gravity.
- Start at setting '0' and gradually increase the setting until the camera remains stable when tilted to various angles without being held.
5.2 Pan and Tilt Drag Control
The 4-step pan and tilt drag controls allow you to customize the resistance for smooth and precise camera movements.
- Tilt Drag: Adjust the tilt drag control knob to increase or decrease resistance during vertical camera movements.
- Pan Drag: Adjust the pan drag control knob to increase or decrease resistance during horizontal camera movements.
- Independent locks for both pan and tilt axes are available to secure the camera in a fixed position.
5.3 Pan Arm Installation and Use
The removable telescoping pan arm can be mounted on either side of the video head for comfortable operation.
- Insert the pan arm into one of the rosettes on either side of the video head.
- Tighten the locking knob on the rosette to secure the pan arm.
- Adjust the length of the telescoping pan arm for optimal comfort and control.
5.4 Accessory Mount
A 3/8"-16 accessory mount is provided for attaching external devices.
- Use this mount to attach accessories such as video monitors, audio recorders, or small lights.
- Ensure any attached accessories do not exceed the head's maximum load capacity and are securely fastened.
6. Maintenance
Proper maintenance ensures the longevity and optimal performance of your Benro BV10H video head.
- Cleaning: Regularly wipe down the video head with a soft, dry cloth to remove dust and debris. For stubborn dirt, use a slightly damp cloth and mild soap, then dry thoroughly. Avoid harsh chemicals or abrasive materials.
- Lubrication: The internal mechanisms are factory-lubricated. Do not attempt to lubricate internal parts yourself, as this may void the warranty or damage the head.
- Storage: Store the video head in a clean, dry environment, away from extreme temperatures and humidity. Use the provided carrying bag or a protective case for transport.
- Inspection: Periodically check all knobs, levers, and screws for tightness. Ensure the quick-release plate mechanism operates smoothly.
7. Troubleshooting
If you encounter issues with your Benro BV10H video head, refer to the following common problems and solutions:
- Camera not balancing correctly:
- Ensure the camera plate is properly positioned and locked.
- Adjust the sliding quick-release plate forward or backward to find the camera's center of gravity.
- Verify the counterbalance setting is appropriate for your camera's weight.
- Pan or tilt movements are not smooth:
- Check if the pan or tilt drag controls are set too high or too low for your preference. Adjust as needed.
- Ensure the pan and tilt locks are fully disengaged.
- Clean any dust or debris from the moving parts.
- Video head feels loose on the tripod:
- Tighten the tie-down handle that secures the video head to the tripod's bowl.
- Ensure the tripod legs are fully extended and locked.
- Accessories not attaching securely to the 3/8"-16 mount:
- Verify that the accessory has a compatible 3/8"-16 screw.
- Ensure the accessory is tightened firmly but do not overtighten.
If the issue persists, please contact Benro customer support for further assistance.
8. Specifications
| Feature | Detail |
|---|---|
| Model Number | BV10H |
| Load Capacity | Up to 22.0 lb (10 kg) |
| Bowl Size | 100 mm |
| Counterbalance Steps | 5 steps (0-4) |
| Pan/Tilt Drag Steps | 4 steps |
| Tilt Range | +90° / -70° |
| Accessory Mount | One 3/8"-16 thread |
| Quick Release Plate | QR13 (501/504PL compatible) |
| Item Weight | 6.61 pounds (3 kg) |
| Product Dimensions (L x W x H) | 18.11 x 9.84 x 7.87 inches (46 x 25 x 20 cm) |
| Compatible Devices | Camera, Monitor |
9. Warranty & Support
9.1 Limited Warranty
The standard limited warranty for the Benro BV10H is 3 years from the date of purchase for the original owner. If you register the product online, the warranty is extended by an additional 2 years, totaling 5 years in applicable regions. Please refer to the official Benro website for complete warranty terms and conditions.
9.2 Customer Support
For technical assistance, spare parts, or warranty claims, please contact Benro customer support. You can find contact information and additional resources on the official Benro website: www.benro.com.