1. Important Safety Information
Please read all instructions before assembly and operation. Keep this manual for future reference.
- Recommended Age: Suitable for children aged 3 years and above.
- Adult Supervision: Adult supervision is recommended during play, especially during initial setup.
- Small Parts: This product contains small parts (die-cast cars) which may pose a choking hazard for very young children.
- Avoid Misuse: Do not aim cars at eyes or face. Do not modify the track or cars.
- Cleaning: Clean with a damp cloth only. Do not immerse in water.
2. Package Contents
Ensure all items listed below are present in the package:
- 1 x Shark Attack Track Set
- 3 x Die-cast Cars

Figure 2.1: Product packaging illustrating the track set and included cars.
3. Assembly and Setup
Follow these steps to assemble your Shark Attack Track:
- Unpack Components: Carefully remove all track pieces, the shark head, the launcher, and the die-cast cars from the packaging.
- Connect Track Pieces: Join the track sections together to form a single lane race track. Ensure the connections are secure.
- Attach Launcher: Securely attach the pull-back elastic launcher to the starting end of the track.
- Position Shark Head: Place the shark head at the designated point on the track, ensuring the car can pass through its jaws.
- Prepare Cars: Place the die-cast cars near the launcher, ready for play.

Figure 3.1: The fully assembled track set, showing the launcher, track, shark head, and included cars.
4. Operating Instructions
Once assembled, the track is ready for action:
- Place a Car: Position one of the die-cast cars onto the track, directly in front of the launcher.
- Engage Launcher: Pull back the elastic launcher mechanism.
- Release Car: Release the launcher to propel the car forward along the track.
- Watch the Action: Observe as the car speeds along the track and attempts to pass through the shark's open jaws.
- Repeat: Use the other included cars or compatible 3-inch die-cast cars for continuous play.
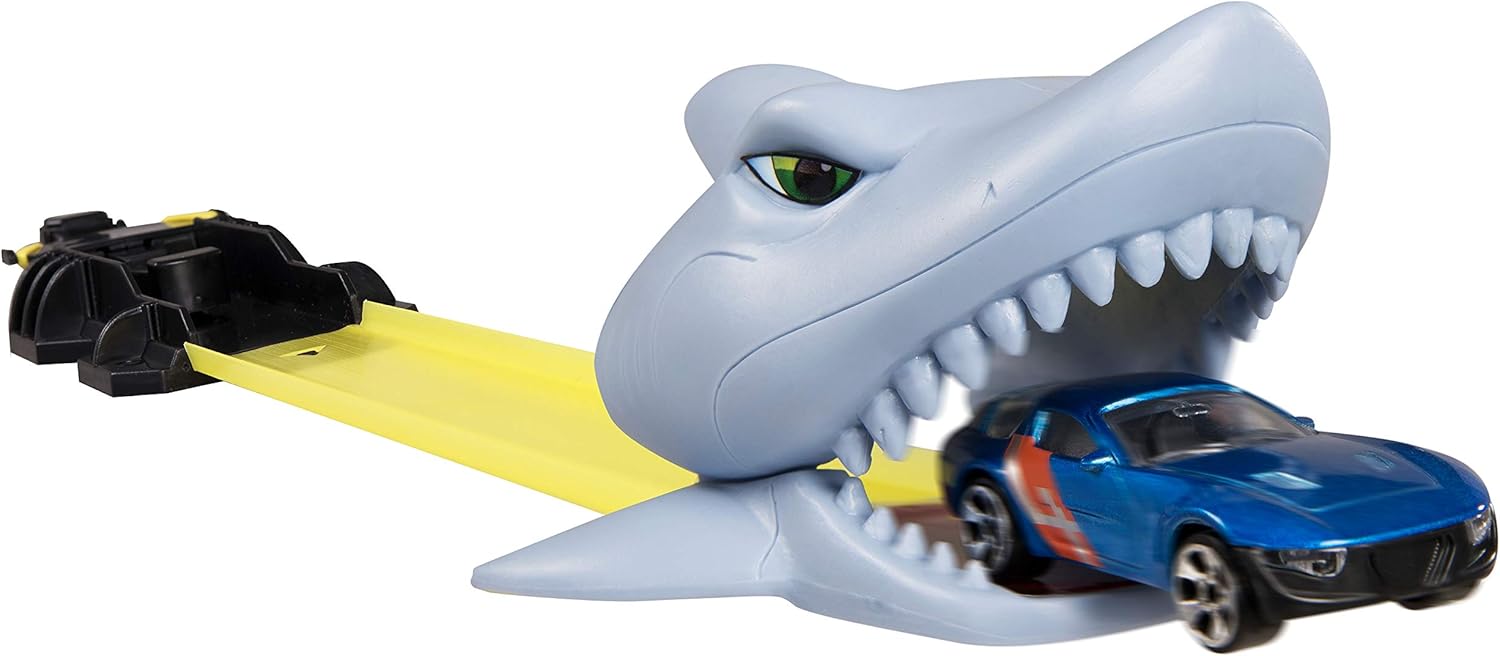
Figure 4.1: A die-cast car successfully navigating the shark's mouth on the track.
5. Maintenance
To ensure the longevity of your Teamsterz Shark Attack Track:
- Cleaning: Wipe the track and cars with a soft, damp cloth. Do not use harsh chemicals or abrasive cleaners.
- Storage: Store the track set in a cool, dry place away from direct sunlight when not in use. Disassemble if necessary for compact storage.
- Inspection: Periodically check all track connections and the launcher mechanism for any signs of wear or damage. Discontinue use if damaged.
6. Troubleshooting
If you encounter any issues, refer to the following common problems and solutions:
| Problem | Solution |
|---|---|
| Car does not launch effectively. | Ensure the car is placed correctly against the launcher. Pull the launcher back fully before releasing. Check the elastic band for damage. |
| Car gets stuck in the shark's jaws. | Verify that the shark head is positioned correctly and not obstructing the track. Ensure the car is launched with sufficient force. |
| Track pieces do not stay connected. | Ensure all connectors are fully engaged. Avoid lifting the track by a single section. |
7. Specifications
- Model Number: 7535-16435
- ASIN: B073HHLNVD
- Brand: HTI
- Product Dimensions: 4.5 x 5 x 12 inches
- Item Weight: 11.3 ounces
- Manufacturer Recommended Age: 3 years +
- Contents: 1 Track Set, 3 Die-cast Cars
8. Warranty and Support
This product is manufactured by HTI. For any questions regarding product assembly, operation, or missing parts, please contact the retailer or manufacturer directly. Please retain your proof of purchase for any warranty claims.
No specific warranty information is provided with this manual. Please refer to the product packaging or retailer's website for details on applicable warranties.