Hampton Bay 57289
Hampton Bay Holly Springs 52-inch Ceiling Fan User Manual
Model: 57289
Introduction
This manual provides detailed instructions for the installation, operation, and maintenance of your Hampton Bay Holly Springs Low Profile 52-inch LED Brushed Nickel Ceiling Fan. Please read this manual thoroughly before beginning installation or operation to ensure safe and proper use of the product.
The Hampton Bay Holly Springs Low Profile ceiling fan is designed for large rooms with low ceilings, offering optimal airflow without excessive hanging depth. It features QuickFit components for simplified installation, including a slide-on mounting bracket, AccuArm blade arms, and QuickInstall blades. The integrated light kit utilizes three energy-efficient LED bulbs.
Safety Information
Always follow basic safety precautions when installing and operating electrical appliances to reduce the risk of fire, electric shock, and personal injury.
- Disconnect power at the circuit breaker or fuse box before installation or servicing.
- Ensure all electrical connections comply with local codes and ordinances, as well as the National Electrical Code (NEC).
- Consult a qualified electrician if you are unsure about wiring or installation procedures.
- Mount the fan directly to a structural ceiling joist or an outlet box marked "Acceptable for Fan Support of 35 lbs (15.9 kg) or less."
- Keep hands, feet, and other objects away from the rotating fan blades.
- Do not operate the fan with damaged parts.
- This fan is designed for indoor use only.
Package Contents
Verify that all components are present before beginning installation. If any parts are missing or damaged, contact Hampton Bay customer service.
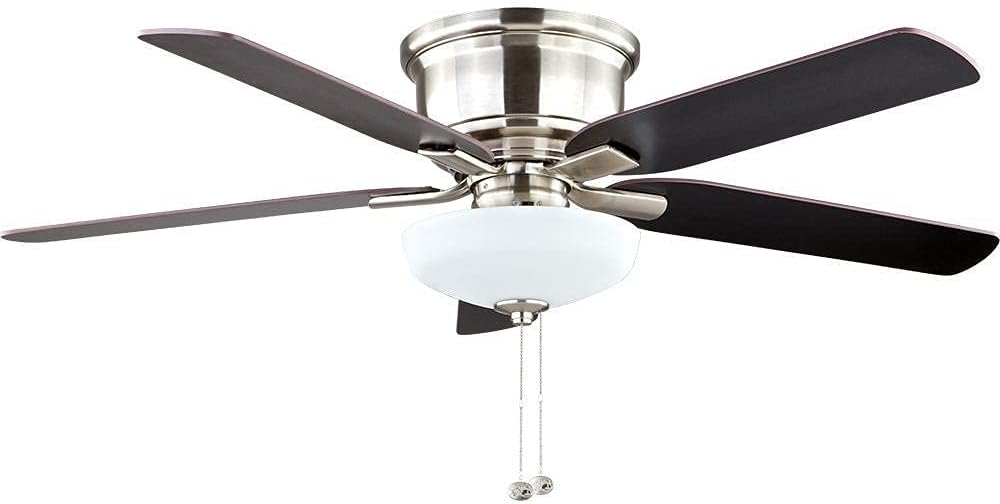
Main Fan Assembly: Includes motor housing, mounting bracket, and light kit components.

Fan Blades: Five reversible blades (Walnut/Brown finish) with AccuArm blade arms.

Individual Blade (Walnut): Detail of one fan blade showing the walnut finish.
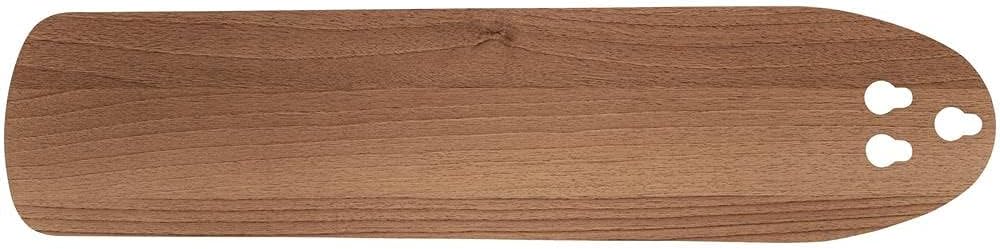
Individual Blade (Brown): Detail of one fan blade showing the brown finish.
Note: Additional hardware such as screws, washers, and wire nuts are included but not pictured. Refer to the detailed parts list in the included installation guide for a complete inventory.
Setup and Installation
Tools Required (Not Included):
- Phillips screwdriver
- Flathead screwdriver
- Adjustable wrench
- Wire strippers
- Electrical tape
- Step ladder
Pre-Installation Considerations:
- Ensure the installation location has a suitable electrical supply (120 Volts).
- The fan is designed for indoor use only.
- The fan is suitable for rooms 12 ft x 12 ft to 18 ft x 18 ft.
- The fan is a low-profile design, ideal for rooms with lower ceilings.

Dimensions and Room Suitability: The fan has a 52-inch span and a height of approximately 14.17 inches, suitable for large rooms (12 ft x 12 ft to 18 ft x 18 ft).
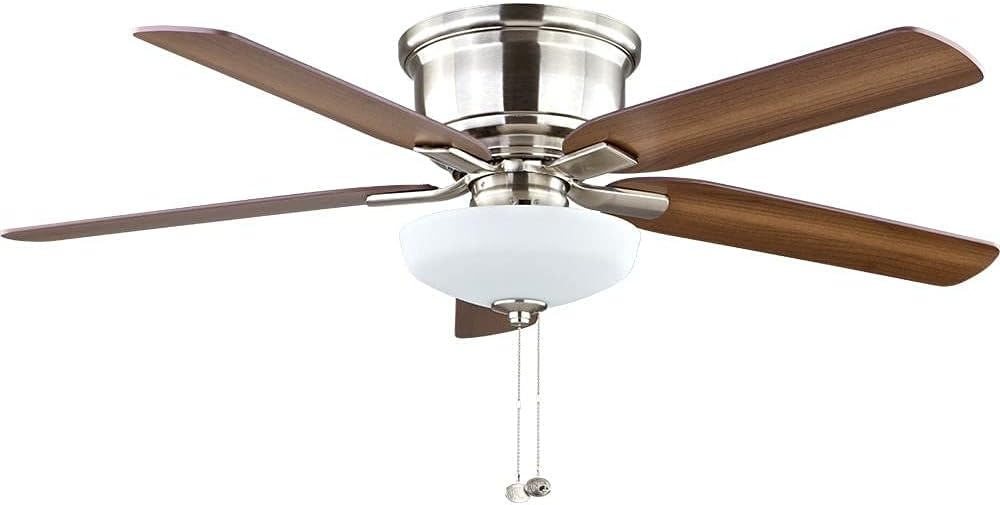
Key Features Overview: Illustrates close-to-ceiling mounting, pull chain control, LED bowl light kit, 3,763 CFM airflow, suitability for large rooms, and reversible walnut/brown blade finishes.
Installation Steps:
- Turn Off Power: Before starting, ensure power is turned off at the circuit breaker or fuse box to prevent electrical shock.
- Mounting Bracket Installation: Secure the mounting bracket to the ceiling outlet box. Ensure the outlet box is securely fastened to the building structure and is marked "Acceptable for Fan Support."
- Wiring Connections: Connect the fan's electrical wires to the household wiring according to the wiring diagram provided in the full installation guide. Typically, this involves connecting live, neutral, and ground wires.
- Fan Assembly Attachment: Carefully lift the fan assembly and attach it to the mounting bracket. The QuickFit slide-on mounting bracket simplifies this step.
- Blade Installation: Attach the fan blades to the motor housing using the AccuArm blade arms and QuickInstall blades. Ensure blades are securely fastened. You can choose between the walnut or brown side of the reversible blades.
- Light Kit Installation: Install the frosted glass bowl light kit. Insert the three LED bulbs into the sockets.
- Final Checks: Double-check all connections and ensure no wires are pinched. Restore power at the circuit breaker.
Operating Instructions
The Hampton Bay Holly Springs ceiling fan is controlled via pull chains.
Fan Speed Control:
- Locate the fan speed pull chain (usually marked or identifiable by a fan icon).
- Pull the chain once for high speed.
- Pull the chain a second time for medium speed.
- Pull the chain a third time for low speed.
- Pull the chain a fourth time to turn the fan off.
Light Control:
- Locate the light kit pull chain (usually marked or identifiable by a light bulb icon).
- Pull the chain once to turn the light on.
- Pull the chain a second time to turn the light off.
Reversing Fan Direction (Seasonal Use):
A slide switch on the fan motor housing controls the direction of airflow. This switch is typically located on the side of the motor housing, above the light kit.
- Summer Operation (Downward Airflow): Set the switch to the position that causes the blades to rotate counter-clockwise, pushing air downward to create a cooling effect.
- Winter Operation (Upward Airflow): Set the switch to the position that causes the blades to rotate clockwise, drawing air upward to circulate warm air trapped near the ceiling.
- Always turn off the fan and wait for the blades to stop completely before changing the direction switch.
Maintenance
Regular maintenance ensures optimal performance and extends the life of your ceiling fan.
- Cleaning: To avoid damaging the finish, clean the fan with a soft, damp cloth. Do not use abrasive cleaners or solvents.
- Blade Cleaning: Dust the fan blades regularly to prevent dust buildup, which can affect balance and airflow.
- Tightening Screws: Periodically check all screws on the fan assembly, especially those securing the blades, and tighten them if necessary. Vibration from normal fan operation can cause screws to loosen over time.
- Light Bulb Replacement: The fan uses LED bulbs. While LEDs have a long lifespan, if replacement is needed, ensure the power is off before changing bulbs. Use only bulbs of the specified wattage and type.
- No Lubrication Required: The fan motor is permanently lubricated and does not require oiling.
Troubleshooting
| Problem | Possible Cause | Solution |
|---|---|---|
| Fan does not start. | No power to the fan; Loose wire connections; Incorrect wiring. | Check circuit breaker/fuse; Ensure all connections are secure; Verify wiring against diagram. |
| Fan wobbles. | Loose blade screws; Unbalanced blades; Loose mounting bracket. | Tighten all blade screws; Use balancing kit (if necessary); Ensure mounting bracket is secure. |
| Light kit does not work. | Loose wire connections; Faulty bulb; Incorrect bulb type. | Check light kit wiring; Replace bulb; Ensure correct bulb type and wattage. |
| Noisy operation. | Loose screws; Motor hum (normal); Blades hitting an obstruction. | Tighten all screws; Ensure fan is mounted securely; Check for obstructions. |
Specifications
- Model Number: 57289
- Brand: Hampton Bay
- Fan Size: 52 inches
- Design: Low Profile Ceiling Fan
- Finish: Brushed Nickel
- Blade Finish: Reversible Walnut/Brown
- Light Kit: Integrated LED Bowl Light Kit
- Bulb Type: LED (compatible with CFL, incandescent, LED)
- Wattage: 29 watts (fan motor)
- Voltage: 120 Volts
- Control Method: Pull Chain
- Airflow: 3,763 Cubic feet per minute (CFM)
- Indoor/Outdoor Usage: Indoor use only
- Item Weight: 22.2 pounds
- Product Dimensions (Installed): 52 inches (diameter) x 14.17 inches (height)
- UPC: 082392572891
Warranty and Support
This product is refurbished and tested to look and work like new. The refurbishing process includes functionality testing, basic cleaning, inspection, and repackaging. The product ships with all relevant accessories, and may arrive in a generic box.
For specific warranty details or technical support, please refer to the documentation included with your purchase or contact Hampton Bay customer service directly. Contact information can typically be found on the manufacturer's website or on the product packaging.
Note: The provided product information indicates this is a refurbished item. Warranty terms for refurbished products may differ from new products.