1. Introduction
This manual provides essential information for the safe and efficient operation of your Philips Daily Collection HD2583/90 600-Watt 2-in-1 Toaster and Sandwichmaker. Please read these instructions carefully before first use and retain them for future reference.

Image 1: The Philips Daily Collection HD2583/90 2-in-1 Toaster and Sandwichmaker with a croissant on the integrated bun rack.
2. Important Safety Instructions
Always follow basic safety precautions when using electrical appliances to reduce the risk of fire, electric shock, and injury.
- Do not touch hot surfaces. Use handles or knobs.
- To protect against electrical hazards, do not immerse the cord, plugs, or appliance in water or other liquid.
- Close supervision is necessary when any appliance is used by or near children.
- Unplug from outlet when not in use and before cleaning. Allow to cool before putting on or taking off parts.
- Do not operate any appliance with a damaged cord or plug, or after the appliance malfunctions or has been damaged in any manner.
- Do not use outdoors.
- Do not let cord hang over edge of table or counter, or touch hot surfaces.
- Do not place on or near a hot gas or electric burner, or in a heated oven.
- Always attach plug to appliance first, then plug cord into the wall outlet. To disconnect, turn any control to “off”, then remove plug from wall outlet.
- Do not use appliance for other than intended use.
- Oversize foods, metal foil packages, or utensils must not be inserted in a toaster as they may create a risk of fire or electric shock.
- A fire may occur if toasters are covered or touching flammable material, including curtains, draperies, walls, and the like, when in operation.
- Do not attempt to dislodge food when toaster is plugged in.
- Do not operate unattended.
3. Product Overview
The Philips Daily Collection HD2583/90 is a versatile 2-in-1 appliance designed for both toasting bread and making sandwiches. It features a sleek black design and offers multiple functions for convenient use.
Key Features:
- 8 Browning Settings: Customize your toast to your preferred crispness.
- Integrated Bun Rack: Ideal for warming buns, pastries, and rolls.
- 2 Large Variable Slots: Accommodates different bread sizes, including thicker slices.
- Reheat and Defrost Functions: Conveniently reheat cold toast or defrost frozen bread.
- Cancel Button: Stop the toasting cycle at any time.
- Removable Crumb Tray: Ensures easy cleaning and maintains hygiene.
- Integrated Sandwich Maker: Allows for easy preparation of toasted sandwiches.
- Extra Auto Shut-off Protection: Enhances safety by automatically turning off the appliance.
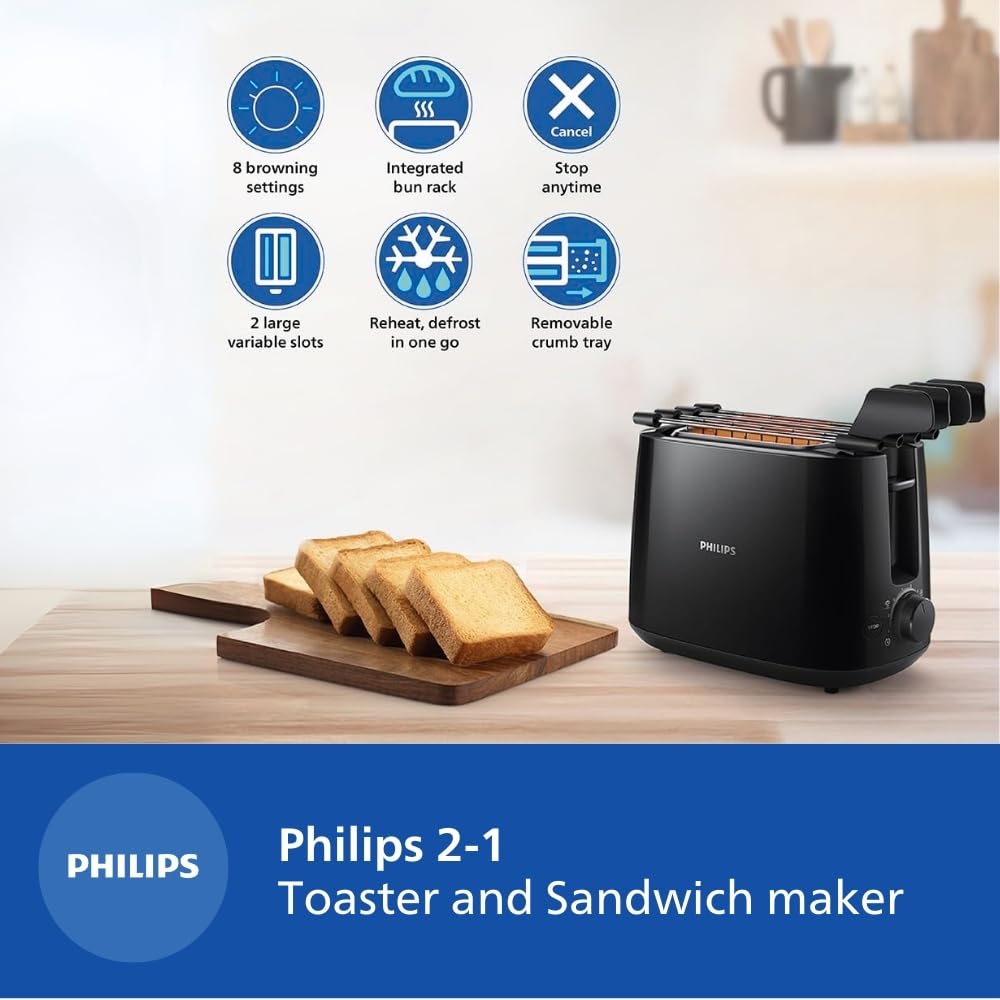
Image 2: Visual representation of the key features including 8 browning settings, integrated bun rack, cancel function, 2 large variable slots, reheat/defrost, and removable crumb tray.
4. Setup
4.1 Unpacking
Carefully remove the toaster and all accessories from the packaging. Retain the packaging for future storage or transport if needed.
4.2 Placement
Place the toaster on a stable, flat, heat-resistant surface, away from flammable materials such as curtains or walls. Ensure there is adequate ventilation around the appliance. The dimensions of the toaster are approximately 22.9 cm (Depth) x 32.4 cm (Width) x 21.4 cm (Height).

Image 3: Diagram showing the dimensions of the Philips HD2583/90 toaster.
4.3 Initial Cleaning
Before first use, wipe the exterior of the toaster with a damp cloth. Remove the crumb tray and wash it with warm, soapy water, then rinse and dry thoroughly. Do not immerse the main unit in water.
5. Operating Instructions
5.1 Toasting Bread
- Plug the toaster into a 240V power outlet.
- Place up to two slices of bread into the toasting slots. The large variable slots accommodate various bread types and thicknesses.
- Select your desired browning level using the browning control knob (settings 1-8). A lower number results in lighter toast, while a higher number results in darker toast.
- Press the carriage lever down until it locks into place. The toasting cycle will begin.
- Once the selected browning level is reached, the toast will automatically pop up.
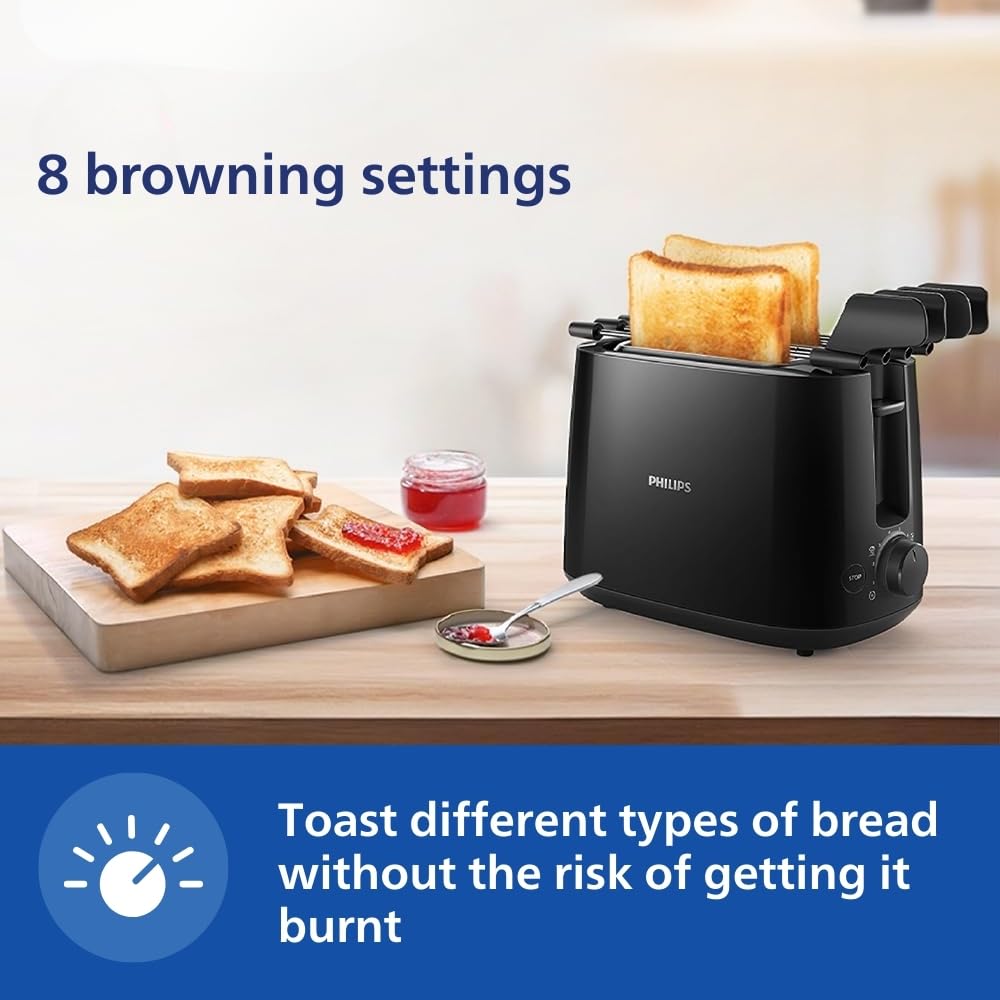
Image 4: The toaster in operation, demonstrating the 8 browning settings for different toast preferences.
5.2 Using the Integrated Bun Rack
The integrated bun rack is designed for warming buns, croissants, pastries, and rolls. To use:
- Gently push the bun rack levers upwards until the rack is in position above the toasting slots.
- Place the items to be warmed on the bun rack.
- Set the browning control to a low setting (e.g., 1 or 2).
- Press the carriage lever down. The heating elements will activate to warm the items.
- Once warmed, lift the carriage lever to stop heating and carefully remove the items.

Image 5: The integrated bun rack in use, warming a croissant.
5.3 Using the Integrated Sandwich Maker
The toaster includes an integrated sandwich maker for preparing toasted sandwiches.
- Prepare your sandwich.
- Open the sandwich maker racks and place your sandwich inside.
- Close the sandwich maker racks and insert them into the toasting slots.
- Select your desired browning level and press the carriage lever down.
- Once toasted, the sandwich will pop up. Carefully remove the sandwich maker racks and your toasted sandwich.

Image 6: The toaster with the sandwich maker racks, illustrating how to prepare a toasted sandwich.
5.4 Reheat and Defrost Functions
- Reheat: To reheat cold toast, place it in the slots, select a low browning setting, and press the carriage lever. The toaster will warm the toast without further browning.
- Defrost: To toast frozen bread, place it in the slots, select your desired browning setting, and press the carriage lever. The toaster will automatically adjust the cycle to defrost and then toast the bread.
5.5 Cancel Function
To stop the toasting cycle at any time, simply press the STOP button located on the front of the toaster. The carriage will immediately lift, and the heating elements will turn off.

Image 7: A hand pressing the 'STOP' button on the toaster to cancel the toasting process.
6. Maintenance and Cleaning
Regular cleaning ensures optimal performance and extends the life of your toaster.
6.1 Cleaning the Crumb Tray
- Always unplug the toaster and allow it to cool completely before cleaning.
- Pull out the removable crumb tray located at the bottom of the toaster.
- Empty the crumbs into a waste bin.
- Wipe the tray with a damp cloth or wash it with warm, soapy water. Rinse and dry thoroughly before reinserting.
- Push the crumb tray back into place until it clicks securely.
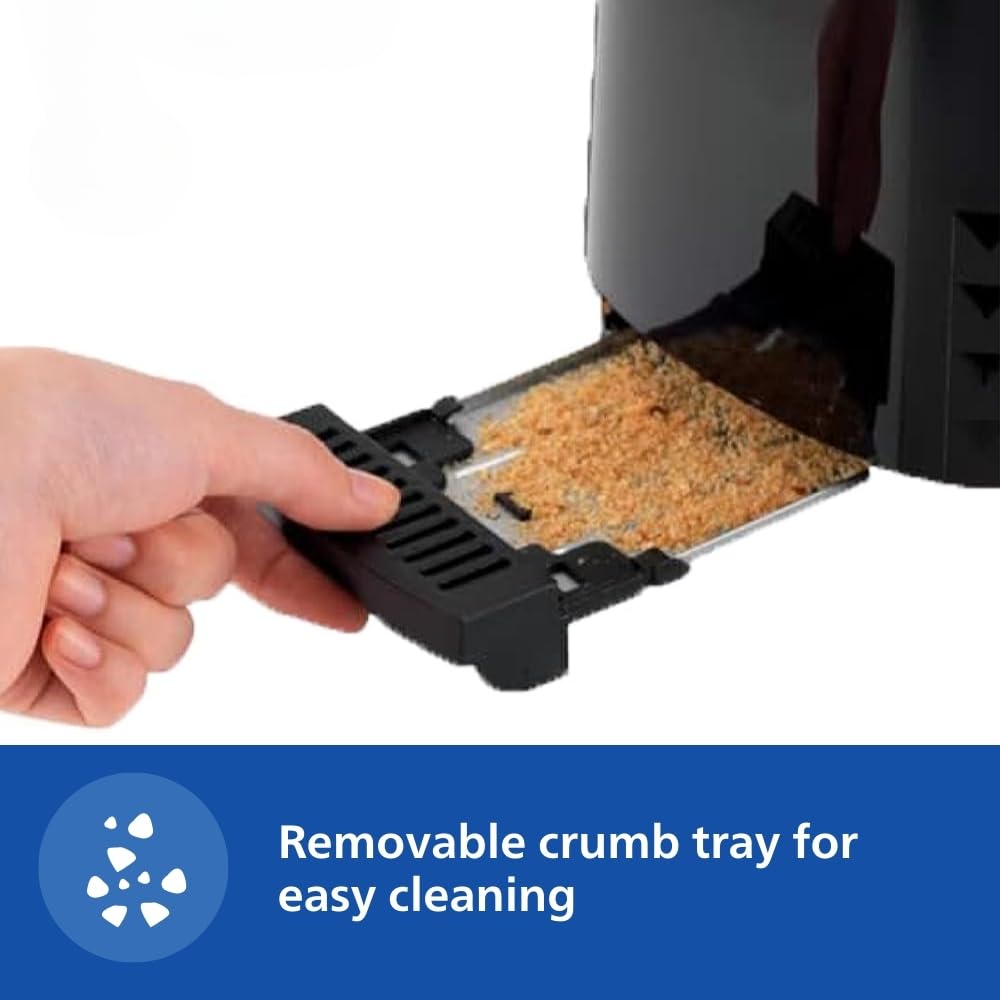
Image 8: A hand removing the crumb tray from the toaster for cleaning.
6.2 Cleaning the Exterior
Wipe the exterior of the toaster with a soft, damp cloth. Do not use abrasive cleaners or scouring pads, as these can damage the surface. Ensure the toaster is completely dry before plugging it back in.
6.3 Cleaning the Interior
Do not attempt to clean the interior of the toaster with any sharp objects or metal utensils. If food becomes lodged inside, unplug the toaster, allow it to cool, and carefully turn it upside down to shake out any debris. Never reach inside the toaster with your fingers or any conductive material.
7. Troubleshooting
If you encounter any issues with your Philips toaster, please refer to the following common troubleshooting tips:
- Toaster not turning on: Ensure the power cord is securely plugged into a working electrical outlet. Check if the circuit breaker has tripped.
- Toast not browning evenly: Ensure bread slices are centered in the slots. Different types of bread may require different browning settings.
- Carriage lever not staying down: This usually indicates that the toaster is not plugged in or there is no power.
- Smoke coming from toaster: Unplug immediately. This may be due to crumbs accumulating in the bottom of the toaster. Clean the crumb tray thoroughly. If the issue persists, discontinue use and contact customer support.
- Food stuck in toaster: Unplug the toaster and allow it to cool completely. Carefully remove the food using non-metallic tongs. Never use metal utensils.
If the problem persists after trying these steps, please contact Philips customer support.
8. Specifications
| Feature | Specification |
|---|---|
| Brand | Philips |
| Model Number | HD2583/90 |
| Wattage | 600 Watts |
| Voltage | 240 Volts |
| Number of Slices | 2 |
| Number of Browning Settings | 8 |
| Material | Plastic |
| Color | Black |
| Product Dimensions (D x W x H) | 22.9D x 32.4W x 21.4H Centimeters |
| Item Weight | 1.27 Kilograms |
| Special Feature | Cancel Function |
| Included Components | Pop-up toaster |
9. Warranty and Support
9.1 Warranty Information
This Philips Daily Collection HD2583/90 Toaster and Sandwichmaker comes with a standard 2-year warranty on the product, ensuring peace of mind regarding manufacturing defects and performance issues. Please retain your purchase receipt as proof of purchase for warranty claims.
9.2 Customer Support
For any product-related queries, assistance, or to claim warranty, please contact Philips customer support. You can reach them via the toll-free number: 1800-102-2929.

Image 9: Information regarding Philips Free Home Service and the toll-free number for support.
10. Product Videos
10.1 Philips HD2583/90 Product Features Overview
Video 1: A short preview highlighting the key features of the Philips HD2583/90 toaster, including browning settings, bun rack, crumb tray, auto shut-off, reheat/defrost, cancel function, and integrated sandwich maker.
10.2 How to Use the Sandwich Maker
Video 2: A demonstration on how to effectively use the integrated sandwich maker feature of the Philips HD2583/90 toaster to prepare toasted sandwiches.
10.3 Philips HD2583/90 Product Overview
Video 3: A comprehensive overview of the Philips Daily Collection HD2583/90 2-in-1 Toaster and Sandwichmaker, detailing its design and functionalities.