Introduction
Thank you for choosing the Amazon Basics Vacuum Sealer Machine. This manual provides essential information for the safe and efficient operation, maintenance, and troubleshooting of your new appliance. Please read these instructions thoroughly before first use and retain them for future reference.
This vacuum sealer is designed to preserve food by removing air from specially designed bags, extending freshness and flavor. It is also suitable for preparing food for sous vide cooking and protecting non-food items from moisture and air.
Important Safety Instructions
- Read all instructions before use.
- Do not immerse the appliance, power cord, or plug in water or other liquids.
- This appliance is not intended for use by persons (including children) with reduced physical, sensory or mental capabilities, or lack of experience and knowledge, unless they have been given supervision or instruction concerning use of the appliance by a person responsible for their safety.
- Children should be supervised to ensure that they do not play with the appliance.
- Unplug from outlet when not in use and before cleaning. Allow to cool before putting on or taking off parts, and before cleaning the appliance.
- Do not operate any appliance with a damaged cord or plug or after the appliance malfunctions, or has been damaged in any manner.
- The sealing strip becomes hot during operation. Avoid direct contact.
- Use only Amazon Basics vacuum sealer bags or rolls designed for this appliance.
- This appliance is for household use only. Do not use outdoors.
Product Overview
Familiarize yourself with the components of your vacuum sealer.
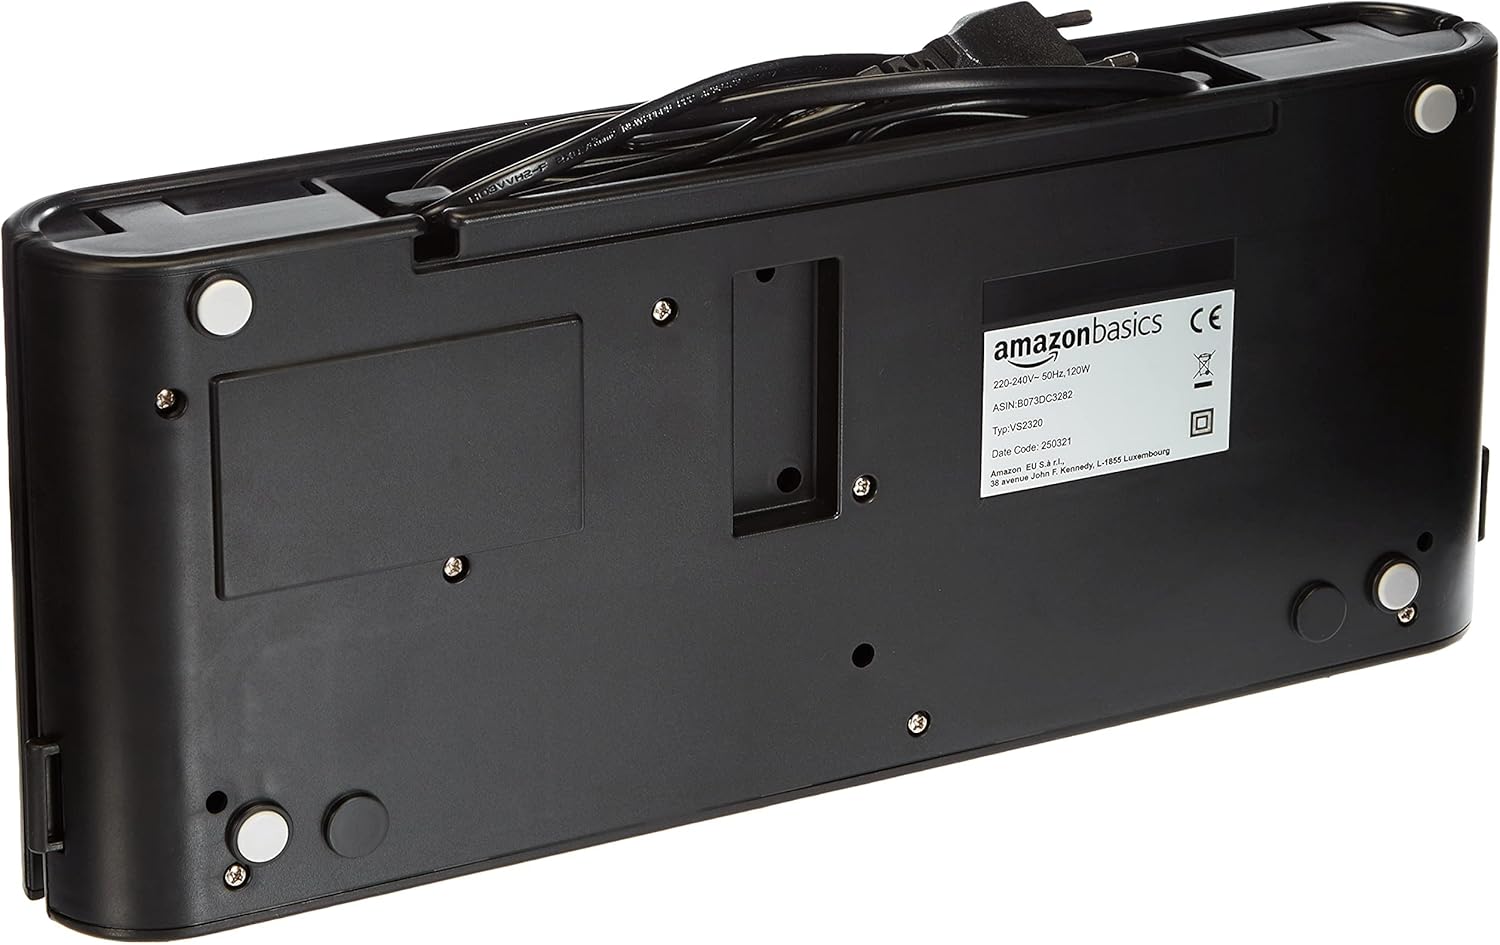
Image 1: Top view of the Amazon Basics Vacuum Sealer Machine. This image shows the sleek black design of the appliance with its control panel visible on the top surface.

Image 2: Interior view of the Amazon Basics Vacuum Sealer Machine with the lid open. This image highlights the vacuum channel, sealing strip, and foam gaskets.

Image 3: Close-up of the control panel on the Amazon Basics Vacuum Sealer Machine. Buttons for Dry, Moist, Pulse Vacuum, Seal, Vacuum & Seal, and Cancel are clearly visible.
Key Components:
- Control Panel: Buttons for various sealing modes (Dry, Moist, Pulse Vacuum, Seal, Vacuum & Seal, Cancel).
- Vacuum Channel: Area where air is extracted from the bag.
- Sealing Strip: Heats up to create an airtight seal.
- Gaskets: Create a vacuum chamber seal.
- Lid Latches: Secure the lid during operation.
- Integrated Bag Cutter: For custom-sized bags from rolls.
- Accessory Port: For external vacuuming of canisters (accessory hose not included).
Setup
- Unpack the Appliance: Carefully remove the vacuum sealer from its packaging. Retain packaging for storage or future transport.
- Inspect for Damage: Check the appliance for any signs of damage. Do not use if damaged.
- Clean the Appliance: Wipe the exterior with a damp cloth. Ensure the sealing strip and vacuum channel are clean and dry.
- Position the Appliance: Place the vacuum sealer on a flat, stable, and dry surface. Ensure there is enough space around it for operation.
- Power Connection: Plug the power cord into a standard electrical outlet. The appliance is ready for use.
- Cord Storage: The appliance features integrated cord storage on the underside for neat organization.

Image 4: Underside of the Amazon Basics Vacuum Sealer Machine, showing the power cord neatly stored in the integrated compartment.
Operating Instructions
This section details how to use your vacuum sealer for various food types and sealing needs.
Preparing Bags:
- Use only compatible vacuum sealer bags or rolls.
- When using a roll, pull out the desired length and use the integrated cutter to create a bag. Seal one end using the "Seal" function before filling.
- Leave at least 7-10 cm (3-4 inches) of space between the food and the top of the bag to ensure a proper seal.
- Ensure the inside of the bag near the sealing area is clean and dry. Moisture or food particles can prevent a proper seal.
Vacuum Sealing Food:
- Place Food in Bag: Put the food item into the vacuum sealer bag.
- Position the Bag: Open the lid of the vacuum sealer. Place the open end of the bag into the vacuum channel, ensuring it lies flat and smooth over the sealing strip. The bag opening should be fully inside the vacuum channel.
- Close the Lid: Press down firmly on both sides of the lid until you hear a click, indicating it is securely latched.
- Select Mode:
- Dry Mode: For dry food items. Press the "Vacuum & Seal" button. The machine will automatically vacuum the air and then seal the bag.
- Moist Mode: For moist or liquid-rich food items. Press the "Moist" button, then "Vacuum & Seal". This mode adjusts the vacuum pressure and sealing time for better results with moist foods.
- Pulse Vacuum: For delicate foods (e.g., bread, chips) where full vacuum might crush them. Press and hold "Pulse Vacuum" to manually control the vacuum process. Release the button when the desired vacuum level is reached, then press "Seal" to seal the bag.
- Seal Only: To create a seal without vacuuming (e.g., for making bags from a roll, or resealing bags). Place the bag end over the sealing strip and press "Seal".
- Monitor Process: The machine will indicate when the process is complete (e.g., indicator light turns off).
- Release and Remove: Press the release buttons (if present, or lift the lid firmly) to open the lid. Remove the sealed bag.

Image 5: A visual step-by-step guide demonstrating the process of preparing a bag, placing it in the vacuum sealer, and initiating the vacuum and seal process. This collage shows the bag cutter, bag placement, and button presses.
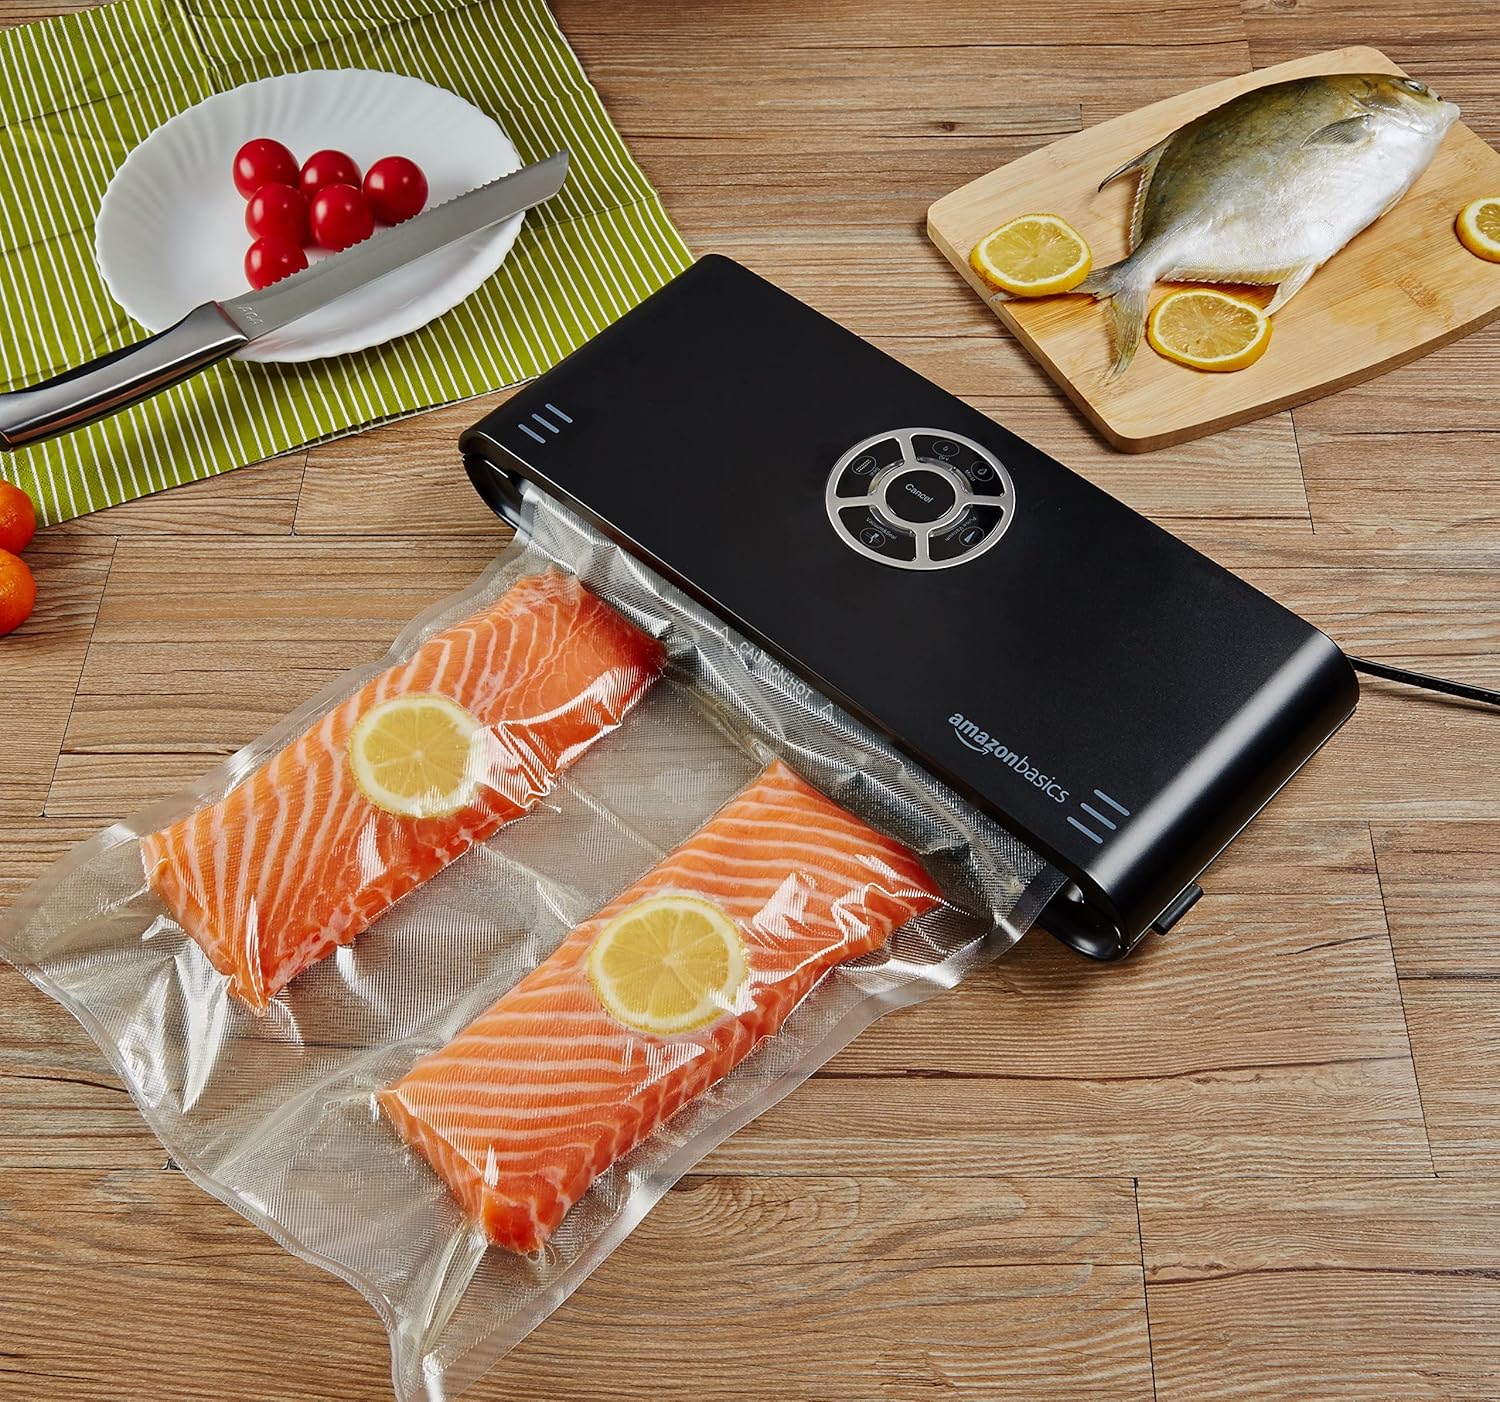
Image 6: Two salmon fillets vacuum-sealed in bags, ready for storage or cooking. This image illustrates the end result of the vacuum sealing process.
Maintenance
Proper maintenance ensures the longevity and optimal performance of your vacuum sealer.
- Cleaning:
- Always unplug the appliance before cleaning.
- Wipe the exterior with a damp cloth and mild soap. Do not use abrasive cleaners.
- Clean the vacuum channel and sealing strip after each use, especially if sealing moist foods. Use a damp cloth to remove any food residue. Ensure these areas are completely dry before next use.
- Do not immerse the appliance in water.
- Gasket Care:
- Inspect the foam gaskets regularly for any signs of wear, tears, or deformation. Damaged gaskets can prevent a proper vacuum seal.
- Clean gaskets with a damp cloth.
- Storage:
- Store the appliance with the lid unlatched to prevent compression of the gaskets, which can lead to permanent deformation and affect sealing performance.
- Store in a cool, dry place.
Troubleshooting
If you encounter issues with your vacuum sealer, refer to the following common problems and solutions:
| Problem | Possible Cause | Solution |
|---|---|---|
| Machine does not turn on. | Not plugged in; power outlet malfunction. | Ensure the power cord is securely plugged into a working outlet. |
| Machine vacuums but does not seal. | Bag not positioned correctly; sealing strip or gaskets dirty/damaged; bag material incompatible. |
|
| Machine seals but does not vacuum. | Lid not properly latched; gaskets dirty/damaged; bag not positioned correctly. |
|
| Air leaks into the bag after sealing. | Improper seal; puncture in bag; food with sharp edges. |
|
| Bag melts during sealing. | Sealing time too long (rare for automatic machines); bag not suitable. |
|
Specifications
| Model Number | VS2320EU |
| Brand | Amazon Basics |
| Dimensions (L x W x H) | 38 x 15.19 x 5.89 cm (14.96 x 5.98 x 2.32 inches) |
| Weight | 1.38 kg (3.04 lbs) |
| Material | Plastic and Metal |
| Color | Black |
| Seal Width | 30 cm (11.8 inches) |
| Vacuum Power | 90% at 0.8 bar |
| Seal Bar Thickness | 3 mm |
| Country of Origin | China |
| Special Features | Powerful automatic vacuum system, Multiple operating modes (Dry/Moist/Pulse), Strong seal, Integrated bag cutter, Cord storage |
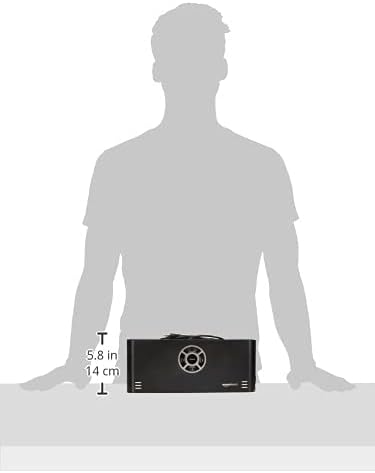
Image 7: Diagram illustrating the dimensions of the Amazon Basics Vacuum Sealer. The image shows the height of the machine as 5.8 inches (approximately 14.7 cm). Please note a slight discrepancy with the listed specification of 5.89 cm for height, which may be a typographical error in the source data.
Warranty and Support
For warranty information and customer support, please refer to the documentation included with your purchase or visit the official Amazon Basics website.
Online Support: For the most up-to-date information, FAQs, and contact options, please visit Amazon Customer Service.

