Important Safety Instructions
When using electrical appliances, basic safety precautions should be followed, including the following:
- Read all instructions before using the appliance.
- To reduce the risk of fire, electric shock, or injury to persons, do not operate the oven when empty.
- Do not heat liquids or other foods in sealed containers as they are liable to explode.
- Do not attempt to operate this oven with the door open since open-door operation can result in harmful exposure to microwave energy.
- This product contains chemicals known to the State of California to cause cancer and birth defects or other reproductive harm.
Always ensure proper ventilation and placement as described in the setup section.
Product Overview
The Oster OGZD0701 Microwave Oven is a compact 0.7 cubic foot appliance designed for countertop use. It features 700 watts of power, 10 power levels, and 6 pre-set cooking menus for various food types. The LED display includes a kitchen timer, and a child safety lock is integrated for secure operation.
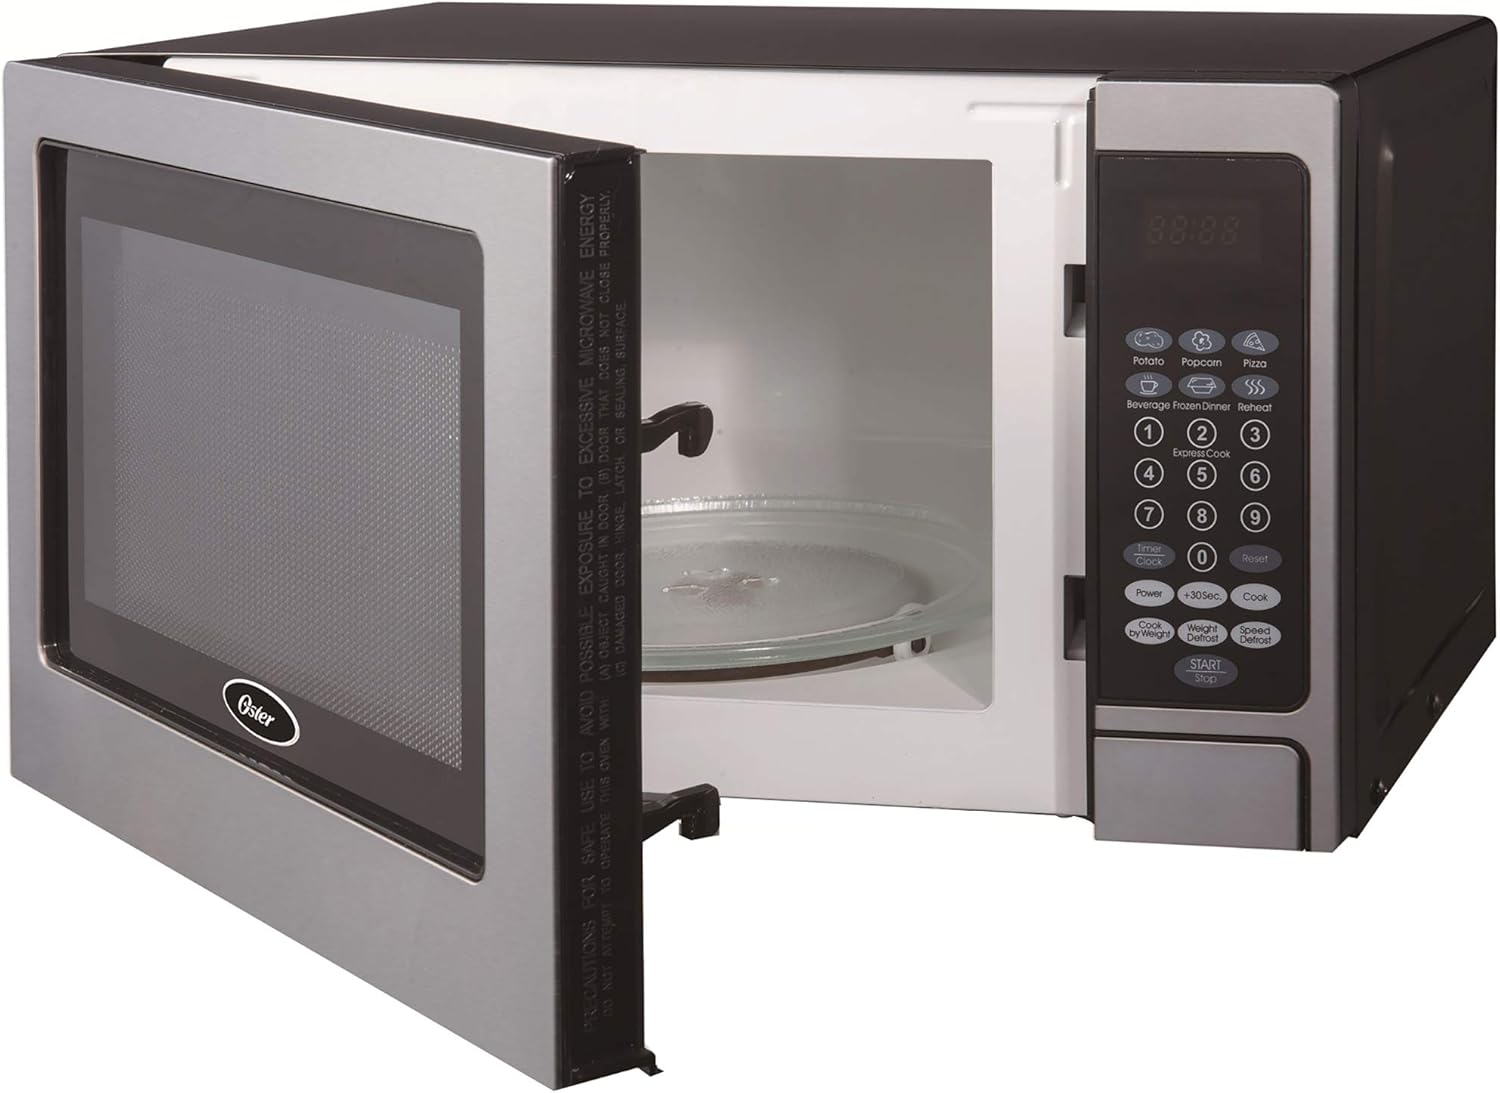
Front view of the Oster OGZD0701 Microwave Oven with the door open, showing the interior cavity and control panel.
Components
- Oven Cavity: The interior space where food is placed for heating.
- Glass Turntable: A removable glass tray that rotates to ensure even cooking.
- Turntable Ring: Supports the glass turntable and allows it to rotate.
- Control Panel: Features an LED display, numeric keypad, and function buttons.
- Oven Door: Equipped with a safety lock system.
Setup
Unpacking
- Remove all packaging materials from inside and outside the oven.
- Check the oven for any damage, such as dents or a misaligned door. Do not operate if damaged.
- Remove any protective film from the cabinet surface.
Turntable Assembly

The turntable ring, which supports the glass tray and allows it to rotate.

The removable glass turntable tray for even cooking.
- Place the turntable ring securely in the circular indentation on the oven floor.
- Position the glass turntable tray on top of the ring, ensuring it sits properly on the central hub.
Placement
- Place the oven on a flat, stable surface that can support its weight and the heaviest food item likely to be cooked.
- Ensure at least 3 inches (7.5 cm) of clearance on the top, sides, and rear for proper ventilation.
- Do not block air vents.
- Keep the oven away from heat sources and strong magnetic fields.
- Plug the oven into a dedicated 3-prong grounded outlet. Do not use extension cords.
Operating Instructions
Setting the Clock
To set the clock:
- Press the 'CLOCK' button once.
- Use the number pad to enter the current time (e.g., 12:30 for 12:30 PM).
- Press the 'CLOCK' button again to confirm.
Basic Microwave Cooking
- Place food in a microwave-safe container on the glass turntable.
- Close the oven door securely.
- Enter the desired cooking time using the number pad.
- Press the 'POWER' button to adjust power level if needed (default is 100%). Use the number pad to select a power level from 1 to 10.
- Press the 'START' button to begin cooking.
Pre-set Cooking Menus
The oven includes 6 pre-set cooking menus for common foods:
- Popcorn
- Potato
- Pizza
- Beverage
- Frozen Dinner
- Reheat
To use a pre-set menu:
- Place food in the oven.
- Press the desired menu button (e.g., 'POPCORN').
- Press 'START' to begin. Some menus may require pressing the button multiple times to select weight or quantity.
Defrost Functions
The oven offers two defrost modes:
- Time Defrost: Press 'TIME DEFROST', enter the desired defrosting time, then press 'START'.
- Weight Defrost: Press 'WEIGHT DEFROST', enter the food's weight in pounds (e.g., 1.0 for 1 pound), then press 'START'. The oven will automatically calculate the defrosting time.
Child Lock Safety
To activate the child lock, press and hold the 'STOP/CANCEL' button for 3 seconds. The lock indicator will appear on the display. To deactivate, press and hold 'STOP/CANCEL' again for 3 seconds.
Maintenance and Cleaning
General Cleaning
- Always unplug the oven before cleaning.
- Wipe the exterior with a damp cloth and mild soap. Do not use abrasive cleaners.
- Clean the interior cavity with a damp cloth after each use to prevent food buildup. For stubborn stains, place a bowl of water with lemon slices inside and microwave for a few minutes, then wipe clean.
- Clean the door seals and adjacent parts carefully with a damp cloth to ensure proper door closure.
Turntable Care
- The glass turntable and turntable ring can be removed for cleaning.
- Wash them in warm, soapy water or in the dishwasher.
- Ensure they are completely dry before placing them back in the oven.
Troubleshooting
| Problem | Possible Cause | Solution |
|---|---|---|
| Oven does not start | Power cord not plugged in; Door not closed properly; Fuse blown or circuit breaker tripped. | Ensure plug is firmly in outlet; Close door securely; Check household fuse/circuit breaker. |
| Food not heating | Incorrect cooking time/power level; Door not closed properly. | Adjust time/power; Ensure door is securely latched. |
| Turntable not rotating | Turntable not properly seated; Obstruction under turntable. | Re-seat glass tray and ring; Remove any debris. |
| Clock difficult to set | Unfamiliarity with control panel. | Refer to 'Setting the Clock' instructions in the Operating section. Practice the steps. |
| Start/Stop button unresponsive | Child lock activated; Internal malfunction. | Deactivate child lock (hold 'STOP/CANCEL' for 3 seconds). If issue persists, contact customer support. |
Specifications
| Feature | Detail |
|---|---|
| Model Name | OGZD0701 |
| Brand | Oster |
| Capacity | 0.7 Cubic Feet |
| Color | Stainless Steel |
| Wattage | 700 Watts |
| Power Levels | 10 |
| Cooking Programs | 6 |
| Control Type | Touch Pad |
| Special Features | Child Safety Lock, LED Display, Kitchen Timer |
| Installation Type | Countertop |
| Material | Stainless Steel |
| Defrost System Type | Auto Defrost |
Warranty and Support
Warranty Information
This Oster OGZD0701 Microwave Oven comes with a 1-year limited warranty from the date of purchase. This warranty covers defects in materials and workmanship under normal household use. It does not cover damage resulting from misuse, accident, alteration, or commercial use.
Please retain your proof of purchase for warranty claims.
Customer Support
For technical assistance, warranty service, or to inquire about replacement parts, please contact Oster customer support. Refer to the contact information provided in your product packaging or visit the official Oster website for the most current support details.
When contacting support, please have your model number (OGZD0701) and purchase date available.