1. Introduction
Thank you for choosing the NEX HT-CS141W-M Sewing Machine. This manual provides essential information for the safe and efficient operation, setup, and maintenance of your new sewing machine. Please read these instructions thoroughly before first use and retain them for future reference.
2. Safety Instructions
- Always disconnect the sewing machine from the power supply when changing the needle, threading, or when the machine is not in use.
- Keep fingers away from the needle area during operation.
- Do not allow children to operate the machine without supervision.
- Use only the recommended power adapter.
- Never operate the machine if it is damaged or malfunctioning.
- Ensure the machine is placed on a stable, flat surface during use.
3. Product Overview
The NEX HT-CS141W-M is a compact sewing machine designed for crafting and mending tasks, featuring 12 built-in stitch patterns.

Figure 3.1: Front view of the NEX HT-CS141W-M Sewing Machine, showing its compact size with approximate dimensions of 10.8 inches (length), 4.8 inches (width), and 10.2 inches (height).

Figure 3.2: Overview of key features including 12 built-in stitch patterns, double thread capability, overlock function, sleeve sewing, reverse sewing, bobbin winding, adjustable needle distance, integrated drawer, stitch tightness control, and a 2-speed On/Off switch.
4. Setup
4.1 Powering the Machine
The machine can be powered by either the included AC adapter or 4 AA batteries (not included).
- AC Adapter: Insert the small end of the AC adapter into the DC input jack on the machine. Plug the other end into a standard wall outlet.
- Batteries: Open the battery compartment cover on the bottom of the machine. Insert 4 AA batteries, ensuring correct polarity. Close the cover.

Figure 4.1: The underside of the sewing machine showing the battery compartment and an illustration of the AC power adapter connection. The machine also features anti-skid legs for stability.
4.2 Threading the Machine
Proper threading is crucial for smooth operation and consistent stitches.
4.2.1 Winding the Bobbin
- Place an empty bobbin onto the bobbin winder spindle.
- Place a spool of thread onto the spool pin.
- Guide the thread through the tension disc and around the bobbin several times.
- Turn on the machine and press the foot pedal or speed switch to wind the thread onto the bobbin. Stop when the bobbin is full.
4.2.2 Inserting the Bobbin
- Lift the presser foot and needle to their highest positions.
- Open the bobbin cover plate.
- Insert the wound bobbin into the bobbin case, ensuring the thread unwinds in the correct direction (usually counter-clockwise).
- Pull the bobbin thread through the tension spring and out through the small opening.
- Close the bobbin cover plate.
4.2.3 Upper Threading
- Place a spool of thread onto the spool pin.
- Guide the thread through the upper thread guide.
- Pass the thread through the tension control dial.
- Thread the take-up lever from right to left.
- Guide the thread down through the needle bar thread guide.
- Finally, thread the needle from front to back.
- Pull both the upper and bobbin threads to the back under the presser foot.
5. Operating Instructions
5.1 Selecting Stitch Patterns
Your machine features 12 built-in stitch patterns. Rotate the stitch selector dial to choose the desired stitch (numbered 1-12).
5.2 Adjusting Stitch Tightness (Tension)
The tension control dial allows you to adjust the tightness of your stitches. Turn the dial to increase or decrease tension as needed for your fabric and thread type.
5.3 Speed Control and On/Off Switch
The machine has two speed settings (Low and High). Use the speed switch to select your preferred sewing speed or to turn the machine On/Off.
5.4 Reverse Sewing Function
To reinforce stitches, press and hold the reverse sewing button. The machine will sew backward. Release the button to resume forward sewing.
5.5 Sewing Sleeves and Cuffs
The free arm design allows for easy sewing of cylindrical items like sleeves, cuffs, and pant hems. Simply remove the accessory drawer to expose the free arm.
5.6 Overlock Function
Certain stitch patterns (refer to the stitch selector dial) can be used to create an overlock-like finish, preventing fabric edges from fraying.
5.7 LED Night Light
An integrated LED light illuminates the sewing area, providing better visibility during operation.

Figure 5.1: Details of the presser foot, which can be replaced, the integrated cutting knife for thread trimming, and the LED night light illuminating the sewing area.
5.8 Handling Multilayer Cloth
The machine is designed to support sewing through multiple layers of fabric, making it suitable for various mending and crafting projects.
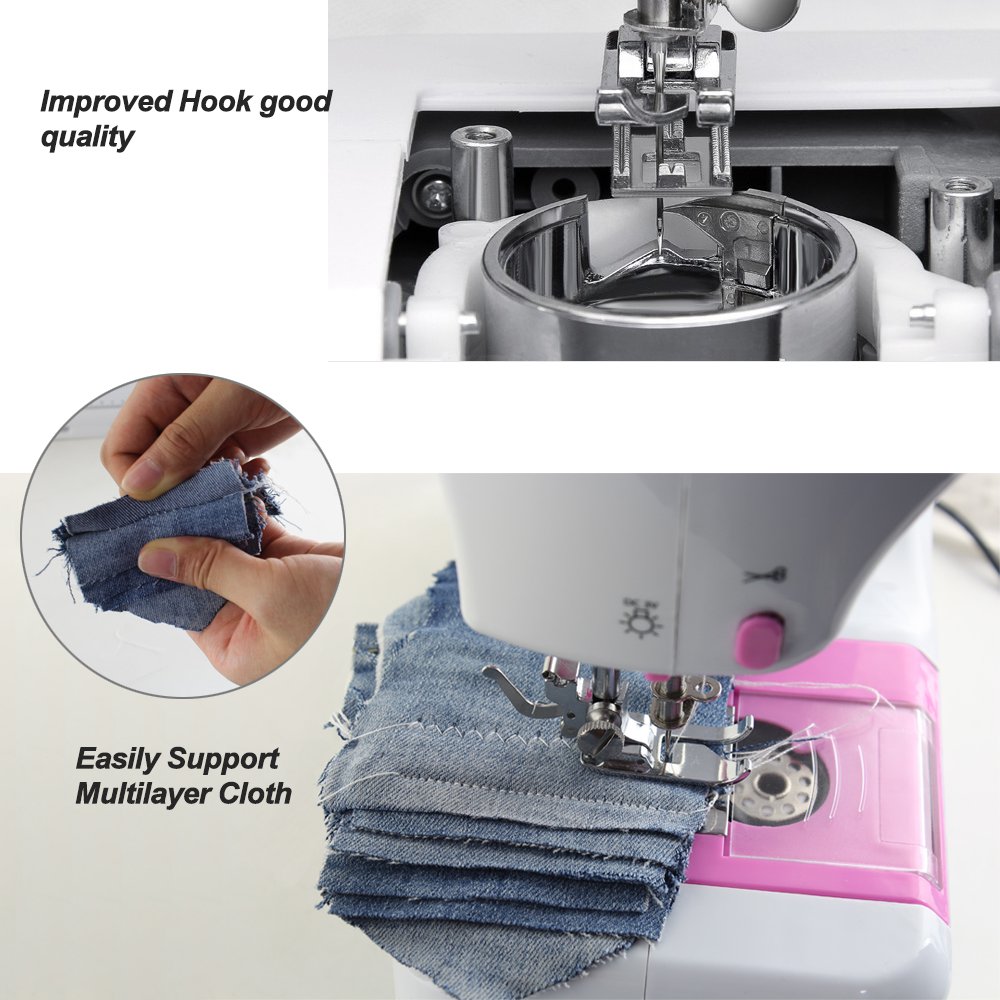
Figure 5.2: Close-up of the sewing area demonstrating the machine's capability to easily sew through multiple layers of cloth, highlighting the improved hook quality.
6. Maintenance
6.1 Cleaning
- Regularly clean lint and dust from the bobbin area and feed dogs using a small brush.
- Wipe the exterior of the machine with a soft, dry cloth. Do not use harsh chemicals or abrasive cleaners.
6.2 General Care
- Store the machine in a dry, dust-free environment.
- Ensure the needle is always sharp and replace it if it becomes bent or dull.
- Do not force the machine if it jams; investigate the cause and clear any obstructions.
7. Troubleshooting
| Problem | Possible Cause | Solution |
|---|---|---|
| Machine not turning on | No power supply; batteries drained; power switch off | Check power adapter connection or replace batteries; ensure power switch is ON. |
| Skipped stitches | Incorrect needle; bent needle; improper threading | Use correct needle type for fabric; replace needle; re-thread machine carefully. |
| Thread breaking | Incorrect tension; poor quality thread; needle bent or dull | Adjust tension; use good quality thread; replace needle. |
| Fabric not feeding | Feed dogs obstructed; presser foot not lowered | Clean feed dogs; ensure presser foot is in the down position. |
8. Specifications
- Model Number: HT-CS141W-M
- Brand: NEX
- Stitch Patterns: 12 Built-in
- Power Source: Electric (AC Adapter) or Battery (4x AA)
- Item Weight: 2 kg 650 g
- Item Dimensions (LxWxH): 27.9 x 12.7 x 25.4 Centimeters (approximately 10.8 x 4.8 x 10.2 inches)
- UPC: 735810345415
9. Warranty and Support
For warranty information or technical support, please refer to the documentation included with your purchase or contact NEX customer service through their official website. Keep your purchase receipt as proof of purchase.


