Introduction
This manual provides detailed instructions for the proper setup, operation, and maintenance of your Carver DTL-50 Compact Disc Player. To ensure optimal performance and longevity of your unit, please read this manual thoroughly before use and retain it for future reference.
The Carver DTL-50 is designed to deliver high-fidelity audio reproduction from compact discs, offering a superior listening experience. Familiarizing yourself with its features and functions will allow you to fully enjoy its capabilities.
Product Overview
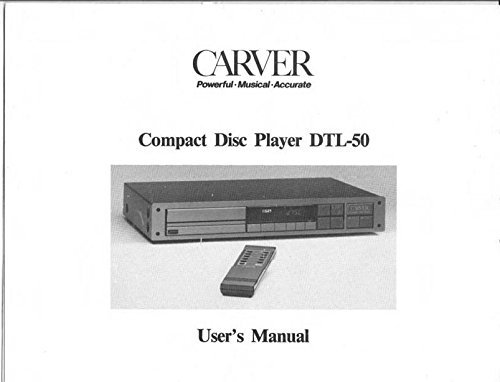
Figure 1: Carver DTL-50 Compact Disc Player and Remote Control
This image displays the Carver DTL-50 Compact Disc Player, a rectangular audio component, alongside its dedicated remote control. The CD player features a disc tray, a display screen, and various control buttons on its front panel. The remote control is slender with an array of buttons for operating the player.
The Carver DTL-50 Compact Disc Player is engineered for precision audio playback. It typically features a front-loading disc tray, a digital display, and a suite of control buttons for playback, track navigation, and programming. A dedicated remote control provides convenient operation from a distance.
Setup
Unpacking and Placement
- Carefully remove the CD player and all accessories from the packaging.
- Place the unit on a stable, level surface, away from direct sunlight, heat sources, and excessive dust or moisture. Ensure adequate ventilation around the unit.
- Avoid placing the unit near strong magnetic fields or other electronic devices that may cause interference.
Connecting to Your Audio System
- Audio Connections: Connect the audio output jacks (typically RCA L/R) on the rear of the DTL-50 to the corresponding audio input jacks (e.g., "CD," "Aux," or "Line In") on your amplifier or receiver using high-quality audio cables.
- Power Connection: Once all audio connections are secure, plug the AC power cord into the power inlet on the rear of the DTL-50, and then into a standard AC wall outlet.
- Remote Control Batteries: Insert the specified batteries (e.g., two "AA" or "AAA" batteries) into the remote control, observing the correct polarity.
Note: Always ensure your amplifier/receiver is turned off before making any connections to prevent damage to your equipment.
Operating Instructions
Basic Playback
- Power On: Press the POWER button on the front panel or remote control to turn on the unit.
- Load Disc: Press the OPEN/CLOSE button to open the disc tray. Place a compact disc, label side up, into the tray. Press OPEN/CLOSE again to close the tray.
- Play: Press the PLAY (►) button. Playback will begin from the first track.
- Pause: Press the PAUSE (∥∥) button to temporarily stop playback. Press again to resume.
- Stop: Press the STOP (■) button to halt playback.
- Skip Tracks: Use the SKIP (►►| or |◄◄) buttons to move to the next or previous track.
- Fast Forward/Rewind: Hold down the SEARCH (►► or ◄◄) buttons to fast forward or rewind within a track.
Advanced Functions (Typical)
- Program Play: Allows you to create a custom playback order for tracks on a disc. Refer to the original manual for specific programming steps.
- Repeat Play: Repeat a single track, the entire disc, or a programmed sequence.
- Random Play: Play tracks on the disc in a random order.
- Time Display: Toggle between elapsed time, remaining time for the current track, or remaining time for the entire disc.
Maintenance
Cleaning the Unit
- Exterior: Use a soft, dry cloth to wipe the exterior surfaces of the CD player. For stubborn marks, slightly dampen the cloth with a mild, non-abrasive cleaner. Avoid using harsh chemicals or abrasive materials.
- Disc Tray: Keep the disc tray clean and free of dust. Do not use compressed air directly into the disc mechanism.
Disc Handling
- Always hold discs by their edges or the center hole to avoid fingerprints on the playing surface.
- Clean discs with a soft, lint-free cloth, wiping gently from the center outwards. Do not wipe in circular motions.
- Store discs in their cases when not in use to protect them from dust and scratches.
- Avoid exposing discs to direct sunlight or high temperatures.
Caution: Never attempt to open the unit's casing. There are no user-serviceable parts inside, and doing so will void any potential warranty and expose you to dangerous voltages.
Troubleshooting
Before contacting service, please check the following common issues and solutions:
| Problem | Possible Cause | Solution |
|---|---|---|
| No power | Power cord unplugged; outlet not active. | Ensure power cord is securely plugged into the unit and a live outlet. Check circuit breaker. |
| No sound | Audio cables loose; incorrect input selected on amplifier; amplifier volume low. | Check audio cable connections. Select the correct input on your amplifier. Increase amplifier volume. |
| Disc does not play / "No Disc" error | Disc inserted incorrectly; disc dirty or scratched; disc format not supported. | Ensure disc is inserted label side up. Clean the disc. Try a different, known-good audio CD. |
| Remote control not working | Batteries dead or inserted incorrectly; obstruction between remote and unit. | Replace batteries, ensuring correct polarity. Remove any obstructions. Point remote directly at the unit's sensor. |
If the problem persists after trying these solutions, it may indicate a need for professional service. Please consult a qualified technician.
Specifications (Typical for CD Players of this Era)
While specific detailed specifications for the Carver DTL-50 are best found in the original manufacturer's documentation, typical specifications for a high-quality CD player from its era would include:
- Disc Compatibility: Audio CD (CD-DA)
- Frequency Response: 20 Hz - 20 kHz (±0.5 dB)
- Signal-to-Noise Ratio: > 95 dB
- Dynamic Range: > 90 dB
- Total Harmonic Distortion: < 0.005%
- Channel Separation: > 90 dB
- Output Level: 2.0 V RMS (typical)
- Power Requirements: 120V AC, 60 Hz (North America) or 220-240V AC, 50/60 Hz (International models)
Note: These are general specifications. For precise details, refer to the original Carver DTL-50 product manual.
Warranty and Support
This document is a reprint of the original Carver DTL-50 Compact Disc Player owner's instruction manual. As a reprint, it does not convey any new or implied warranty from the publisher of this reprint. Any original manufacturer's warranty for the Carver DTL-50 CD Player would have been provided at the time of its initial purchase and is now likely expired due to the age of the product.
For technical support or service inquiries regarding vintage Carver audio equipment, it is recommended to seek out specialized audio repair shops or online communities dedicated to vintage audio and Carver products. These resources may offer valuable insights and assistance for maintaining your DTL-50 CD Player.