wollcocer Quart 5-6
Instruction Manual
wollcocer Sealing Rings Silicone Gasket Float Valve Kit
Model: Quart 5-6
1. Product Overview
This kit provides essential replacement components for your pressure cooker, ensuring its proper and safe operation. The kit includes a silicone sealing ring, a float valve, and two sealers. These parts are crucial for maintaining pressure within the cooker and preventing leaks.
This set is designed to fit 5 or 6 quart models, including Innova 42106, Instant Pot models IP-CSG60, IP-CSG50, IP-LUX60, IP-DUO50, IP-LUX50, Smart-60 (Smart), PPCXL Smart-60 (Smart), PPC770, PPC770-1, PCXL-PRO6, and PC-TRI6. It is made from 100% safe food-grade durable silicone and is odor resistant.
Kit Contents:
- 1 x Silicone Sealing Ring
- 1 x Float Valve
- 2 x Sealer Gaskets (for the float valve)

Figure 1.1: Overview of the Sealing Rings Silicone Gasket Float Valve Kit components.
2. Setup and Installation
Proper installation of these replacement parts is crucial for the safe and effective operation of your pressure cooker. Always ensure the pressure cooker is unplugged and completely cool before attempting any installation or replacement.
2.1. Replacing the Silicone Sealing Ring
- Remove Old Ring: Gently pull the old silicone sealing ring from the rim of the pressure cooker lid. It should come off easily.
- Clean Lid: Clean the groove on the lid where the sealing ring sits to remove any food debris or residue.
- Install New Ring: Align the new silicone sealing ring with the groove on the inside of the pressure cooker lid. Press it firmly into place, ensuring it is seated evenly all around the rim. The ring should fit snugly without any twists or gaps.
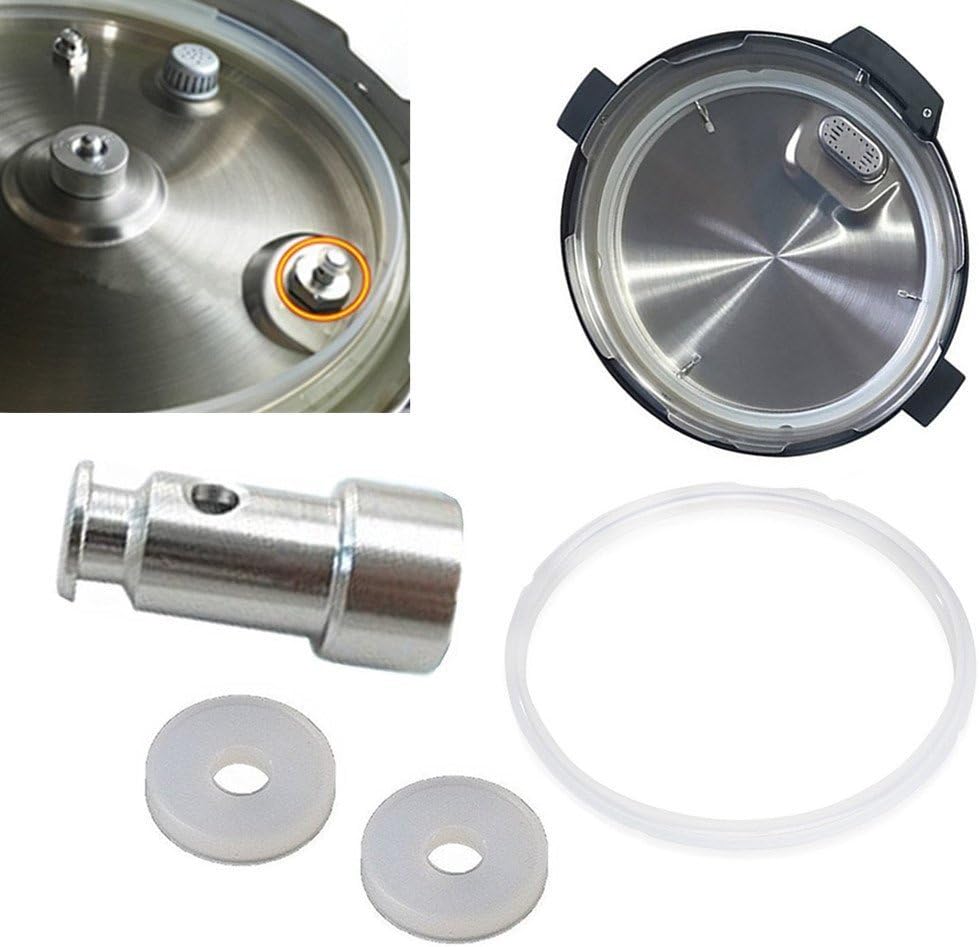
Figure 2.1: Pressure cooker lid with the silicone sealing ring and float valve assembly.
2.2. Replacing the Float Valve and Sealers
The float valve and its sealers are small but vital components for pressure regulation. Handle them with care.
- Locate Float Valve: On the underside of the pressure cooker lid, locate the small metal pin (float valve) that protrudes through a hole.
- Remove Old Parts: From the top side of the lid, gently push the float valve downwards until it comes out from the underside. Note the position of the small silicone sealer gaskets on the float valve. Typically, one sealer is on the top side of the lid and one on the bottom side, securing the float valve in place.
- Install New Sealers: Place one new silicone sealer gasket onto the narrow end of the float valve.
- Insert Float Valve: From the outside (top) of the lid, insert the narrow end of the float valve through the designated hole.
- Secure with Second Sealer: From the inside (underside) of the lid, place the second new silicone sealer gasket onto the float valve, pushing it up firmly to secure the float valve in place. Ensure the float valve can move freely up and down within the hole.

Figure 2.2: Step-by-step guide for float valve and sealer replacement.

Figure 2.3: Detail of the float valve and a single sealer gasket.
3. Maintenance
Regular maintenance of your pressure cooker's sealing components is essential for safety and performance.
3.1. Cleaning
- All components in this kit are dishwasher safe.
- After each use, remove the silicone sealing ring and the float valve assembly from the lid.
- Wash all parts with warm, soapy water or place them in the dishwasher.
- Ensure all food particles and residue are thoroughly removed, especially from the sealing ring groove and around the float valve.
- Allow all parts to dry completely before reassembling the lid.
3.2. Replacement Schedule
The silicone sealing ring should be replaced every 18-24 months, or sooner if any deformation, cracking, or signs of wear are present. The float valve and sealers should also be inspected regularly and replaced if they appear damaged or if the pressure cooker is not sealing properly.
4. Troubleshooting
If your pressure cooker is not functioning correctly after replacing the parts, consider the following common issues:
| Problem | Possible Cause | Solution |
|---|---|---|
| Pressure not building or escaping from lid. |
|
|
| Lid not closing properly. |
|
|
| Odor from sealing ring. |
|
|
5. Specifications
| Feature | Detail |
|---|---|
| Brand | wollcocer |
| Model Compatibility | 5 or 6 Quart Pressure Cookers (e.g., Innova 42106, Instant Pot IP-CSG60, IP-CSG50, IP-LUX60, IP-DUO50, IP-LUX50, Smart-60, PPCXL Smart-60, PPC770, PPC770-1, PCXL-PRO6, PC-TRI6) |
| Material | Food-Grade Silicone (Sealing Ring, Sealers), Metal (Float Valve) |
| Sealing Ring Dimensions | Inside diameter: 8.7 inches, Outside diameter: 9.5 inches |
| Dishwasher Safe | Yes |
| Item Weight | Approximately 0.001 ounces (total kit) |

Figure 5.1: Sealing Ring Dimensions.
6. Warranty and Support
For specific warranty information regarding this product, please refer to the purchase documentation or contact the seller directly. For product support or inquiries, please reach out to wollcocer customer service through the platform where the product was purchased.
Ask a question about this manual
Ask about setup, troubleshooting, compatibility, parts, safety, or missing instructions. Manuals+ will review the question and use this page’s manual context to help answer it.