PROTACTOR LEPUSPTLSHI5015
PROTACTOR 2 Pole 40 Amp AC Contactor (Model LEPUSPTLSHI5015) Instruction Manual
Your guide to installation, operation, and maintenance.
1. Introduction
This manual provides comprehensive instructions for the PROTACTOR 2 Pole 40 Amp AC Contactor, Model LEPUSPTLSHI5015. This heavy-duty, enclosed contactor is designed as a replacement for residential 2-pole contactors rated at 40 Amps or less, featuring 24-volt coils. It is suitable for use in air conditioning and heat pump systems. Please read this manual thoroughly before installation and operation to ensure safe and correct usage.
2. Safety Information
WARNING: Electrical work should only be performed by qualified personnel. Failure to follow these safety instructions could result in electric shock, fire, or serious injury.
- Always disconnect power to the unit before installing, servicing, or removing the contactor.
- Verify that the replacement contactor's specifications (Amperage, Voltage, Coil Voltage) match or exceed the original unit's requirements.
- Ensure all wiring connections are secure and properly insulated.
- Do not operate the contactor if it appears damaged.
- Wear appropriate personal protective equipment (PPE) when working with electrical systems.
3. Product Overview
The PROTACTOR 2 Pole 40 Amp AC Contactor is engineered for reliability and ease of installation. Key features include:
- 40 FLA Amp Rating: Suitable for various residential AC and heat pump applications.
- 2 Pole Design: Controls two lines of power.
- 24 Volt Coil: Standard coil voltage for many HVAC systems.
- Enclosed Contacts: Protects against insects and debris, enhancing longevity.
- Encapsulated Coil: No exposed tape wrapping for improved durability.
- Heavy Lug Terminals: Provides secure connections for high voltage wiring.
- Quick Connect Terminals: Four male 1/4” quick connect terminals on each line voltage connection for wiring flexibility. Double 1/4” male quick connects for low voltage coil terminals.
- Visible Plunger: Allows for positive verification of contact engagement.

Figure 3.1: Main view of the PROTACTOR 2 Pole 40 Amp AC Contactor. This image shows the overall design, including the main terminals and the coil connections.

Figure 3.2: Front view of the contactor, highlighting the L1, L2, T1, T2 terminals and the coil voltage rating.
4. Specifications
| Feature | Detail |
|---|---|
| Brand | PROTACTOR |
| Model Number | LEPUSPTLSHI5015 |
| Amperage | 40 Amps (FLA) |
| Voltage (Coil) | 24 Volts |
| Wattage (Coil) | 6 VA sealed / 31 VA inrush |
| Poles | 2 Pole |
| Material | Plastic |
| Package Dimensions | 3.27 x 2.24 x 2.24 inches |
| Weight | 5.61 ounces |
| UL Listed | Yes |

Figure 4.1: Side view of the contactor, showing the mounting bracket and terminal configuration.
5. Setup and Installation
This contactor is designed to replace most residential two-pole contactors. Follow these steps for proper installation:
- Disconnect Power: Crucially, turn off all power to the HVAC unit at the main breaker before beginning any work. Verify power is off using a voltage tester.
- Identify Wiring: Carefully note the wiring connections on the existing contactor. Take photos if necessary. Identify the line voltage connections (L1, L2, T1, T2) and the low voltage coil connections.
- Remove Old Contactor: Disconnect all wires from the old contactor. Unscrew or unclip the old contactor from its mounting location.
- Mount New Contactor: The PROTACTOR contactor features a mounting base measuring 2-5/16” X 1-15/16” with four oblong mounting holes 1-5/8” x 1-5/8” on center. It also has four slots in the base for flexible mounting. Secure the new contactor in the same location as the old one using appropriate fasteners.
- Connect High Voltage Wires: Connect the main power lines to the L1 and L2 terminals. Connect the load wires (to the compressor/fan) to the T1 and T2 terminals. The contactor has heavy lug terminals and four male 1/4” quick connect terminals on each line voltage connection for maximum wiring flexibility. Ensure connections are tight and secure.
- Connect Low Voltage Coil Wires: Connect the 24-volt control wires to the coil terminals. Each coil terminal has double 1/4” male quick connects. Ensure these connections are firm.
- Verify Connections: Double-check all wiring connections against your notes or photos to ensure they are correct and secure.
- Restore Power: Once all connections are verified and the contactor is securely mounted, restore power to the HVAC unit.
- Test Operation: Initiate a call for cooling or heating to ensure the contactor engages and disengages properly. The visible plunger provides positive verification that the contacts are pulled in.

Figure 5.1: Angled view of the contactor, showing the various terminals and the robust construction.
6. Operation
The PROTACTOR 2 Pole 40 Amp AC Contactor operates automatically in response to a 24-volt control signal from your thermostat or HVAC control board. When the thermostat calls for cooling or heating, it sends 24 volts to the contactor's coil. This energizes the coil, causing the internal plunger to pull in, closing the main contacts. This action allows high voltage power to flow from the L1/L2 terminals to the T1/T2 terminals, activating the compressor and outdoor fan motor.
When the thermostat satisfies the call, the 24-volt signal to the coil is removed, the coil de-energizes, and the contacts open, interrupting the high voltage power to the outdoor unit.
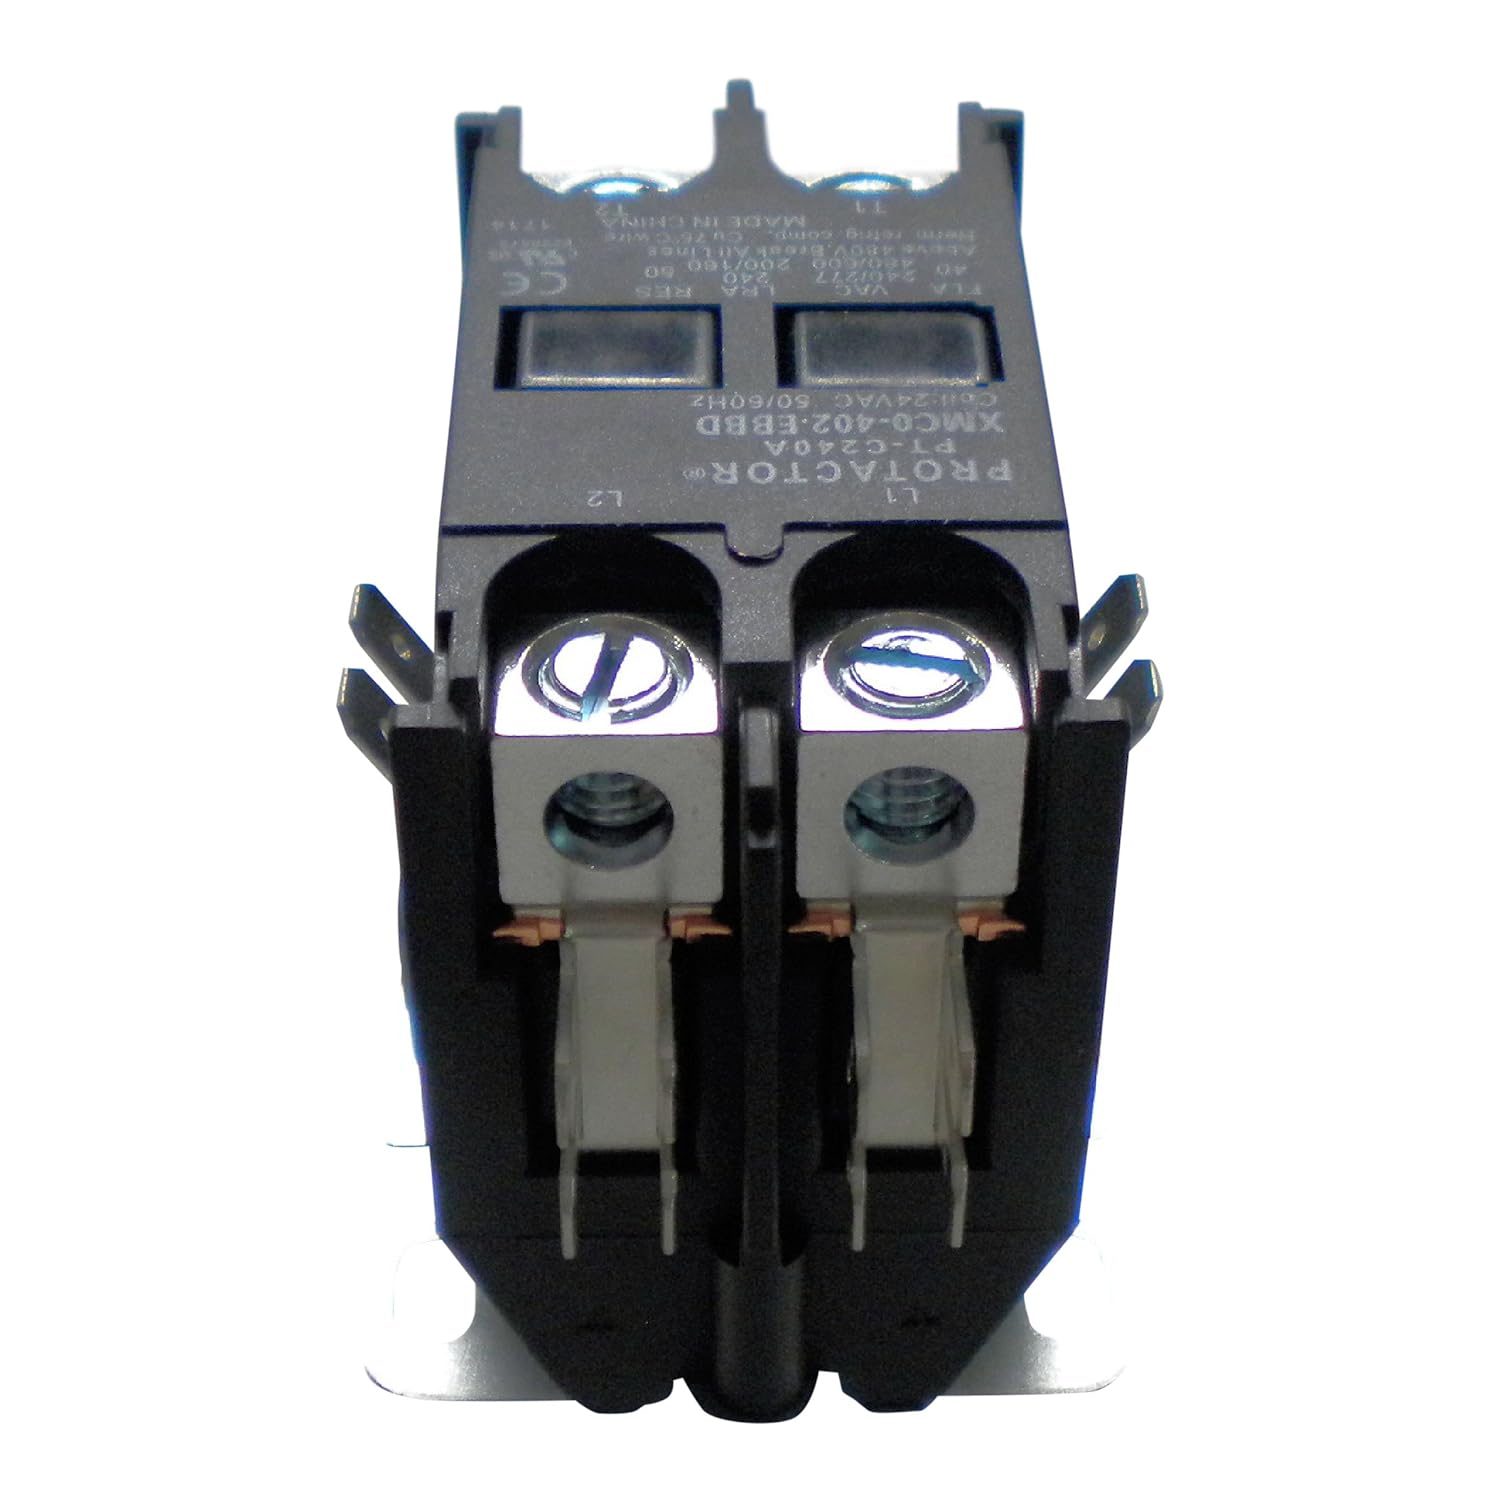
Figure 6.1: Top view of the contactor, showing the L1 and L2 input terminals.
7. Maintenance
The PROTACTOR contactor is designed for minimal maintenance. However, periodic inspection can help ensure optimal performance and longevity:
- Visual Inspection: Annually, with power disconnected, visually inspect the contactor for any signs of wear, corrosion, or damage to the terminals or housing.
- Terminal Tightness: Check that all wiring connections are tight. Loose connections can lead to overheating and premature failure.
- Cleanliness: While the contacts are enclosed, ensure the surrounding area is free from excessive dust, debris, or insect nests.
- Plunger Movement: Observe the visible plunger during operation (from a safe distance) to ensure it moves freely and fully engages.

Figure 7.1: Bottom view of the contactor, showing the T1 and T2 output terminals.
8. Troubleshooting
If your HVAC outdoor unit is not operating correctly, consider the following troubleshooting steps related to the contactor:
| Problem | Possible Cause | Solution |
|---|---|---|
| Contactor does not pull in (outdoor unit not starting) | No 24V to coil; Faulty coil; Open safety switch (e.g., high/low pressure switch, float switch) | Check for 24V at coil terminals. If present, coil may be faulty (replace contactor). Check safety switches for continuity. |
| Contactor hums loudly but doesn't pull in fully | Low 24V to coil; Mechanical obstruction; Damaged coil | Verify 24V supply. Inspect for debris. Replace contactor if coil is damaged. |
| Contactor pulls in, but outdoor unit still doesn't run | Main contacts are pitted/burnt; No high voltage to L1/L2; Faulty compressor/fan motor | With power off, check continuity across main contacts (L1-T1, L2-T2) when plunger is manually depressed. Check high voltage supply. Consult an HVAC technician for motor issues. |
| Contactor sticks in closed position | Welded contacts; Mechanical issue | Replace contactor immediately. This is a safety hazard. |
Note: Always disconnect power before performing any troubleshooting or repairs. If you are unsure about any step, consult a qualified HVAC technician.
9. Warranty Information
This PROTACTOR product is covered by an exclusive two-year limited replacement policy. If this part fails within two years from the date of purchase, return the defective part along with a copy of the original invoice to the place of purchase for replacement. Please contact the authorized PROTACTOR dealer from whom you purchased the part for specific details and procedures regarding this warranty claim.
10. Customer Support
For further assistance, technical questions, or warranty inquiries, please contact your authorized PROTACTOR dealer or the retailer where you purchased this product. When contacting support, please have your product model number (LEPUSPTLSHI5015) and purchase information readily available.
You may also visit the PROTACTOR website for additional resources and contact information (if available).