1. Introduction
Thank you for choosing the PatrolEyes PE-DV5-2 Body Camera. This device is designed for professional use, offering high-definition video recording, advanced night vision capabilities, and integrated GPS for reliable evidence collection. This manual will guide you through the setup, operation, and maintenance of your new body camera to ensure optimal performance and longevity.
2. Package Contents
Please verify that all items are present in your package:
- PatrolEyes PE-DV5-2 Body Camera
- Battery (Included Components)
- USB Charging/Data Cable
- Wall Charger
- Mounting Clip
- User Manual (this document)
3. Parts and Controls
Familiarize yourself with the various parts and controls of your PatrolEyes PE-DV5-2 body camera.

Figure 3.1: Front view of the PatrolEyes PE-DV5-2 body camera, highlighting the central camera lens, surrounding infrared (IR) lights for night vision, and the PatrolEyes logo at the bottom. The device has a rugged, black casing.

Figure 3.2: Front-side perspective of the PatrolEyes PE-DV5-2 body camera, providing a clearer view of the camera lens and the array of control buttons located on the side panel, including the yellow button at the top.

Figure 3.3: Side view of the PatrolEyes PE-DV5-2 body camera, prominently featuring the red record button and the covered USB port for charging and data transfer.
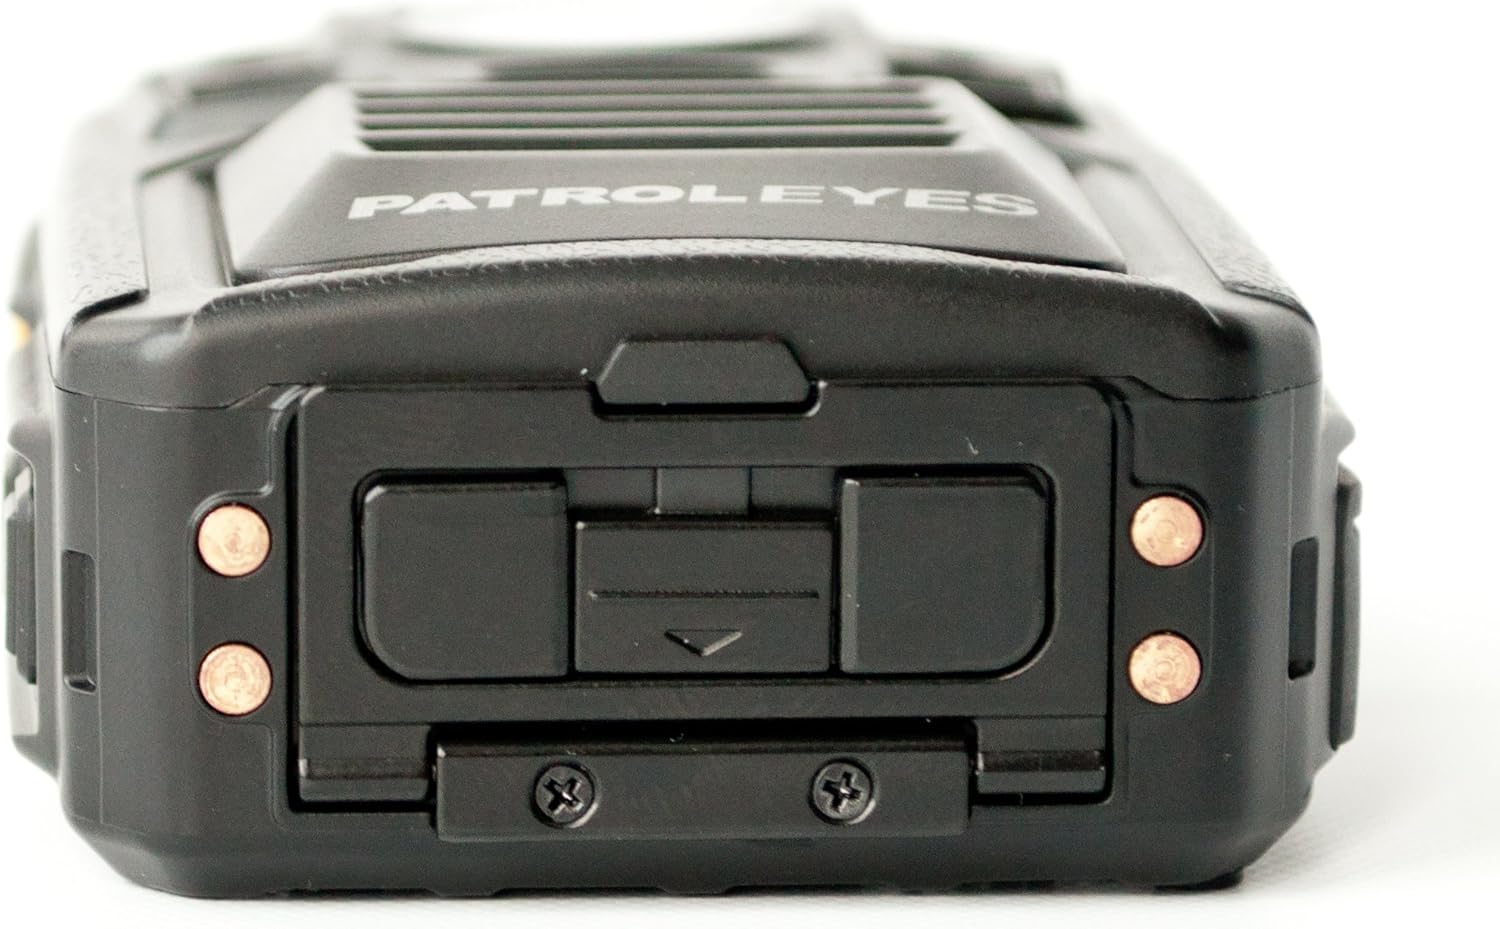
Figure 3.4: Top view of the PatrolEyes PE-DV5-2 body camera, displaying the GPS indicator light and other top-mounted features.

Figure 3.5: Bottom view of the PatrolEyes PE-DV5-2 body camera, revealing the charging contacts designed for use with a docking station.
4. Getting Started
4.1. Charging the Battery
Before first use, fully charge the camera's battery. The camera comes with a rechargeable battery.
- Connect the USB charging cable to the camera's USB port.
- Plug the other end of the USB cable into the wall charger and then into a power outlet.
- The charging indicator light will illuminate. It will change color or turn off once charging is complete.
Alternatively, use a compatible docking station (sold separately) for charging.
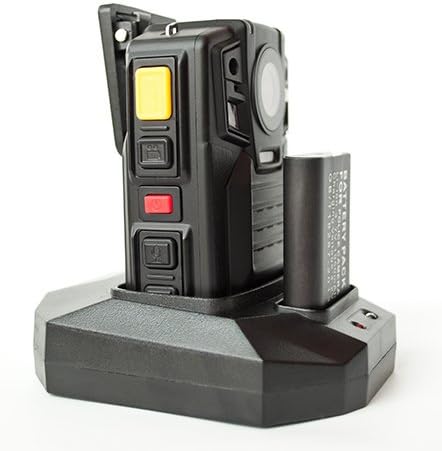
Figure 4.1: The PatrolEyes body camera securely placed in its docking station, which also features a dedicated slot for charging an additional battery pack.

Figure 4.2: Rear view of the PatrolEyes docking station, clearly showing the power input port and the USB data port for connecting to a computer.
4.2. Powering On/Off
- To Power On: Press and hold the Power button for a few seconds until the device vibrates and the indicator lights turn on.
- To Power Off: Press and hold the Power button until the device vibrates and the indicator lights turn off.
4.3. Attaching the Mounting Clip
Attach the provided mounting clip to the back of the camera. This allows you to securely fasten the camera to your uniform or gear.
5. Operating the Camera
5.1. Recording Video
The camera supports video capture resolutions of 1080p, 480p, and 720p.
- Ensure the camera is powered on.
- Press the dedicated Record Button (often red) once to start video recording. The recording indicator light will flash.
- Press the Record Button again to stop recording. The indicator light will stop flashing.
5.2. Taking Photos
The camera has an effective still resolution of 33 MP.
- While in standby mode or during video recording, press the Photo Button once to capture a still image.
5.3. Night Vision (IR)
The camera features auto IR night vision with a range of 30 feet, utilizing infrared light sources.
- The camera is equipped with automatic infrared (IR) activation. In low-light conditions, the IR lights will automatically turn on to provide clear night vision footage.
5.4. GPS Functionality
The integrated GPS module automatically records location data with your video footage. Ensure the camera has a clear view of the sky for optimal GPS signal acquisition.
5.5. Playback
You can review recorded videos and photos directly on the camera's screen.
- Enter Playback mode via the menu or a dedicated button (refer to on-screen prompts).
- Navigate through files using the directional buttons.
- Press the OK/Select button to play a video or view a photo.
5.6. Connecting to a Computer
To transfer files, connect the camera to a computer using the provided USB cable.
- Power on the camera.
- Connect the camera to your computer using the USB cable.
- The camera will appear as a removable disk drive on your computer.
- You can now access and transfer video and photo files.
6. Maintenance and Care
6.1. Cleaning
- Wipe the camera body with a soft, damp cloth. Do not use harsh chemicals or abrasive cleaners.
- For the lens, use a specialized lens cleaning cloth and solution to avoid scratches.
6.2. Storage
- Store the camera in a cool, dry place away from direct sunlight and extreme temperatures.
- Ensure the battery is partially charged (around 50%) if storing for extended periods to preserve battery life.
6.3. Battery Care
- Avoid fully discharging the battery frequently.
- Use only the original or approved charging accessories.
7. Troubleshooting
| Problem | Possible Cause | Solution |
|---|---|---|
| Camera does not power on. | Low or no battery charge. | Charge the battery fully. |
| Cannot record video/take photos. | Storage full. | Transfer files to a computer and delete them from the camera. |
| Poor video/image quality. | Dirty lens; low light conditions. | Clean the lens; ensure IR is active in low light. |
| GPS not acquiring signal. | Obstructed view of sky; indoor use. | Move to an open outdoor area. |
| Camera not recognized by computer. | Faulty USB cable; driver issue. | Try a different USB port/cable; ensure camera is powered on. |
8. Specifications
| Feature | Detail |
|---|---|
| Model Number | PE-DV5-2 |
| Video Capture Resolution | 1080p, 480p, 720p |
| Effective Still Resolution | 33 MP |
| Frame Rate | 30 fps |
| Night Vision Range | 30 Feet |
| Connectivity Technology | Wireless (Wi-Fi) |
| Power Source | Battery Powered |
| Included Components | Battery |
| International Protection Rating | IP54 |
| Special Features | Motion Sensor, Night Vision |
| Indoor/Outdoor Usage | Indoor, Outdoor |
| Manufacturer | PatrolEyes |
| First Available Date | May 14, 2017 |
9. Warranty Information
PatrolEyes products typically come with a limited manufacturer's warranty. Please refer to the warranty card included with your purchase or visit the official PatrolEyes website for detailed warranty terms and conditions. Keep your proof of purchase for warranty claims.
10. Customer Support
For technical assistance, troubleshooting beyond this manual, or inquiries about your PatrolEyes PE-DV5-2 body camera, please contact PatrolEyes customer support. Contact information can typically be found on the manufacturer's website or on the product packaging.
Online Resources: Visit the official PatrolEyes website for FAQs, software updates, and additional support materials.


