Introduction
This manual provides instructions for the installation, adjustment, and maintenance of your Hobbypark Aluminum Turnbuckle Steering Linkage Rods. These components are designed as an upgrade for compatible 1/10 scale RC vehicles, offering enhanced durability and precision.
Product Overview
Package Contents
The package includes the following items:
- 6x Aluminum Turnbuckle Rods with Machined Aluminum Rod Ends (Purple)
- Screws (as shown in image)
- M3 Lock Nuts (as shown in image)
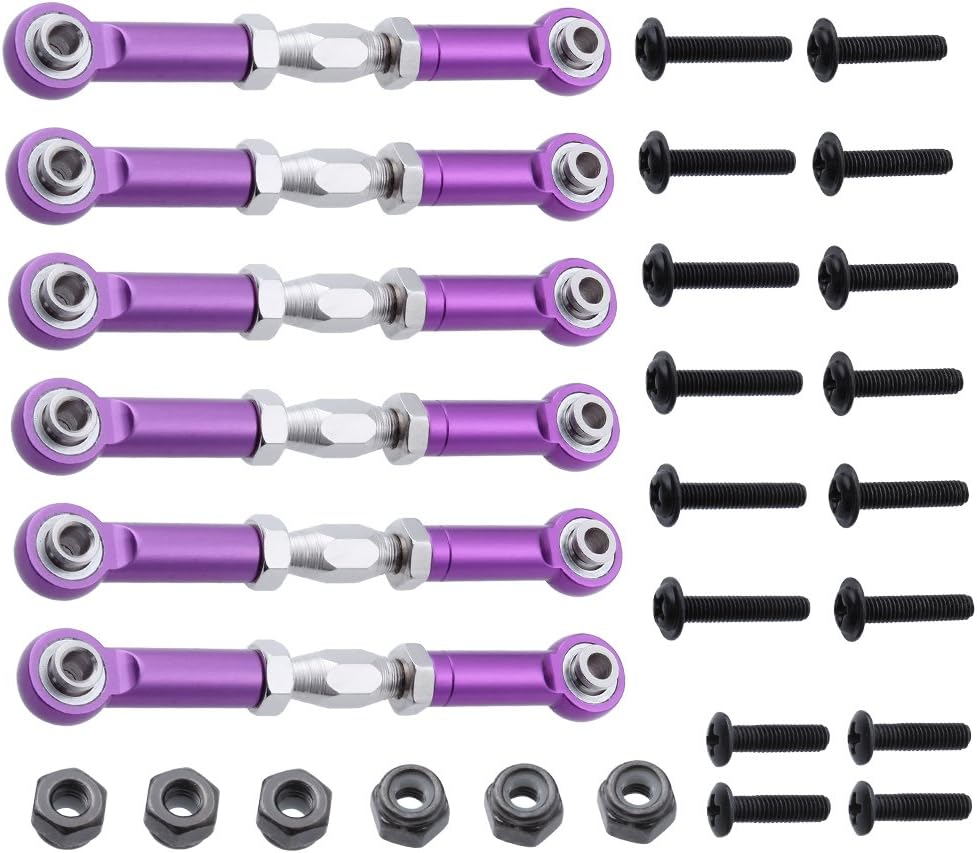
This image displays the complete set of six aluminum turnbuckle rods, including the necessary screws and M3 lock nuts for installation.
Key Features
- Constructed from 6061 Aluminum for durability.
- CNC machined for precise fit and finish.
- Adjustable length for fine-tuning vehicle setup.
- Increased strength and precision over stock components.
Compatibility
These turnbuckle steering linkage rods are compatible with the following 1/10 scale RC vehicles:
- Redcat Racing Shockwave
- Redcat Racing Tornado EPX/EPX PRO
- Redcat Racing Tornado S30
- Redcat Racing Volcano EPX/EPX PRO
- Redcat Racing Volcano S30
- Redcat Racing Vortex SS
- HSP BRONTOSAURUS Pro Monster Truck
Always refer to your specific model's manual to confirm compatibility before installation.
Setup and Installation
Follow these steps to install the aluminum turnbuckle steering linkage rods onto your RC vehicle:
- Preparation: Ensure your RC vehicle is powered off and stable. Gather any necessary tools, such as a small wrench or hex driver.
- Remove Existing Linkages: Carefully detach the existing steering linkage rods from your vehicle. Note their orientation and connection points for reference.
- Assemble Turnbuckles (if necessary): The turnbuckles come with machined aluminum rod ends. If not pre-assembled, screw the rod ends onto the threaded turnbuckle shaft. Ensure both ends are threaded equally to allow for adjustment.
- Initial Length Adjustment: Adjust the overall length of the new turnbuckle rods to approximately match the length of the rods you removed. The adjustable length range is approximately 69mm-82mm overall, or 60mm-73mm eye-to-eye.
- Install New Linkages: Attach the new aluminum turnbuckle rods to the designated connection points on your RC vehicle using the provided screws and M3 lock nuts. Ensure all connections are secure but do not overtighten.
- Final Check: Verify that the steering mechanism moves freely without binding and that the wheels are aligned correctly. Further adjustments may be needed during the 'Operating and Adjustment' phase.

This image shows the individual components of the turnbuckle: a purple aluminum rod end, a silver threaded turnbuckle shaft, and two silver lock nuts.

This image displays two fully assembled turnbuckle rods, demonstrating how the rod ends connect to the central threaded shaft and are secured by nuts.
Operating and Adjustment
The adjustable design of these turnbuckles allows for precise tuning of your vehicle's steering geometry. To adjust the length:
- Loosen Lock Nuts: Use a suitable wrench to slightly loosen the M3 lock nuts on both ends of the turnbuckle shaft.
- Rotate Turnbuckle: Rotate the central hexagonal section of the turnbuckle shaft. Turning it in one direction will shorten the rod, while turning it in the opposite direction will lengthen it.
- Check Alignment: After making adjustments, check your vehicle's wheel alignment (toe-in/toe-out). Ensure both front wheels are aligned symmetrically.
- Tighten Lock Nuts: Once the desired length and alignment are achieved, securely tighten the M3 lock nuts against the rod ends to prevent the turnbuckle from changing length during operation. Do not overtighten.
Small adjustments can significantly impact steering performance. Test your vehicle after each adjustment.
Maintenance
Regular maintenance will ensure the longevity and optimal performance of your turnbuckle rods:
- Cleaning: After use, especially in dirty or dusty conditions, clean the turnbuckles with a soft brush or cloth to remove debris.
- Inspection: Periodically inspect the rods for any signs of bending, cracking, or wear on the rod ends. Check that the lock nuts remain tight.
- Lubrication: While not typically required for these components, if you notice any stiffness in the rod end pivots, a small amount of dry lubricant can be applied.
- Storage: Store the rods in a clean, dry environment when not in use.
Troubleshooting
If you encounter issues with your turnbuckle rods, consider the following:
- Loose Steering/Inconsistent Handling: Check if the lock nuts are securely tightened. Re-adjust the turnbuckle length and ensure proper wheel alignment.
- Binding/Stiff Movement: Inspect the rod ends for any debris or damage. Ensure the screws are not overtightened, which can restrict movement.
- Rod Bending/Damage: This may occur due to severe impacts. Replace any bent or damaged rods immediately to maintain vehicle performance and prevent further issues.
- Difficulty Adjusting Length: Ensure lock nuts are sufficiently loosened. Clean any dirt or grime from the threads.
Specifications
| Feature | Detail |
|---|---|
| Material | 6061 Aluminum |
| Color | Purple |
| Overall Adjustable Length | Approx. 69mm - 82mm |
| Eye-to-Eye Adjustable Length | Approx. 60mm - 73mm |
| Compatibility | 1/10 Scale Redcat Racing, HSP BRONTOSAURUS Pro |
| Manufacturer Part Number | DN191161 |
| UPC | 756970384427 |
Warranty and Support
Hobbypark products are manufactured to high standards. For any concerns regarding product defects or performance, please refer to the retailer's return policy or contact Hobbypark customer support directly.
If you are not 100% completely satisfied with your product, please do not hesitate to contact Hobbypark to request a refund or exchange. Contact information can typically be found on the official Hobbypark website or through your purchase platform.