
Introduction
This manual provides detailed instructions for the installation, maintenance, and troubleshooting of the Vintage Electronics Complete Belt Kit for the JVC KD-A1 cassette deck. This kit includes all three necessary belts, manufactured to OEM specifications, to restore optimal performance to your audio equipment.
Setup and Installation
Proper installation of the belt kit is crucial for the correct operation of your JVC KD-A1 cassette deck. If you are not comfortable performing this procedure, it is recommended to seek assistance from a qualified technician.
Required Tools:
- Small Phillips head screwdriver
- Tweezers or small pliers (optional, for belt handling)
- Isopropyl alcohol and cotton swabs (for cleaning pulleys)
Installation Steps:
- Power Disconnection: Ensure the JVC KD-A1 cassette deck is unplugged from the power source before beginning any work.
- Accessing the Mechanism: Carefully remove the outer casing of the cassette deck to gain access to the internal drive mechanism. Refer to your JVC KD-A1 service manual for specific disassembly instructions.
- Old Belt Removal: Locate the existing belts. Carefully remove all old belts from their respective pulleys and motor shafts. Note their original routing for reference.
- Cleaning Pulleys: Use isopropyl alcohol and cotton swabs to thoroughly clean all pulleys, motor shafts, and any surfaces where the new belts will make contact. This removes old rubber residue and ensures optimal grip.
- New Belt Installation: Install the new belts one by one, ensuring they are correctly routed around the appropriate pulleys and motor shafts. The kit includes three belts of varying sizes for different functions (e.g., capstan, counter, reel drive). Match the new belts to the positions of the old ones. Ensure belts are not twisted.
- Verification: Gently rotate the capstan flywheel by hand to ensure all belts move freely and smoothly without slipping or binding.
- Reassembly: Carefully reassemble the cassette deck's casing, ensuring all screws are tightened securely.
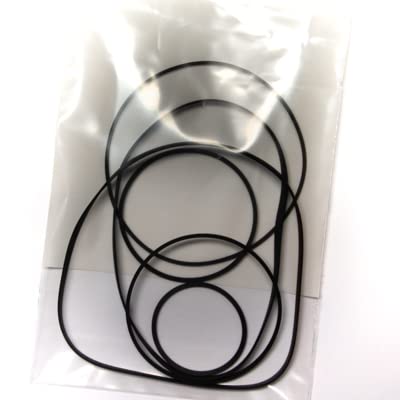
Image: The Complete Belt Kit for JVC KD-A1, featuring three new stock belts designed to OEM specifications.
Operating Instructions
After successful installation of the belt kit, your JVC KD-A1 cassette deck should operate as intended. Insert a cassette tape and test all functions, including Play, Fast Forward, Rewind, and Stop, to confirm proper belt engagement and tape transport.
Maintenance
To ensure the longevity and optimal performance of your new belts and cassette deck:
- Periodic Inspection: Every few years, or if performance issues arise, inspect the belts for signs of wear, cracking, or stretching.
- Cleaning: If accessible, periodically clean the pulleys and belt surfaces with a lint-free cloth lightly dampened with isopropyl alcohol to remove dust and grime.
- Storage: Store the cassette deck in a clean, dry environment away from extreme temperatures and direct sunlight, which can degrade rubber components over time.
Troubleshooting
If you encounter issues after installing the belt kit, consider the following:
- Tape Speed Inconsistency: If the tape plays too fast, too slow, or with wow and flutter, re-check belt tension and ensure belts are not slipping on pulleys. Ensure pulleys are clean.
- No Tape Movement: Verify that all belts are correctly installed and seated on their respective pulleys and motor shafts. Check for any obstructions in the tape path.
- Squeaking Noises: This may indicate friction. Ensure belts are not rubbing against other components and that pulleys are clean.
- Intermittent Operation: Check for loose connections or improperly seated belts.
If problems persist, refer to the JVC KD-A1 service manual or contact technical support.
Specifications
| Product Type | Complete Belt Kit |
| Compatibility | JVC KD-A1 Cassette Deck |
| Number of Belts | 3 |
| Belt Material | New stock rubber, manufactured to OEM specs |
| Brand | Vintage Electronics |
| UPC | 790913744800 |
| ASIN | B072B9PW3X |
Warranty Information
This Complete Belt Kit for JVC KD-A1 comes with a Lifetime Warranty on all belts. This warranty covers manufacturing defects and premature wear under normal operating conditions. For warranty claims, please retain your proof of purchase and contact Vintage Electronics support.
Support
Vintage Electronics offers Outstanding Tech Support with 45 years of experience in vintage electronics. If you require assistance with installation, troubleshooting, or have any questions regarding your belt kit, please contact us through the seller platform or refer to the contact information provided with your purchase.
Seller: Bob's Vintage-Electronics Parts