
Product Overview
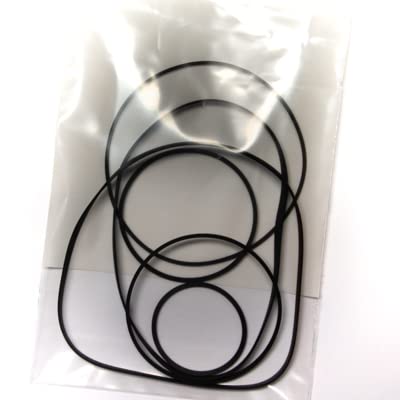
This image displays the complete set of five replacement belts included in the kit, designed for the Pioneer CT-F505 cassette deck.
The Vintage Electronics Complete Belt Kit for Pioneer CT-F505 provides a full set of five precision-engineered replacement belts. These belts are manufactured to meet original equipment manufacturer (OEM) specifications, ensuring optimal performance and longevity for your Pioneer CT-F505 cassette deck.
Safety Information
Please read and understand all safety precautions before proceeding with installation.
- Always disconnect the Pioneer CT-F505 cassette deck from the power source before beginning any installation or maintenance.
- Exercise caution when handling internal components to avoid damage to sensitive electronics.
- Keep small parts away from children.
- If you are unsure about any step, consult a qualified technician.
Package Contents
Verify that all items are present in your kit:
- 5 x Replacement Belts for Pioneer CT-F505 (various sizes)
Installation Guide
Tools Required
- Small Phillips head screwdriver
- Small flathead screwdriver (optional, for prying)
- Tweezers or small pliers (for belt manipulation)
- Isopropyl alcohol and cotton swabs (for cleaning)
Preparation
- Disconnect the Pioneer CT-F505 from the main power supply.
- Place the unit on a clean, stable, and well-lit work surface.
- Carefully remove the outer casing of the cassette deck according to the original service manual for your CT-F505. This typically involves removing screws from the back and bottom panels.
- Locate the existing belts within the mechanism. Note their routing and position.
Belt Replacement Procedure
- Gently remove the old, worn belts. Pay attention to the path each belt takes around the pulleys and flywheels.
- Using isopropyl alcohol and cotton swabs, thoroughly clean all pulley surfaces, flywheels, and any other components that come into contact with the belts. Remove any residue from the old belts. Allow to dry completely.
- Identify the correct replacement belt for each position. The kit contains belts of varying sizes for different functions (e.g., capstan, counter, reel drive).
- Carefully install each new belt, ensuring it is properly seated on its respective pulleys and flywheels without any twists or kinks. Refer to your notes or a service diagram if available for correct routing.
- Once all belts are installed, manually rotate the flywheels and other moving parts to confirm smooth operation and proper belt tension.
- Before reassembling the casing, perform a preliminary functional test if possible, ensuring no tools or loose parts are inside.
- Carefully reattach the outer casing, ensuring all screws are tightened securely. Do not overtighten.
Post-Installation Check
After installing the new belts, perform the following checks to ensure proper functionality:
- Connect the cassette deck to power and audio system.
- Insert a known good cassette tape.
- Test all transport functions: Play, Fast Forward, Rewind, Stop, and Record (if applicable).
- Listen for consistent playback speed and absence of wow or flutter.
- Verify that the tape counter operates correctly.
Maintenance
Proper maintenance ensures the longevity of your new belts and cassette deck:
- Keep the cassette deck in a clean, dust-free environment.
- Avoid exposing the unit to extreme temperatures or humidity.
- Periodically clean the tape path (heads, capstan, pinch roller) with appropriate cleaning solutions.
- Do not use abrasive cleaners on any part of the deck or belts.
Troubleshooting
| Problem | Possible Solution |
|---|---|
| Tape speed is inconsistent (wow/flutter) | Ensure belts are correctly seated and not twisted. Clean capstan and pinch roller. |
| Fast Forward/Rewind not working | Check the specific belts responsible for these functions. Verify they are installed and tensioned correctly. |
| Tape counter not advancing | Inspect the counter belt for proper installation and tension. |
| No tape movement | Verify all belts are installed and not slipping. Ensure the motor is functioning. |
Specifications
- Number of Belts: 5
- Compatibility: Pioneer CT-F505 Cassette Deck
- Material: High-quality rubber compound (OEM specifications)
- UPC: 710827790243
Warranty and Support
This Vintage Electronics Complete Belt Kit comes with a Lifetime Warranty on all belts, ensuring peace of mind for your repair.
For technical support or warranty claims, please contact Vintage Electronics customer service. Refer to the original purchase documentation for specific contact details or visit the Vintage Electronics website.