Introduction
The Gear Pro HypeCam GDV485SL.01 is a compact and powerful 4K Ultra HD sports action camera designed to capture high-quality video and photos in various environments. Featuring Wi-Fi connectivity for smartphone control, a waterproof case, and a 2.0-inch LCD display, this camera is ideal for recording your adventures. This manual provides detailed instructions for setup, operation, maintenance, and troubleshooting to ensure optimal performance of your device.
What's in the Box
Please verify that all items are present before proceeding with setup.
- Hype 4K Cam
- Waterproof Case
- Data Transfer/Charging Cable
- Handlebar Mount
- Universal Base Mounts
- Fastening Strap
Product Overview
Components and Controls
Familiarize yourself with the camera's main components and controls.
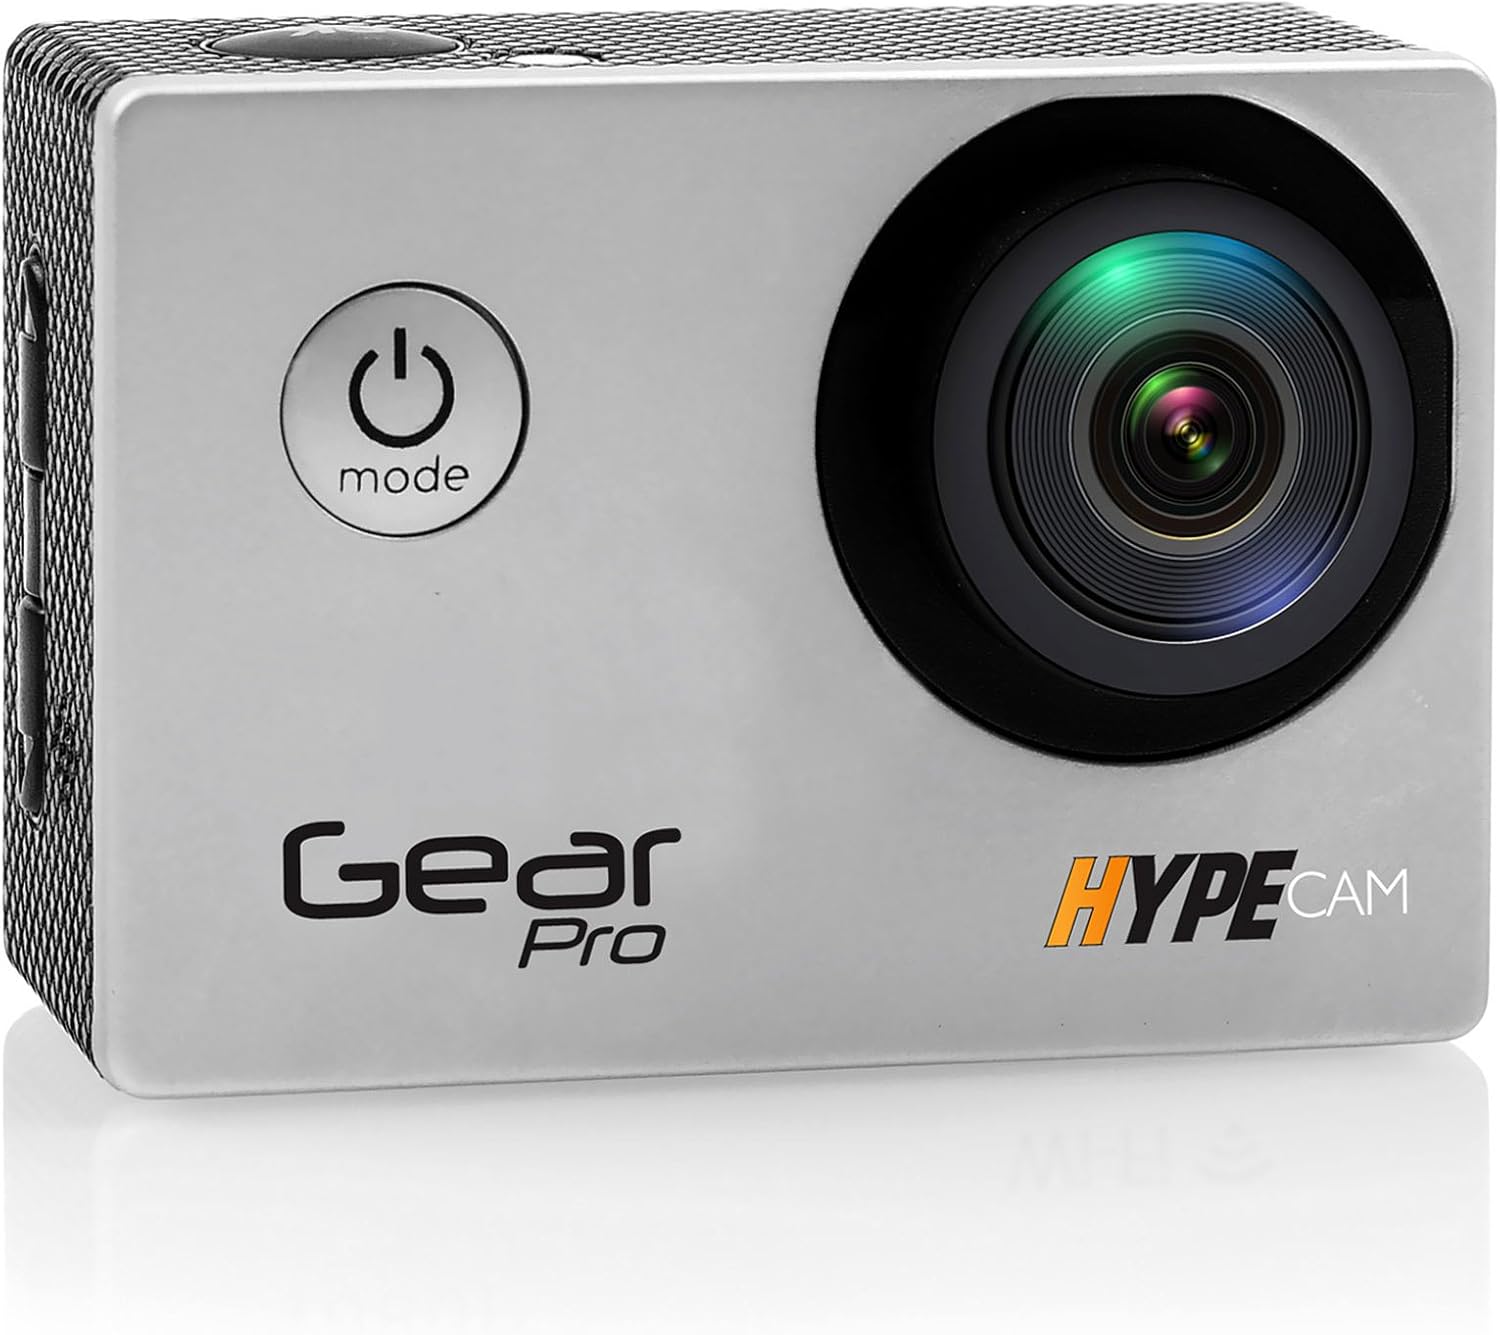
Image: Front view of the Gear Pro HypeCam GDV485SL.01, highlighting the lens and power/mode button.
| Component/Control | Description |
|---|---|
| Power/Mode Button | Press and hold to power on/off. Press briefly to switch between video, photo, and playback modes. |
| Shutter/OK Button | Press to start/stop recording video or take a photo. In menu, confirms selection. |
| Up/Down Buttons | Navigate menu options. |
| Micro SD Card Slot | Insert Micro SD card for storage. Supports up to 32GB (Class 10 or higher recommended). |
| Micro USB Port | For charging the battery and transferring data to a computer. |
| Micro HDMI Port | Connect to an HDTV for viewing content. |
| 2.0" LCD Display | View live footage, playback, and navigate menus. |
| Lens | Captures video and photo input. |
| Microphone | Records audio. |
Setup
Battery Installation
- Open the battery compartment cover on the bottom of the camera.
- Insert the included rechargeable battery, ensuring the correct polarity.
- Close the battery compartment cover securely.
- Connect the camera to a USB power source using the provided data transfer/charging cable to fully charge the battery before first use. The charging indicator light will turn off when charging is complete.
Micro SD Card Installation
- Locate the Micro SD card slot on the side of the camera.
- Insert a Class 10 or higher Micro SD card (up to 32GB) with the contacts facing the back of the camera until it clicks into place.
- To remove, gently push the card in until it clicks, then release to eject.
Attaching the Waterproof Case
The included waterproof case allows the camera to be fully submerged, making it suitable for water sports and adverse weather conditions.
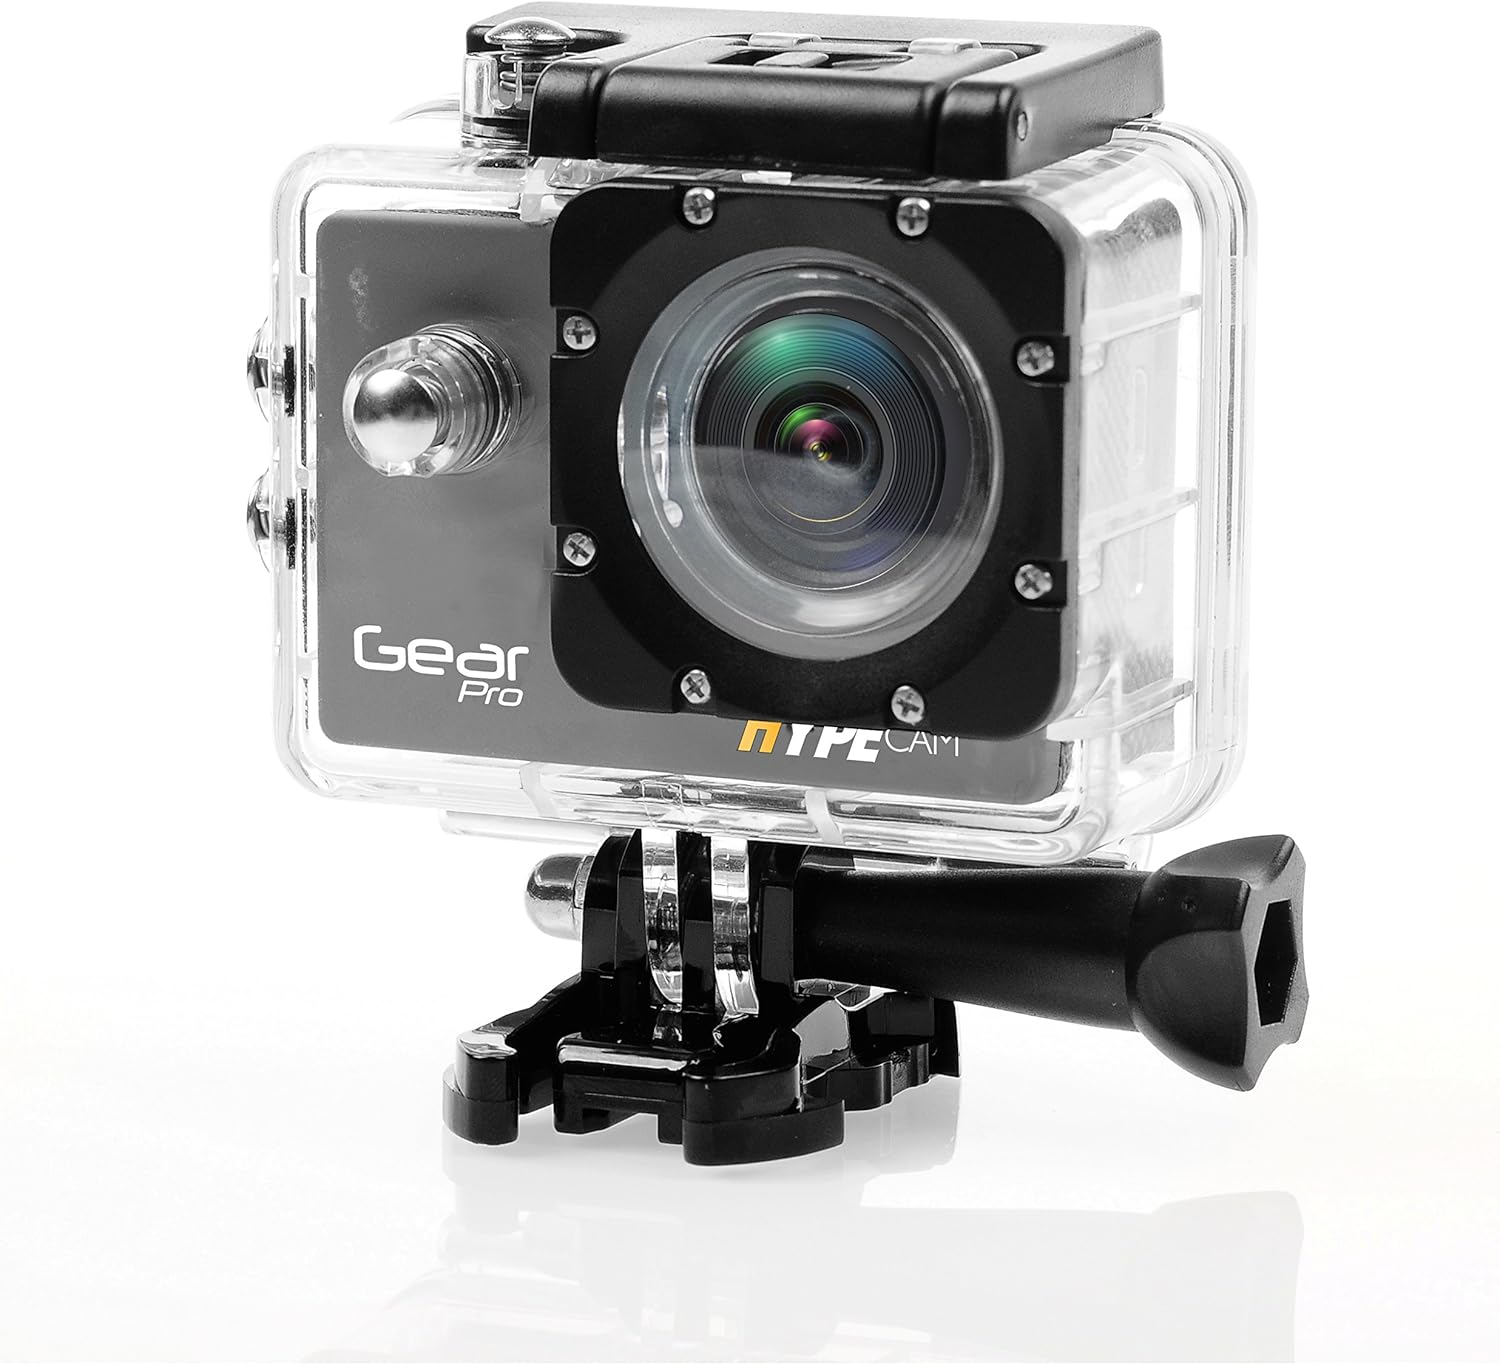
Image: The camera securely housed within its transparent waterproof case, ready for mounting.
- Open the latch on the top of the waterproof case.
- Carefully place the camera inside the case, ensuring it fits snugly.
- Close the latch firmly until it clicks, ensuring a watertight seal.
- Before first use in water, perform a leak test by placing the empty case in water for 30 minutes.
Mounting Options
Utilize the various mounts provided to attach your camera to helmets, handlebars, or other surfaces.

Image: The camera being used in diverse outdoor activities, demonstrating its versatility with different mounting options.
- Attach the waterproof case to the desired mount (e.g., handlebar mount, base mount) using the provided screws and fastening strap.
- Ensure all connections are secure before engaging in activity.
Operating
Powering On/Off
- To power on: Press and hold the Power/Mode button for 3 seconds. The LCD screen will light up.
- To power off: Press and hold the Power/Mode button for 3 seconds. The LCD screen will turn off.
Mode Selection
After powering on, press the Power/Mode button briefly to cycle through the main modes:
- Video Recording Mode: Indicated by a video camera icon.
- Photo Capture Mode: Indicated by a camera icon.
- Playback Mode: Indicated by a play icon.
- Settings Mode: Indicated by a gear icon.
Video Recording
- Switch to Video Recording Mode.
- Press the Shutter/OK button to start recording. A red dot or recording timer will appear on the screen.
- Press the Shutter/OK button again to stop recording. The recording timer will disappear.
Photo Capture
- Switch to Photo Capture Mode.
- Frame your shot using the LCD display.
- Press the Shutter/OK button to take a photo.
Wi-Fi Connectivity
The built-in Wi-Fi allows you to connect your HypeCam to a smartphone for remote control and file transfer.
- Download the official Gear Pro HypeCam app from your smartphone's app store.
- On the camera, navigate to Settings Mode and enable Wi-Fi. The Wi-Fi indicator will appear on the screen.
- On your smartphone, go to Wi-Fi settings and connect to the HypeCam's Wi-Fi network (e.g., "HypeCam_XXXX"). The default password is usually "1234567890" or similar, check the camera screen for details.
- Open the HypeCam app on your smartphone. You can now view live footage, control recording, and access camera settings remotely.
Slow-Motion Recording
The HypeCam supports slow-motion video capture at specific resolutions and frame rates.

Image: Visual representation of the camera's slow-motion feature, detailing supported resolutions and frame rates.
- Access the video settings menu on the camera.
- Select a resolution that supports higher frame rates for slow-motion, such as 1080p @ 60fps or 720p @ 120fps.
- Record as usual. The footage will play back in slow motion.
Maintenance
- Cleaning the Lens: Use a soft, lint-free cloth specifically designed for camera lenses. Avoid abrasive materials or harsh chemicals.
- Cleaning the Camera Body: Wipe with a soft, damp cloth. Do not use solvents.
- Waterproof Case Care: After use in saltwater, rinse the case with fresh water and allow it to air dry. Inspect the O-ring seal regularly for debris or damage.
- Battery Care: Store the battery in a cool, dry place. If not used for extended periods, charge and discharge the battery periodically to maintain its health.
- Storage: Store the camera and accessories in a dry, dust-free environment away from direct sunlight and extreme temperatures.
Troubleshooting
| Problem | Possible Solution |
|---|---|
| Camera does not power on. | Ensure the battery is fully charged and correctly inserted. Try charging the camera for at least 2 hours. |
| Cannot record video/take photos. | Check if a Micro SD card is inserted and has sufficient free space. Ensure the card is Class 10 or higher. Format the SD card if necessary (this will erase all data). |
| Wi-Fi connection fails. | Ensure Wi-Fi is enabled on the camera. Restart both the camera and your smartphone. Verify the Wi-Fi password. |
| Poor video/photo quality. | Clean the camera lens. Ensure sufficient lighting. Check resolution settings; higher resolutions provide better quality. |
| Camera freezes or becomes unresponsive. | Remove and reinsert the battery to perform a hard reset. |
| Water inside waterproof case. | Immediately remove the camera. Inspect the O-ring seal for dirt, hair, or damage. Ensure the latch is fully closed. Do not use the case if the seal is compromised. |
Specifications
| Feature | Detail |
|---|---|
| Model Number | GDV485SL.01 |
| Product Dimensions | 0.97 x 2.33 x 1.62 inches |
| Item Weight | 1.1 pounds |
| Photo Sensor Technology | CMOS |
| Video Capture Resolution | 4K Ultra HD, 2.7K, 1080p, 720p |
| Maximum Focal Length | 30 |
| Maximum Aperture | 2 Millimeters |
| Flash Memory Type | Micro SD (up to 32GB) |
| Video Capture Format | MP4 |
| Supported Audio Format | MP3 |
| Screen Size | 2 Inches |
| Connectivity Technology | Built-in WiFi, Micro HDMI Port, USB Type 2.0 |
| Manufacturer | Sound Around |
Warranty and Support
For warranty information and technical support, please refer to the official ProGear website or contact their customer service. Keep your purchase receipt as proof of purchase for any warranty claims.