
1. Introduction and Overview
The PULUZ 20cm Portable Photography Shooting Light Tent Kit is designed to provide a convenient and effective solution for capturing high-quality product photographs. This compact and foldable light box features integrated LED lighting and multiple background options, making it suitable for various small items.
- High Brightness: Equipped with a customized integrated light-bar featuring 20 high-quality SMD LED beads, ensuring ample brightness for clear and well-lit shots.
- Multi-angle Shooting: Designed with both a front horizontal shooting window and a top vertical window, allowing for diverse photographic angles to meet different creative demands.
- No Strobe Effect: The lighting system is engineered to prevent stroboscopic effects, enabling the capture of professional-quality images even with standard photographic equipment.
- Fast Installation: The studio box features a simple assembly process, primarily utilizing Velcro fasteners for quick and straightforward setup.
- USB Power Supply: Operates on a 5V, 1A USB power supply. Please note that Quick/Fast Charge adapters (outputting more than 5V) are not supported, and a power bank is not included.

Image 1.1: The PULUZ 20cm Portable Photography Shooting Light Tent Kit, showcasing the light box, USB power cable, and included backdrops.
2. Package Contents
Verify that all items listed below are included in your package:
- 1 x Main Studio Box (Foldable)
- 1 x USB Power Cord
- 6 x EVA Photo Box Backdrops (Colors: Black, White, Yellow, Blue, Red, Green)
- 1 x Carry Bag

Image 2.1: Visual representation of the kit's contents, including the foldable studio, USB cable, and various backdrops.
3. Setup Instructions
Follow these steps to quickly assemble your PULUZ Photo Studio Light Box:
- Expand the Studio Tent: Carefully unfold the main studio box from its collapsed state.
- Fold Creases: Firmly fold along the pre-defined creases on the left and right edges, and then the bottom crease, to give the box its structural shape.
- Connect Buckles: Secure the sides by connecting the product's tabs to the corresponding snap buckles for stable installation.
- Insert Backdrop: Choose one of the 6 EVA backdrops. Align the top holes of the backdrop with the hooks inside the studio box and secure it.
- Connect Power: Plug the USB power cord into the integrated light-bar at the top of the studio box, and connect the other end to a compatible 5V, 1A USB power source (e.g., a wall adapter, power bank, or computer USB port).

Image 3.1: Detailed steps for the quick and easy assembly of the photo studio.
Video 3.1: Official product video demonstrating the assembly process and basic usage of the PULUZ Mini 20cm Photo Studio Box.
4. Operating Instructions
Utilize the various features of your light tent for optimal product photography:
- Powering the Lights: Once the USB cable is connected to a 5V/1A power source, the LED lights will illuminate. Ensure your power source meets the specifications to avoid damage.
- Changing Backdrops: Select from the 6 provided EVA backdrops (Black, White, Yellow, Blue, Red, Green) to complement your product. Simply unhook the current backdrop and attach the desired one using the top hooks.
- Multi-Angle Shooting: The studio box offers two primary shooting angles:
- Front Horizontal: Use the front opening for standard eye-level shots.
- Top Vertical (Overhead): Remove the circular cover on the top panel to shoot from directly above, ideal for flat lay or top-down perspectives.
- Product Placement: Position your item centrally within the light box for even illumination and to maximize the effect of the chosen backdrop.

Image 4.1: Demonstrating the use of the light box with a product and a smartphone for photography.
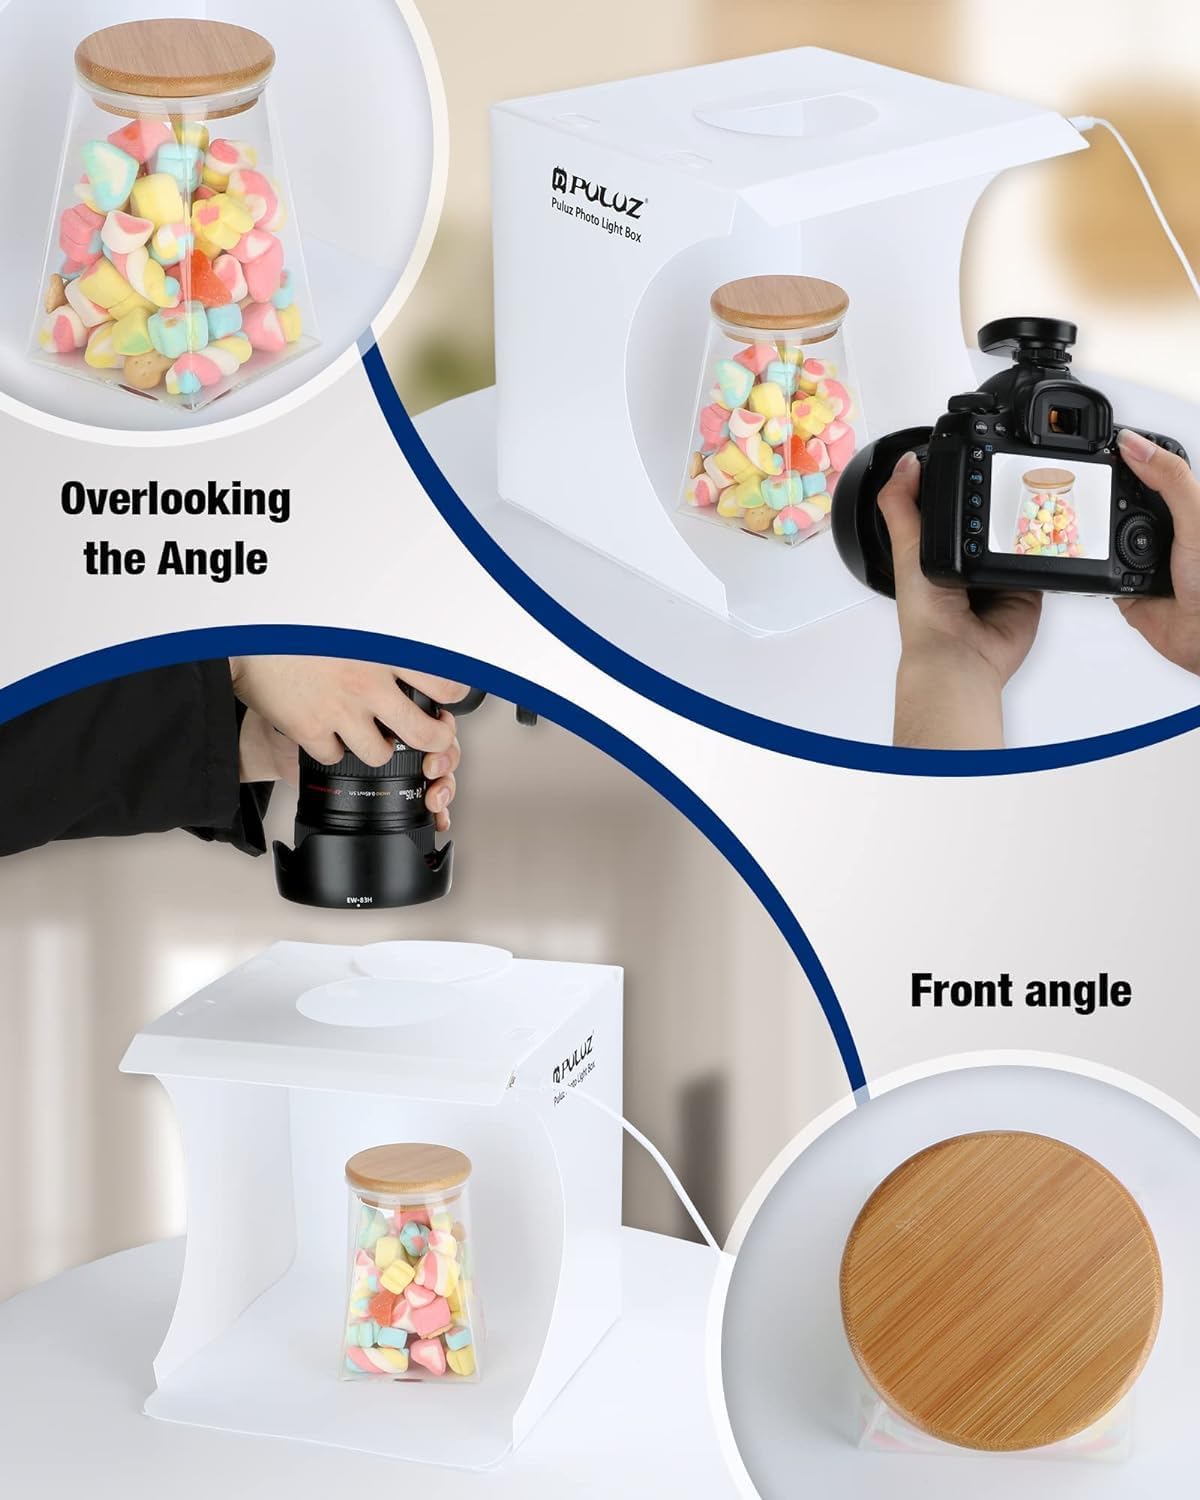
Image 4.2: Illustrating the versatility of shooting angles, including overhead and front views.
5. Maintenance
To ensure the longevity and optimal performance of your PULUZ Photo Studio Light Tent Kit, follow these maintenance guidelines:
- Cleaning: Gently wipe the interior and exterior surfaces of the studio box with a soft, dry, or slightly damp cloth. Avoid abrasive cleaners or solvents that could damage the material.
- Backdrop Care: The EVA backdrops are waterproof and easy to clean. Wipe them with a damp cloth if they become dirty. Store them flat or rolled to prevent creases.
- Storage: When not in use, fold the studio box back into its compact form and store it in the provided carry bag to protect it from dust and damage.
- LED Lights: The LED lights are integrated and generally maintenance-free. Avoid direct contact with water or excessive force.
6. Troubleshooting
If you encounter any issues with your light tent, refer to the following common troubleshooting tips:
- Lights Not Turning On:
- Ensure the USB cable is securely connected to both the light-bar and the power source.
- Verify that the USB power source is active and providing 5V, 1A output. Avoid using Quick/Fast Charge adapters.
- Test with a different USB power source or cable if available.
- Unstable Structure:
- Check that all snap buckles are correctly engaged and secured.
- Ensure the creases are firmly folded to maintain the box's shape.
- Uneven Lighting/Shadows:
- Adjust the placement of your product within the box.
- Ensure the LED light strip is clean and unobstructed.
- Consider using additional external lighting if necessary, though the integrated LEDs are designed for sufficient illumination.
7. Specifications
| Feature | Detail |
|---|---|
| Brand | PULUZ |
| Model Number | PU5021 |
| Product Dimensions (D x W x H) | 8.66"D x 9.45"W x 9.06"H (approx. 20cm x 20cm x 20cm) |
| Item Weight | 9.9 ounces |
| Material | Polyvinyl Chloride (PVC) |
| LED Lights | 20 SMD LED beads (integrated light-bar) |
| Power Supply | USB 5V, 1A (Power bank not included) |
| Backdrops Included | 6 (Black, White, Yellow, Blue, Red, Green) |

Image 7.1: Key product dimensions and details on USB power compatibility.
8. Warranty and Support
Specific warranty information for the PULUZ 20cm Portable Photography Shooting Light Tent Kit is not provided in the product details. For any support inquiries, please refer to the seller's contact information on the platform where the product was purchased.
For general product information or to explore other PULUZ products, you may visit the official PULUZ store: