1. Introduction
The SANNCE 8-Channel 1080P HD 5-in-1 Digital Video Recorder (DVR) is a versatile and essential component for your home security surveillance system. This DVR is designed to provide reliable video recording and monitoring capabilities, supporting a wide range of camera technologies including CVBS, AHD, TVI, CVI, and IP cameras. This manual provides detailed instructions for the setup, operation, maintenance, and troubleshooting of your SANNCE DVR to ensure optimal performance and security.

Figure 1.1: Front view of the SANNCE 8-Channel 5-in-1 DVR unit.
2. Package Contents
Before proceeding with the installation, please verify that all items listed below are included in your package. If any items are missing or damaged, please contact SANNCE customer support.

Figure 2.1: Included items in the SANNCE DVR package.
- SANNCE 8-Channel 5-in-1 DVR (without HDD)
- Power Adapter
- USB Mouse
- User Manual (this document)
- Wall Sticker (for surveillance notice)
3. Setup
3.1 Hardware Installation
Follow these steps to correctly install the hardware components of your DVR system.
- Hard Drive Installation (Optional, if not pre-installed): The DVR is shipped without a hard drive. To enable recording, you must install a compatible 3.5-inch SATA hard drive (up to 8TB capacity).
- Unscrew and remove the top cover of the DVR.
- Connect the SATA data and power cables from the DVR to the hard drive.
- Secure the hard drive to the DVR chassis using the provided screws.
- Replace the top cover and secure it with screws.
- Camera Connection: Connect your surveillance cameras to the corresponding video input ports on the rear of the DVR. This DVR supports TVI, AHD, CVI, CVBS, and IP cameras.
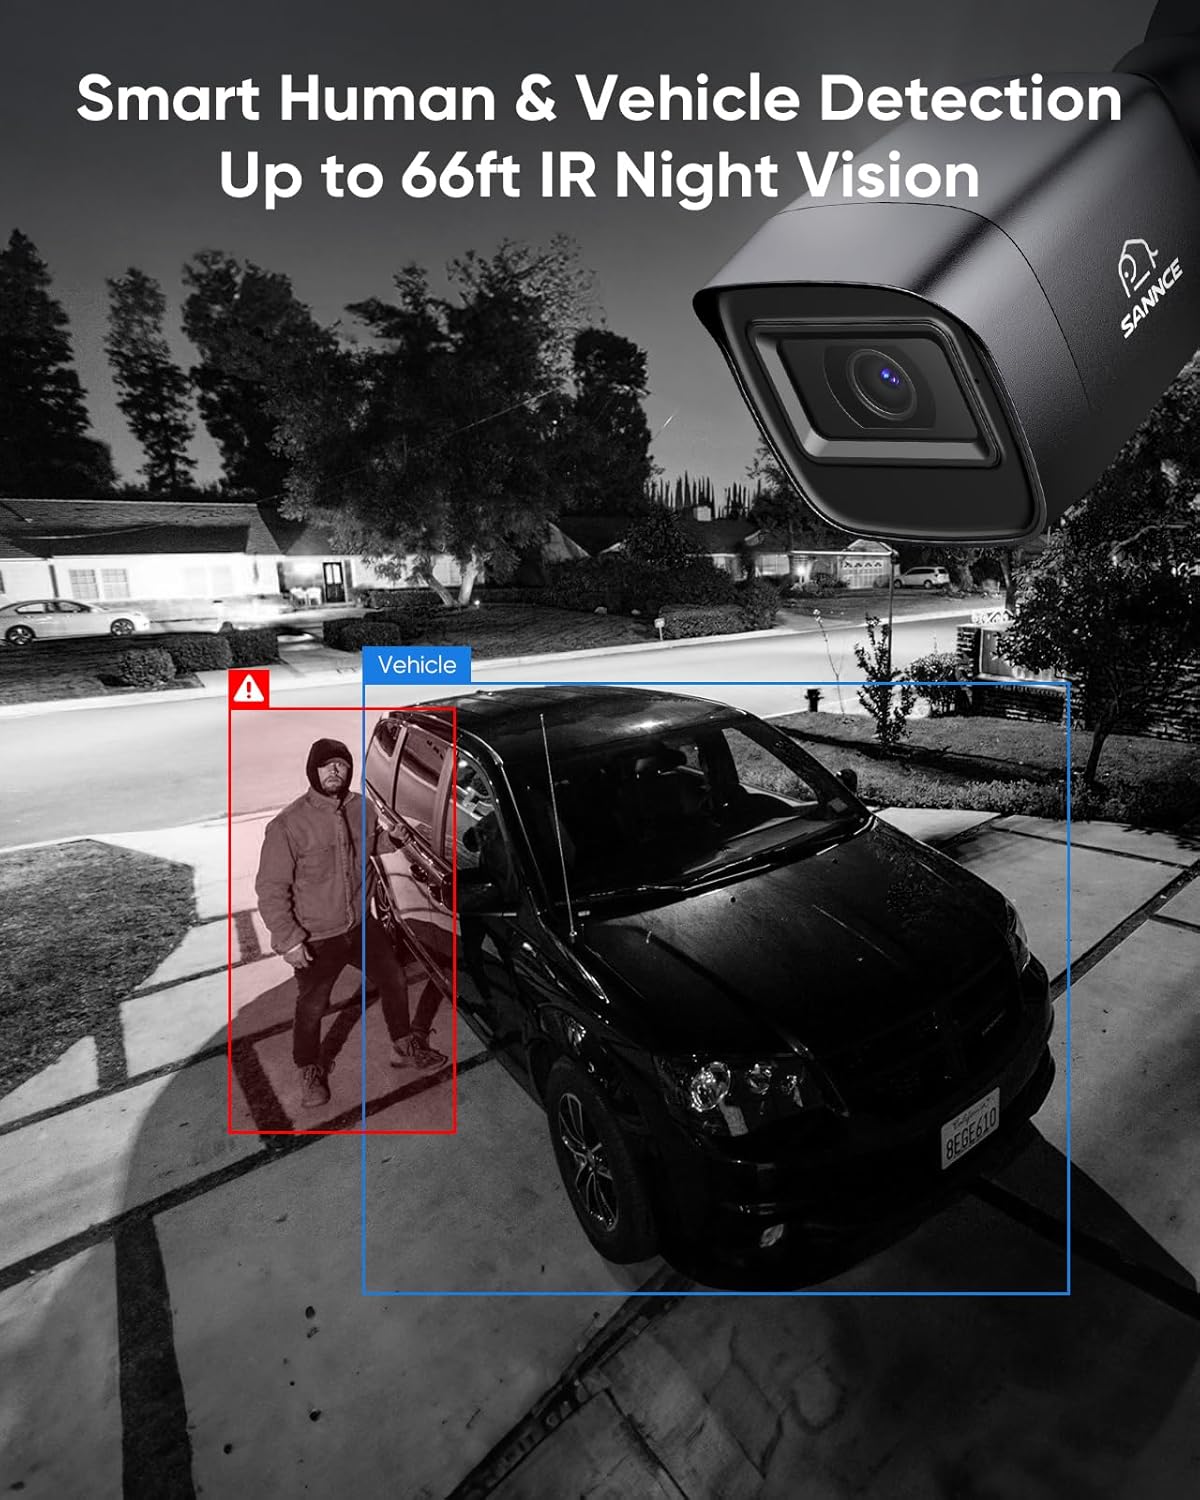
Figure 3.1: DVR rear panel with camera input connections.
- Display Connection: Connect a monitor or TV to the DVR using either the HDMI or VGA port.

Figure 3.2: Connecting the DVR to a display via HDMI or VGA.
- USB Mouse Connection: Plug the included USB mouse into one of the USB ports on the DVR for navigation.
- Network Connection (Optional): For remote viewing and network features, connect an Ethernet cable from the DVR's LAN port to your router.
- Power Connection: Connect the power adapter to the DVR's power input and then plug it into a power outlet. The DVR will power on automatically.
3.2 Initial Configuration
Upon first boot, the DVR will guide you through an initial setup wizard. Follow the on-screen prompts to set up basic parameters such as language, date/time, network settings, and hard drive formatting (if a new HDD was installed).
4. Operating Instructions
4.1 Live View and Playback
Once configured, you can view live camera feeds and play back recorded footage.

Figure 4.1: 8-Channel 1080P HD Live View.
- Live View: On the main interface, you will see the live feeds from all connected cameras. Use the mouse to select individual channels or change the display layout.
- Playback: Access the playback menu to review recorded footage. You can search by date, time, and event type.
4.2 Recording Management
The DVR utilizes H.265+ compression technology to maximize storage efficiency while maintaining video quality.

Figure 4.2: H.265+ Compression for optimized storage.
- Recording Modes: Configure continuous recording, scheduled recording, or motion-triggered recording.
- Storage: The DVR supports up to 8TB hard drives. Ensure your hard drive is formatted correctly for recording.
4.3 Smart Detection and Alerts
The DVR features smart human and vehicle detection to reduce false alarms and provide accurate alerts.

Figure 4.3: Smart Human & Vehicle Detection.
- Motion Detection: Set up specific detection zones and sensitivity levels for each camera.
- Alerts: Receive instant notifications via the mobile app or email when motion is detected.
4.4 Remote Monitoring
Access your security system remotely from anywhere using the SANNCE Home mobile application or a web browser.

Figure 4.4: Remote viewing via SANNCE Home app.
- Mobile App: Download the 'SANNCE Home' or 'Sannce Vision' app from your device's app store. Register an account and add your DVR by scanning the QR code or entering the device ID.
- Web Browser: Access the DVR interface through a web browser on your PC (e.g., Google Chrome, Firefox, Microsoft Edge, Safari, Internet Explorer) by entering the DVR's IP address.
4.5 Privacy Masking
Configure privacy zones to block out specific areas within the camera's view that you do not wish to record or monitor.

Figure 4.5: Setting up privacy zones.
5. Maintenance
Regular maintenance ensures the longevity and optimal performance of your SANNCE DVR.
- Cleaning: Periodically clean the DVR unit and camera lenses with a soft, dry cloth. Avoid using harsh chemicals.
- Firmware Updates: Check the official SANNCE website for available firmware updates. Keeping your DVR's firmware up-to-date can improve performance, add new features, and enhance security.
- Hard Drive Health: Monitor the health of your hard drive through the DVR's system settings. Replace the hard drive if it shows signs of failure to prevent data loss.
- Power Cycle: If the DVR experiences minor issues, try power cycling the device by disconnecting and reconnecting the power adapter.
6. Troubleshooting
This section addresses common issues you might encounter with your SANNCE DVR.
| Problem | Possible Cause | Solution |
|---|---|---|
| No display on monitor/TV | Incorrect cable connection; wrong input selected on display; DVR not powered on. | Check HDMI/VGA cable connections. Ensure the monitor is set to the correct input source. Verify DVR power. |
| No recording | No hard drive installed; hard drive not formatted; recording schedule not set; hard drive full. | Install and format a hard drive. Configure recording schedules. Check hard drive capacity and enable overwrite if needed. |
| Remote access not working | Network connection issue; incorrect app settings; firewall blocking connection. | Ensure DVR is connected to the internet. Verify network settings (DHCP/Static IP). Check app settings and ensure P2P is enabled. Disable firewall temporarily for testing. |
| No video from a specific camera | Camera not powered; cable issue; camera type mismatch. | Check camera power supply and video cable. Ensure the camera type (AHD/TVI/CVI/CVBS/IP) is compatible and correctly configured in DVR settings. |
| DVR not responding to mouse/keyboard | USB port issue; faulty mouse/keyboard. | Try a different USB port. Test with another USB mouse/keyboard. Restart the DVR. |
7. Specifications
Detailed technical specifications for the SANNCE 8-Channel 5-in-1 DVR.
| Feature | Specification |
|---|---|
| Model Number | 81BC |
| Video Input | 8 Channels (TVI, AHD, CVBS, CVI, IP) |
| Video Resolution | Up to 1080P HD |
| Video Compression | H.265+ (for optimized storage) |
| Hard Disk Support | 1 x SATA HDD, up to 8 TB |
| Connectivity Technology | HDMI, VGA, USB, Ethernet (RJ45) |
| USB Ports | 2 |
| Compatible Devices | Smartphone, Tablet, PC |
| Package Dimensions | 30.4 x 28 x 8.7 cm |
| Package Weight | 1.02 kg |
8. Warranty and Support
SANNCE is committed to providing high-quality products and customer satisfaction.
- Warranty: Please refer to the warranty information provided with your purchase documentation for specific terms and conditions.
- Technical Support: SANNCE offers lifetime email support for its products. For technical assistance, please contact our support team via the official SANNCE website or the contact information provided in your product packaging.
- Online Resources: Visit the official SANNCE brand store on Amazon for additional product information, FAQs, and support resources: SANNCE Brand Store.