Introduction
Welcome to your Shure GLXD24R/B58 Wireless Microphone System. This manual provides essential information for setting up, operating, and maintaining your system to ensure optimal performance and longevity. The GLX-D Advanced Digital Wireless system offers exceptional audio clarity and reliable wireless connectivity for various professional applications.
Components Overview
Your Shure GLXD24R/B58 system includes the following main components:
- GLXD4R Rack Mount Receiver: The central unit for receiving audio signals and managing frequencies.
- GLXD2 Handheld Transmitter with BETA58A Vocal Mic Capsule: The wireless microphone for vocal performance.
- Proprietary Lithium-Ion Rechargeable Battery: Provides power for the transmitter.
- Power Supply and Charging Cable: For powering the receiver and charging the battery.
- Antennas: For signal reception.
- Rack Mounting Hardware: For installing the receiver in a standard equipment rack.
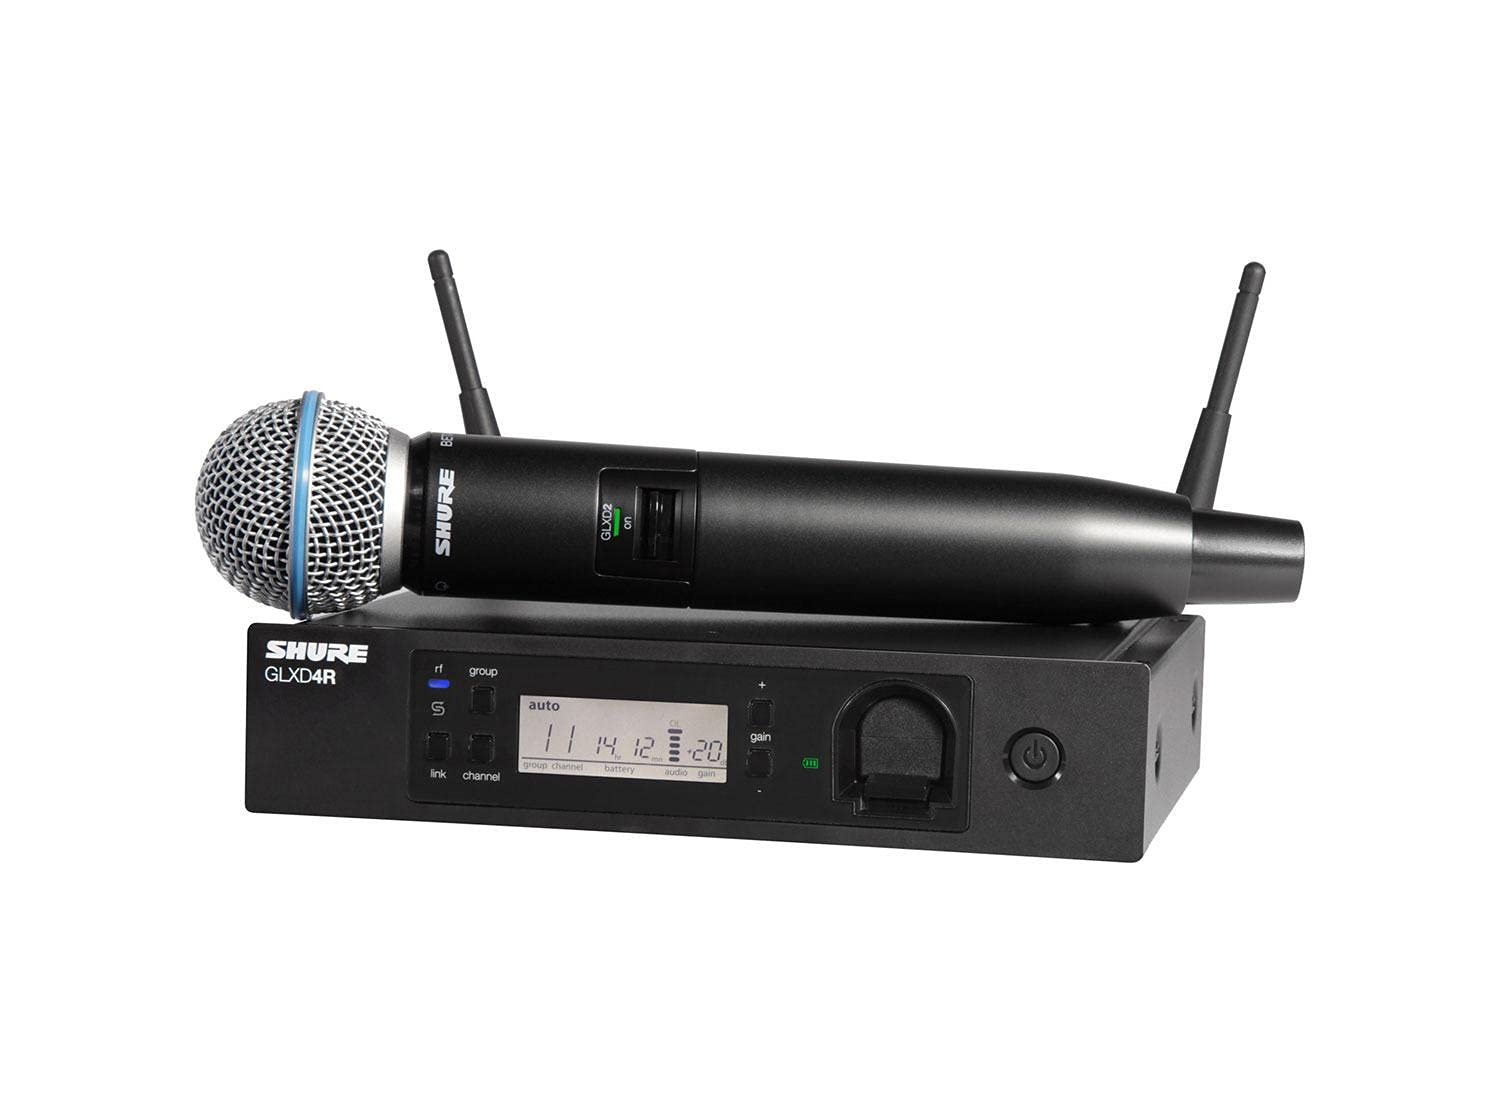
Figure 1: Shure GLXD24R/B58 Wireless Microphone System, showing the GLXD4R receiver and GLXD2 handheld transmitter.
Setup Instructions
1. Connecting the Receiver (GLXD4R)
Follow these steps to connect your GLXD4R Rack Mount Receiver:
- Attach Antennas: Screw the two antennas onto the Antenna A and Antenna B connectors on the rear of the receiver. Position them vertically for optimal reception.
- Connect Power: Plug the power supply into the receiver's 15V DC power input and then into an AC power outlet.
- Connect Audio Output: Connect the receiver's XLR or 1/4" output to your mixer or amplifier's input. Ensure the mic/line switch on the receiver's rear panel is set appropriately for your equipment.
- Rack Mounting (Optional): Use the included hardware to install the receiver into a standard equipment rack if desired.
Figure 2: Rear panel of the GLXD4R Receiver, showing antenna, power, and audio output connections.
2. Transmitter Preparation (GLXD2)
Prepare your GLXD2 Handheld Transmitter:
- Insert/Charge Battery: Open the battery compartment of the GLXD2 transmitter and insert the proprietary Shure Lithium-Ion rechargeable battery. The battery can be charged by placing it in the charging bay on the front of the GLXD4R receiver or using a separate Shure USB charging cable.
- Power On: Press and hold the power button on the transmitter until the display illuminates.

Figure 3: The GLXD2 Handheld Transmitter, showing the power switch and battery compartment.
3. Powering On and Linking
Once both the receiver and transmitter are powered on, the system will automatically scan for the clearest available frequency and link the devices. The receiver's display will show the linked channel and battery status.

Figure 4: Front panel of the GLXD4R Receiver, displaying channel, group, and battery information.
Operating Instructions
This section details the basic operation of your Shure GLXD24R/B58 system.
1. Adjusting Gain
The gain control on the GLXD4R receiver allows you to adjust the audio output level. Use the + and - buttons next to the gain display to increase or decrease the level. Monitor your mixer's input levels to prevent clipping or distortion.
2. Monitoring Battery Life
The GLXD4R receiver's display shows the remaining battery life of the GLXD2 transmitter in hours and minutes. A fully charged proprietary Lithium-Ion battery provides up to 16 hours of continuous use. It is recommended to keep a spare charged battery for extended performances.
3. Automatic Frequency Management
The GLX-D Advanced system features intelligent automatic frequency management. It continuously monitors the RF environment and automatically switches to the clearest available channel if interference is detected, ensuring uninterrupted performance.
Maintenance
Proper maintenance ensures the longevity and optimal performance of your microphone system.
1. Battery Care
- Always use the proprietary Shure Lithium-Ion rechargeable batteries provided with the system.
- Charge batteries fully before each use.
- Store batteries in a cool, dry place when not in use.
- Avoid exposing batteries to extreme temperatures.
2. Cleaning
- Wipe the microphone and receiver surfaces with a soft, dry cloth.
- Do not use abrasive cleaners or solvents.
- For the microphone grille, gently remove any debris.
Troubleshooting
If you encounter issues with your Shure GLXD24R/B58 system, refer to the following common solutions:
- No Audio Output:
- Ensure the receiver and transmitter are powered on and linked.
- Check all audio cable connections between the receiver and your sound system.
- Verify the gain settings on the receiver and your mixer.
- Confirm the mic/line switch on the receiver is set correctly.
- Signal Dropouts or Interference:
- Perform a frequency re-scan on the receiver to find a clearer channel.
- Ensure the receiver antennas are unobstructed and positioned correctly.
- Move the receiver closer to the transmitter.
- Minimize interference from other 2.4 GHz devices (Wi-Fi routers, other wireless systems).
- Short Battery Life:
- Ensure the battery is fully charged before use.
- Check the battery health indicator on the receiver.
- Consider replacing older batteries if their capacity has significantly diminished.
Specifications
| Feature | Detail |
|---|---|
| Brand | Shure |
| Model Number | GLXD24R/B58-Z2 |
| Microphone Form Factor | Microphone System |
| Item Dimensions (L x W x H) | 4.13 x 18.5 x 14.95 inches |
| Power Source | Battery Powered |
| Battery Type | Proprietary Lithium-Ion Rechargeable |
| Material | Stainless Steel |
| Signal-to-Noise Ratio | 150 dB |
| Number of Channels | 11 |
| Item Weight | 7.14 pounds |
| Connectivity Technology | Wireless |
| Special Feature | Rechargeable, Wireless |
| Recommended Uses | Singing, Speech |
| Polar Pattern | Unidirectional |
What's in the Box
The Shure GLXD24R/B58 Wireless Microphone System typically includes:
- GLXD4R Rack Mount Receiver
- GLXD2 Handheld Transmitter with BETA58A Vocal Mic Capsule
- Proprietary Shure Lithium-Ion Rechargeable Battery
- Power Supply
- Antennas (2)
- Rack Mounting Hardware
- User Guide / Documentation
Warranty and Support
For detailed warranty information, product registration, and technical support, please visit the official Shure website or contact your authorized Shure dealer. Keep your purchase receipt as proof of purchase for warranty claims.


