
1. Introduction
Welcome to the Engino 3031 Inventor 30-in-1 construction set. This manual provides detailed instructions for assembling, operating, and maintaining your Engino set. Designed to foster creativity and develop building skills, this set allows you to construct 30 different models from a single kit. Please read these instructions carefully before beginning assembly.
2. Product Overview
The Engino 3031 Inventor set is an educational toy designed for ages 6 and up, promoting STEM learning through hands-on construction. It features a unique snap-fit system and includes a motor to bring your creations to life. With 128 parts, you can explore various engineering principles by building a wide range of vehicles and structures. Engino is recognized for its quality and educational value in the field of educational toys.

Figure 2.1: Examples of 30 models that can be built with the Engino 3031 Inventor set.
3. Components
Your Engino 3031 Inventor set includes 128 individual parts, designed for versatile construction. Key components include various rods, connectors, wheels, and a motor unit. An extraction tool is also provided for easy disassembly.
3.1. Creative Snap-Fit System
The patented connecting system allows for easy and secure assembly. Parts snap together firmly, enabling the creation of complex structures with minimal effort. The system supports multi-directional connections, enhancing design flexibility.

Figure 3.1: Illustration of the creative snap-fit system and extendable rod functionality.
3.2. Extendable Rods
The set includes extendable rods that can be combined to achieve any desired length. These rods feature a locking mechanism to secure their extension, providing greater flexibility in model design.
3.3. Extraction Tool
For convenient disassembly and to prevent damage to parts, an extraction tool is included. This tool helps to safely separate connected components.
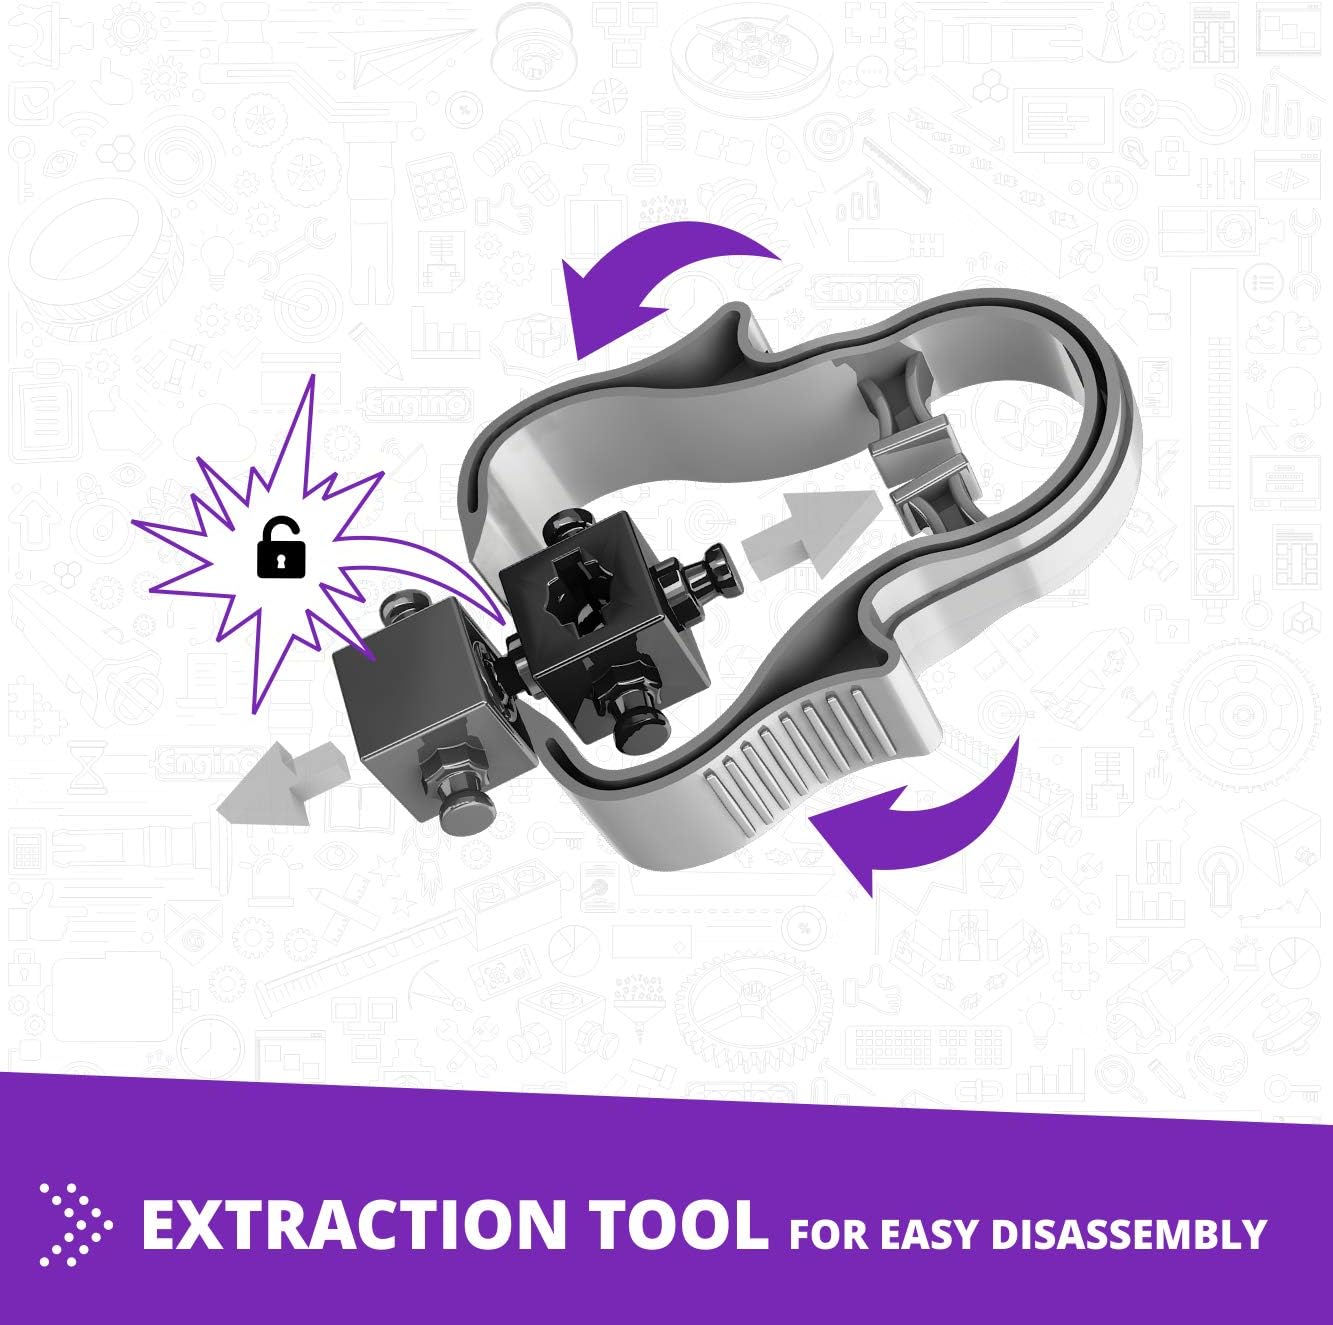
Figure 3.2: The extraction tool for easy disassembly of Engino parts.
3.4. Motor Unit
A motor unit is included to add dynamic movement to your models. It features a high torque gear box and a forward-reverse switch. The motor requires 2 AAA batteries (not included).

Figure 3.3: Detailed view of the motor unit components and battery installation.
4. Assembly and Setup
Follow the instructions below to assemble your Engino models. It is recommended to start with simpler models to familiarize yourself with the building system.
4.1. Printed Instructions
A comprehensive instruction booklet is included with your set. This booklet provides step-by-step visual guides for building several models. Refer to these instructions for detailed assembly sequences.

Figure 4.1: Example of the printed instruction manual and included parts.
4.2. Digital 3D Instructions (Engino kidCAD App)
For an enhanced building experience, download the free Engino kidCAD 3D Viewer app on your smart device. This app provides interactive 3D instructions, allowing you to rotate, zoom, explode, and implode models to view each step from any angle. The app also offers access to additional model designs.
- Rotate in 3D: View models from all perspectives.
- Zoom In and Out: Focus on specific details.
- Explode and Implode: Understand assembly layers.
- Find and Explore More Models: Access a wider range of building possibilities.

Figure 4.2: The Engino kidCAD app providing interactive 3D building instructions.
4.3. Motor Installation
- Locate the battery compartment on the motor unit.
- Open the battery compartment cover.
- Insert 2 AAA batteries, ensuring correct polarity (+/-).
- Close the battery compartment cover securely.
- Integrate the motor unit into your model as indicated in the specific model's instructions.
Note: Batteries are not included and must be purchased separately.
5. Operating Instructions
Once your model is assembled and the motor is installed, you can operate it as follows:
- Ensure all connections are secure and the model can move freely.
- Locate the forward-reverse switch on the motor unit.
- Slide the switch to the desired direction (forward or reverse) to activate the motor.
- Observe your model in motion.
- To stop the motor, slide the switch to the center (off) position.
For models without a motor, manual operation involves manipulating the moving parts as designed (e.g., rolling wheels, rotating gears).
6. Maintenance
Proper maintenance ensures the longevity of your Engino construction set:
- Cleaning: Wipe parts with a dry or slightly damp cloth. Do not use harsh chemicals or abrasive cleaners.
- Storage: Store all parts in a clean, dry place away from direct sunlight and extreme temperatures. Keep small parts in a designated container to prevent loss.
- Battery Care: Remove batteries from the motor unit if the toy will not be used for an extended period to prevent leakage.
- Inspection: Periodically check parts for wear or damage. Replace any broken components to maintain structural integrity.
7. Troubleshooting
If you encounter issues during assembly or operation, refer to the following troubleshooting tips:
- Parts not connecting: Ensure you are using the correct parts as indicated in the instructions. Apply firm, even pressure to snap parts together. If a part is stuck, use the extraction tool.
- Model is unstable: Double-check all connections. Ensure that rods are fully extended and locked if applicable. Refer to the 3D app for a detailed view of the structure.
- Motor not working:
- Verify that 2 fresh AAA batteries are correctly installed with the correct polarity.
- Check that the forward-reverse switch is not in the center (off) position.
- Ensure the motor is properly connected to the model's gears and there are no obstructions.
- Missing parts: Carefully check the packaging and building area. If parts are genuinely missing, contact Engino customer support.
8. Specifications
| Attribute | Detail |
|---|---|
| Model Number | 3031 |
| Brand | Engino |
| Number of Models | 30-in-1 |
| Number of Parts | 128 |
| Recommended Age | 6 years and older |
| Minimum Manufacturer Age (Months) | 72.0 |
| Material | Plastic |
| Educational Objective | Building Skills, Visual Development |
| Product Dimensions (L x W x H) | 41 x 5.89 x 27.99 cm |
| Product Weight | 500 g |
| Batteries Required | 2 x AAA (not included) |
| Assembly Required | Yes |
| Publication Date | 18 November 2019 |
9. Warranty and Support
Specific warranty information for the Engino 3031 Inventor set is not provided in this manual. For details regarding product warranty, replacement parts, or further technical assistance, please visit the official Engino website or contact their customer support directly. Contact information can typically be found on the product packaging or the Engino official website.
Engino Official Website: www.engino.com


