Introduction
This manual provides comprehensive instructions for the installation, operation, and maintenance of your Baldwin L024.MR L024 Style Door Levers. Please read these instructions carefully before beginning installation to ensure proper function and longevity of your product. This product is designed for residential use and features a Non-Lacquered Brass finish, which will naturally patina over time.
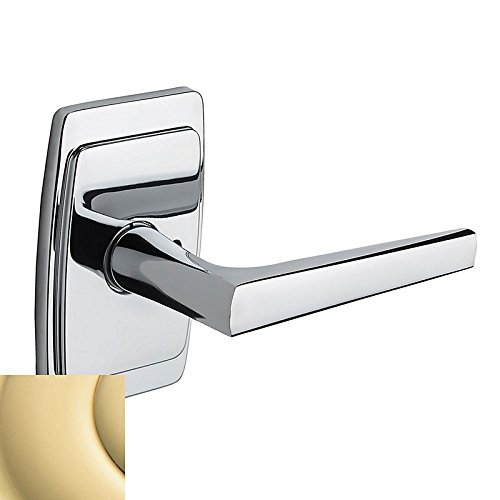
Image: Baldwin L024.MR L024 Style Door Levers. This image displays the complete set of door levers in their Non-Lacquered Brass finish, showcasing the design and components.
Safety Information
Always follow basic safety precautions when installing or maintaining door hardware. Failure to do so may result in injury or damage to the product.
- Wear appropriate personal protective equipment, such as safety glasses, during installation.
- Ensure all screws are tightened securely, but do not overtighten, which can strip threads or damage components.
- Keep small parts away from children to prevent choking hazards.
- If you are unsure about any step, consult a qualified professional.
Package Contents
Verify that all components are present before beginning installation.
- Exterior Lever Assembly
- Interior Lever Assembly
- Latch Mechanism
- Strike Plate
- Mounting Screws (various sizes)
- Spindle
- Installation Template (if included)
Image: Exploded view of Baldwin L024.MR L024 Door Lever components. This diagram illustrates all individual parts included in the package, helping to identify each component before assembly.
Setup and Installation
Tools Required
- Phillips Head Screwdriver
- Measuring Tape
- Pencil
- Drill (optional, for new installations)
- Wood Chisel (optional, for strike plate mortise)
Installation Steps
- Prepare the Door: If installing on a new door, use the provided template to mark and drill holes for the latch and lever assemblies. For existing doors, remove old hardware. Ensure the door bore is standard (typically 2-1/8 inches) and the backset is correct (2-3/8 or 2-3/4 inches).
Image: Door prepared for installation. This image shows a door with the necessary holes drilled for the latch and lever, ready for hardware mounting.
- Install the Latch Mechanism: Insert the latch mechanism into the edge bore hole of the door. Ensure the bevel of the latch bolt faces the door frame. Secure it with the provided screws.
Image: Latch mechanism being installed. This image demonstrates the correct orientation and placement of the latch mechanism within the door edge.
- Install the Exterior Lever Assembly: Place the exterior lever assembly onto the door, aligning the spindle through the latch mechanism.
Image: Exterior lever assembly placement. This image shows the exterior lever assembly positioned on the door, with the spindle inserted into the latch.
- Install the Interior Lever Assembly: Position the interior lever assembly over the spindle and align the mounting holes with the exterior assembly. Secure both assemblies together using the through-bolts or screws provided. Tighten evenly.
Image: Interior lever assembly being secured. This image illustrates the process of attaching the interior lever to the exterior assembly using mounting screws.
- Install the Strike Plate: Close the door and mark the position of the latch bolt on the door frame. Mortise the frame if necessary and install the strike plate with the provided screws. Ensure the latch bolt engages smoothly.
Image: Strike plate installation on door frame. This image shows the strike plate being mounted on the door frame, aligned with the latch bolt.
- Test Operation: Open and close the door several times, operating the levers to ensure smooth and proper latching. Adjust screws if necessary.
Operation
The Baldwin L024.MR L024 door levers are designed for simple and reliable operation.
- Opening the Door: Depress the lever handle downwards to retract the latch bolt. Pull or push the door open.
- Closing the Door: Simply push the door shut. The spring-loaded latch bolt will retract as it contacts the strike plate and then extend to secure the door.
- Locking Mechanism: To lock the door from the exterior, insert the key and turn. To lock from the interior, use the turn-button or push-button mechanism (if present).
Image: Hand operating a Baldwin L024.MR L024 door lever. This image demonstrates the natural motion of depressing the lever to open the door.
Maintenance
Proper care will ensure the lasting beauty and functionality of your Baldwin door levers.
- Cleaning: Clean the Non-Lacquered Brass finish with a soft, damp cloth. Avoid abrasive cleaners, solvents, or polishing agents, as these can damage the natural finish.
- Patina: The Non-Lacquered Brass finish is designed to age naturally, developing a unique patina over time. This is a characteristic of the material and not a defect.
- Lubrication: Periodically apply a small amount of silicone-based lubricant to the latch bolt and internal mechanisms to ensure smooth operation. Do not use oil-based lubricants, which can attract dust.
- Tightening Screws: Check mounting screws periodically and tighten if they have become loose. Do not overtighten.
Troubleshooting
| Problem | Possible Cause | Solution |
|---|---|---|
| Lever is loose or wobbly. | Mounting screws are loose. | Tighten the mounting screws evenly. |
| Latch bolt does not retract smoothly. | Mechanism is dry or obstructed. | Apply silicone-based lubricant to the latch bolt and internal components. Check for debris. |
| Door does not latch properly. | Strike plate misalignment or incorrect backset. | Adjust the strike plate position. Verify the backset measurement during installation. |
| Lever does not return to horizontal position. | Spring mechanism is damaged or obstructed. | Check for obstructions. If spring is damaged, contact customer support for replacement parts. |
Specifications
- Model: L024.031.MR
- Brand: Baldwin
- Finish: Non-Lacquered Brass (Polished)
- Material: Brass
- Handle Type: Lever
- Lock Type: Key Lock (Functionality may vary based on specific configuration)
- Item Weight: 3.49 Pounds
- Included Components: Lever Assemblies, Latch, Strike Plate, Screws
- Special Features: Easy to Install
- UPC: 884011858825
Warranty Information
Baldwin products are manufactured to the highest standards of quality and performance. For specific warranty details regarding your L024.MR L024 door levers, please refer to the warranty card included with your purchase or visit the official Baldwin website. Generally, Baldwin offers a limited lifetime mechanical warranty and a limited finish warranty against defects in material and workmanship.
Customer Support
If you require further assistance, have questions about installation, or need to report a missing or damaged part, please contact Baldwin customer support.
- Website: www.baldwinhardware.com
- Phone: Refer to the Baldwin website for regional contact numbers.


