
Introduction
This manual provides detailed instructions for the safe and effective use of your Godox TT350O Mini TTL HSS 2.4GHz Camera Flash Speedlite. Designed for Olympus and Panasonic mirrorless digital cameras, this compact flash unit offers advanced features including TTL autoflash, High-Speed Sync (HSS), and a 2.4GHz wireless X system for master and slave functionality. Please read this manual thoroughly before operation to ensure optimal performance and to prevent damage to the product.

The compact design of the Godox TT350O flash, suitable for mirrorless camera systems.
What's in the Box
- 1 x Godox TT350O Camera Flash
- 1 x Mini Stand
- 1 x Protection Bag
- 1 x Diffuser
- 1 x User Manual (this document)
- 1 x EACHSHOT Color Filters (set)

The Godox TT350O flash unit shown with its standard accessories: a diffuser and a protective carrying bag.
Setup
1. Battery Installation
The TT350O flash operates on two AA batteries. Ensure you use fresh, high-quality alkaline or NiMH rechargeable batteries for optimal performance.
- Open the battery compartment cover located on the side of the flash unit.
- Insert two AA batteries according to the polarity indicators (+/-) inside the compartment.
- Close the battery compartment cover securely.

Proper insertion of two AA batteries into the Godox TT350O flash unit.
2. Mounting to Camera
To attach the flash to your camera's hot shoe:
- Slide the flash's mounting foot into the camera's hot shoe.
- Rotate the locking wheel clockwise until the flash is securely fastened to the camera.
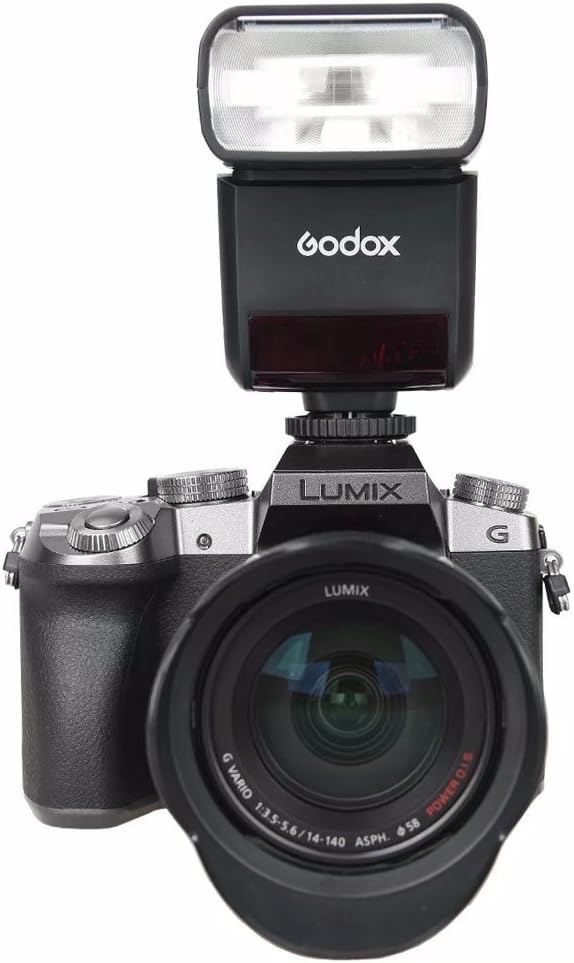
The Godox TT350O flash mounted on a Lumix camera, viewed from the front.

The Godox TT350O flash mounted on a Lumix camera, viewed from the side.
Operating the Flash
1. Power On/Off
Press and hold the power button (U) to turn the flash on or off.
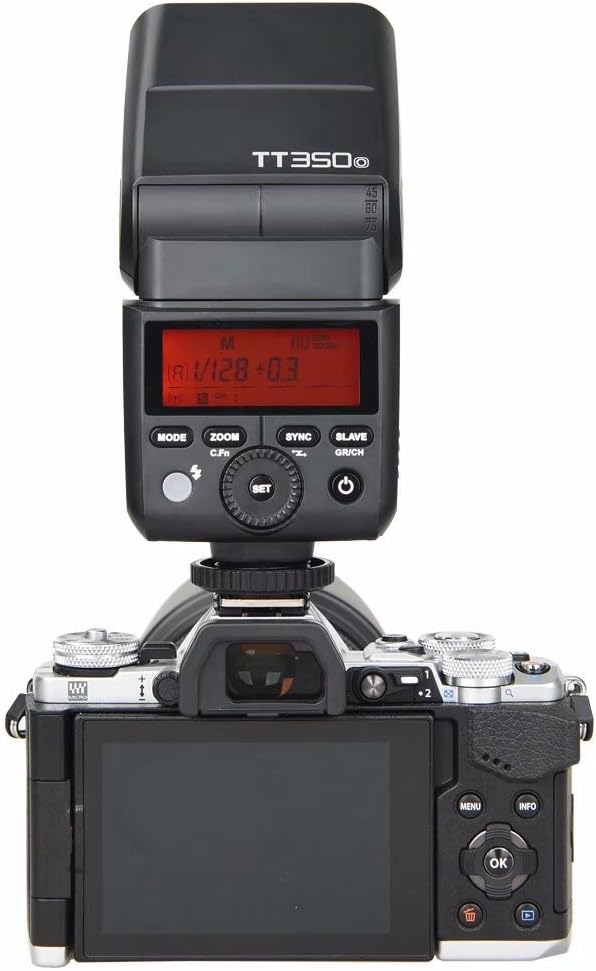
The rear panel of the Godox TT350O, displaying the LCD screen and control buttons for operation.
2. Flash Modes
Press the MODE button to cycle through available flash modes:
- TTL Autoflash Mode: Automatically sets flash output for correct exposure.
- Manual Flash Mode (M): Allows manual adjustment of flash output from 1/1 to 1/128 power.
- Multi Flash Mode: Fires a series of rapid flashes for multiple exposures in a single frame.
3. Flash Exposure Compensation (FEC)
Adjust the flash output level to fine-tune exposure. FEC can be set from -3 to +3 stops in 1/3 stop increments.

Visual representation of flash exposure compensation, showing how different settings affect the final image brightness.
4. Sync Modes
The TT350O supports various sync modes:
- High-Speed Sync (HSS): Allows flash synchronization at shutter speeds up to 1/8000s.
- First-Curtain Sync: Flash fires immediately after the shutter opens.
- Second-Curtain Sync: Flash fires just before the shutter closes, useful for capturing motion trails.

Examples of front curtain sync and rear curtain sync, illustrating how they affect the appearance of motion in photographs.
5. Wireless Flash Function (2.4G Transmission)
The TT350O integrates with the Godox 2.4G wireless X system, functioning as both a master and slave unit.
- Master Unit: The TT350O can control other Godox slave units (e.g., AD600, AD200).
- Slave Unit: The TT350O can be controlled by a Godox master unit or trigger (e.g., X1T-O, V850II).
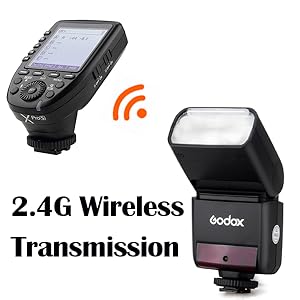
Illustration of the 2.4G wireless transmission system, enabling remote control of the flash.

Diagram showing how the TT350O can function as both a master and slave unit within the Godox 2.4G wireless X system.
6. Flash Head Rotation
The flash head can be rotated horizontally and vertically to bounce light off surfaces, providing softer and more natural illumination.
- Vertical Rotation: -7° to 90°
- Horizontal Rotation: 0° to 270°
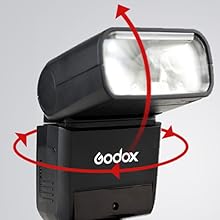
The flash head of the TT350O can be rotated for flexible light positioning and bounce flash techniques.
7. Using the Diffuser and Color Filters
Attach the included diffuser to soften the flash light, reducing harsh shadows. The color filters can be used to adjust the color temperature of the flash to match ambient light or for creative effects.

The Godox TT350O flash with the included diffuser attached, ready for use.

The Godox TT350O flash with a yellow color filter applied, demonstrating accessory use.
Maintenance
1. Cleaning
Regularly clean the flash unit with a soft, dry cloth. Avoid using solvents or harsh chemicals. For the flash tube, use a lint-free cloth to gently wipe away any dust or smudges.
2. Storage
When not in use for extended periods, remove the batteries to prevent leakage. Store the flash in its protective bag in a cool, dry place, away from direct sunlight and extreme temperatures.
3. Firmware Updates
Godox may release firmware updates to improve performance or add new features. Check the official Godox website for the latest firmware and instructions on how to update your TT350O via its USB port.

The process of connecting the flash to a computer for firmware updates via USB.
Troubleshooting
- Flash not firing:
- Check if the flash is securely mounted on the camera's hot shoe.
- Ensure batteries are correctly inserted and have sufficient charge.
- Verify the flash is powered on.
- Check camera settings to ensure external flash is enabled.
- Incorrect exposure:
- Adjust Flash Exposure Compensation (FEC).
- In Manual mode, adjust the power output.
- Ensure the flash head is pointed correctly (not blocked).
- Wireless communication issues:
- Ensure master and slave units are set to the same channel and group.
- Check the distance between units; maximum range is approximately 30m.
- Verify there are no obstructions blocking the signal.
Specifications
| Feature | Specification |
|---|---|
| Model Number | GD-TT350O |
| Compatible Mountings | Olympus, Panasonic |
| Guide Number (GN) | 36 (m ISO 100, @105mm) |
| Flash Coverage | 24 to 105mm (Auto/Manual Zoom) |
| Flash Duration | 1/350 to 1/20000 Seconds |
| Exposure Control System | TTL Autoflash, Manual Flash |
| Flash Exposure Compensation (FEC) | ±3 stops in 1/3 stop increments |
| Sync Mode | High-Speed Sync (up to 1/8000s), First-Curtain Sync, Second-Curtain Sync |
| Multi Flash | Provided (up to 90 times, 99Hz) |
| Wireless Flash Function | Master, Slave, Off (2.4G Transmission) |
| Controllable Slave Groups | 3 (A, B, and C) |
| Transmission Range (approx.) | ≤30m |
| Channels | 16 (1-16) |
| Power Source | 2 x AA batteries |
| Dimensions | 5.51 x 1.5 x 2.44 inches |
| Item Weight | 7.1 ounces |
Warranty and Support
For warranty information and technical support, please refer to the official Godox website or contact your authorized dealer. Keep your proof of purchase for any warranty claims.